Installing LAMP, WordPress, custom domain name into Centos 7 virtual private server (h4)
Tero Karvinen’s Linux course is stepping into a world of servers and I got some homeworks revolving around the topic.
This time I’m going to do the following steps:
– start a Centos 7 VPS [finished]
– enable firewall on it [finished]
– make login without password possible [finished]
– check the security logs for bot traffic [finished]
– install rest of the LAMP [finished]
– install WordPress [finished]
– initialize domain name to our WP service [finished]
– install CA-authorized certificates to enable HTTPS [not working]
On the security key generation part, I’ll be using the same laptop I used in my post Xubuntu boot stick creation.
Renting a vps
First I need to choose a VPS provider. The recommended ones, that are cheapest, are DigitalOcean, Linode and Tilaa (limited in the netherlands). If there’s a need for more complex tools, like load balancing multiple servers and hosting server containers, there’s Amazon’s AWS, Google Cloud Platform and Microsoft Azure to mention the biggest ones.
I choose DigitalOcean, because it’s pretty cheap, but also I happen to have a github education pack, which provides me $50 for free. Since the cheapest server pack is $5/month, I can run that server for 10 months without need to pay.
First thing of course is to register to the service and create an account.
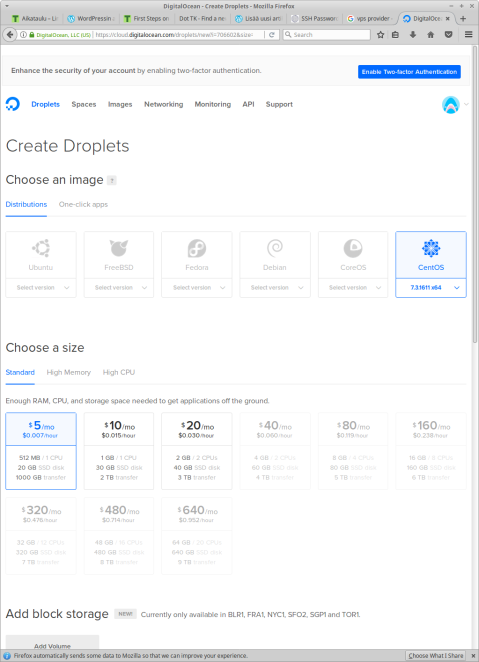
When that is accomplished, the following management page opens:
![]()
First I click the green ”create” button and from the dropdown-menu, I pick ”droplets” which is a term on DigitalOcean’s service catalogue for these VPS packages.
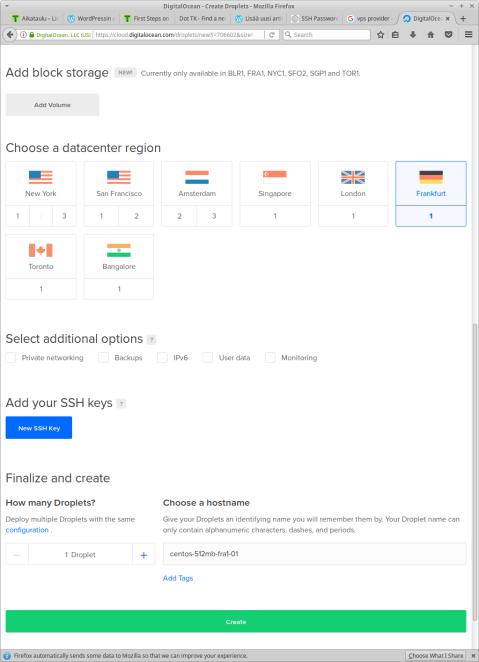
I change the hostname to be wordpress-centos-vps and hit ”create”
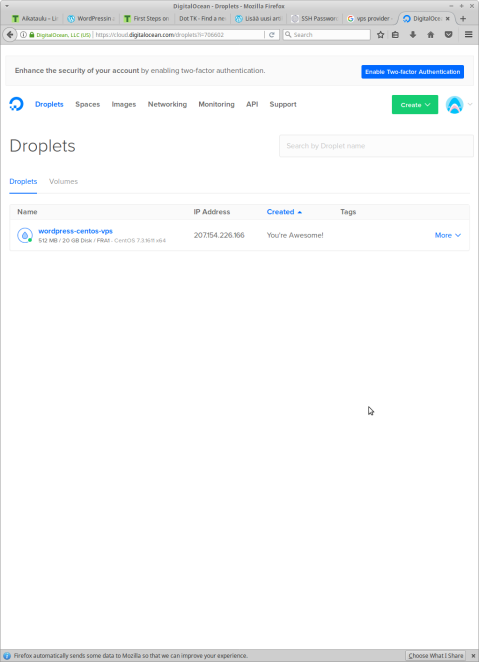
Now the VPS is created and I have my root user’s password sent to my email. Now it’s time to login and follow these steps http://terokarvinen.com/2017/first-steps-on-a-new-virtual-private-server-an-example-on-digitalocean
so first, I’ll establish an ssh connection to the server
ssh root@207.154.226.166
the very first thing is to change your root password, because emailed passwords will bring a serious security risk, even though I’m going to disable the use of root user.
enable the firewall
Next thing to do, would be setting up a firewall to prevent any unwanted access to the server. Apparently Firewalld is a new replacement of the iptables on centos-side, so I need to study it a little bit.
Luckily there’s good tutorial about configuring it and I’ll be referencing to it during this setup https://www.digitalocean.com/community/tutorials/how-to-set-up-a-firewall-using-firewalld-on-centos-7
[root@wordpress-centos-vps ~]# sudo service firewalld start

Redirecting to /bin/systemctl start firewalld.service

[root@wordpress-centos-vps ~]# firewall-cmd --state

running

[root@wordpress-centos-vps ~]# sudo firewall-cmd --zone=public --permanent --add-port=22/tcp

success

[root@wordpress-centos-vps ~]# sudo firewall-cmd --list-all

public

target: default

icmp-block-inversion: no

interfaces:

sources:

services: dhcpv6-client ssh

ports:

protocols:

masquerade: no

forward-ports:

sourceports:

icmp-blocks:

rich rules:
[root@wordpress-centos-vps ~]#
What I did was first setting the firewalld to run and confirming it (state says ”running”). Next part is where I set the port 22 to be permanently allowed in public-zone. If that –permanent-annotation would have been left out, the rould had dropped during the next boot.
Okay, now the firewall is set, it is time to create a new user and block remote access to root for security reasons.
In centos, it’s possible to do by following the steps taken from this guide:
https://www.digitalocean.com/community/tutorials/how-to-add-and-delete-users-on-a-centos-7-server
sudo adduser krister
for the new user, I need to initialize a password. A good password is at least 12 digits long and contains at least one of lower case letters, upper case letters, numbers and special characters.
sudo passwd krister
and finally, add the user into sudoers group
sudo gpasswd -a username wheel
next we try to login with this new user via ssh
ssh krister@207.154.226.166
and it works, now we can safely prevent login of the root user
sudoedit /etc/ssh/sshd_config
Here, I have to uncomment the following line and change the value to ”no”:
PermitRootLogin no
now, I have to restart the daemon to apply the changes
sudo service sshd restart
Next, I’ll test, what happens if I try to login as root via ssh:
xubuntu@xubuntu:~$ ssh root@207.154.226.166

root@207.154.226.166's password:

Permission denied, please try again.

root@207.154.226.166's password:

Permission denied, please try again.

root@207.154.226.166's password:
now it doesn’t allow me to log in as a root user anymore.
Make login without password possible
Next I’m going to create the ssh-keys and make it possible to login without using a password.
on Ubuntu Linux
first I need to create the key with command
ssh-keygen
which produces
Generating public/private rsa key pair.

Enter file in which to save the key (/home/xubuntu/.ssh/id_rsa):

Created directory '/home/xubuntu/.ssh'.

Enter passphrase (empty for no passphrase):

Enter same passphrase again:

Your identification has been saved in /home/xubuntu/.ssh/id_rsa.

Your public key has been saved in /home/xubuntu/.ssh/id_rsa.pub.

The key fingerprint is:

SHA256:9wiLA9ept4DUI5wn+dz1DjmkrbF+qMCBims26AygQeA xubuntu@xubuntu

The key's randomart image is:

+---[RSA 2048]----+

|.                |

|o                |

| E               |

|.  o + . .       |

|o . X = S +      |

|+o o @ = O =     |

|*   + B *.* o    |

|+=   . +.=.+     |

|=o.   .o=.  .    |

+----[SHA256]-----+
now I have the key, next I command the ssh-copy-id to send the public to the server and put it into ”authorized keys”-file.
xubuntu@xubuntu:~$ ssh-copy-id -i .ssh/id_rsa krister@207.154.226.166

/usr/bin/ssh-copy-id: INFO: Source of key(s) to be installed: ".ssh/id_rsa.pub"

/usr/bin/ssh-copy-id: INFO: attempting to log in with the new key(s), to filter out any that are already installed

/usr/bin/ssh-copy-id: INFO: 1 key(s) remain to be installed -- if you are prompted now it is to install the new keys

krister@207.154.226.166's password:
Number of key(s) added: 1
Now I try to login into the machine, with: ”ssh ’krister@207.154.226.166′”
and see, if the ssh daemon recognizes my rsa-key handshake.
xubuntu@xubuntu:~$ ssh krister@207.154.226.166

Last login: Fri Sep 22 13:28:59 2017 from pub-nat.haaga-helia.fi

[krister@wordpress-centos-vps ~]$
no password was asked so it works.
on windows
I’ll be following a tutorial from getfilecloud and use the tools provided by putty.org.
https://www.getfilecloud.com/blog/ssh-without-password-using-putty/
http://www.putty.org/
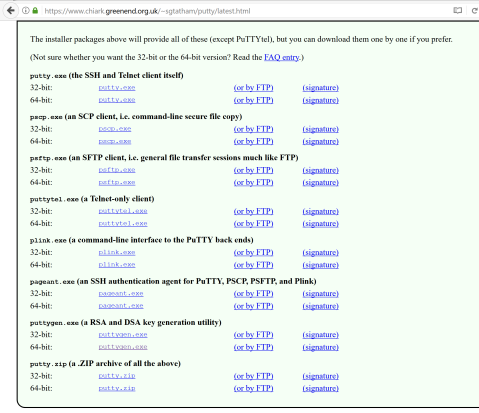
From here you need to download both putty.exe and puttygen.exe
first we need to create the keys, so let’s open up puttygen
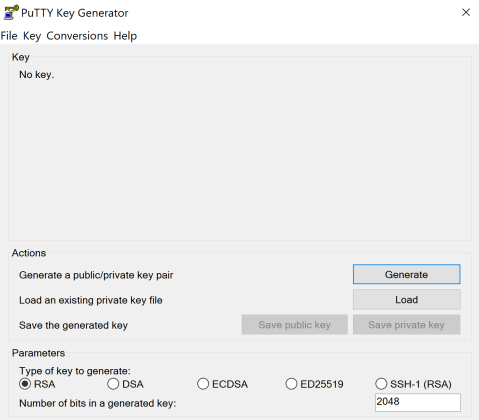
so first just click ”generate”
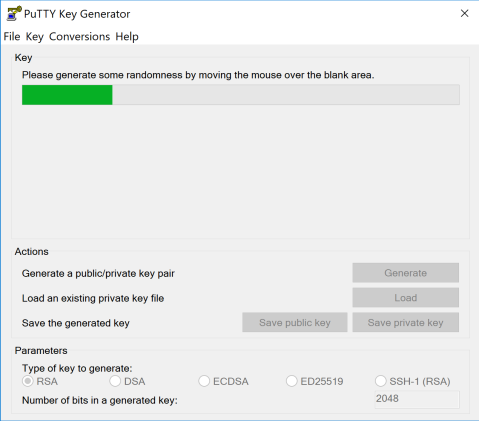
It’ll ask you to create some noise with mouse, so move the cursor until the bar finishes.
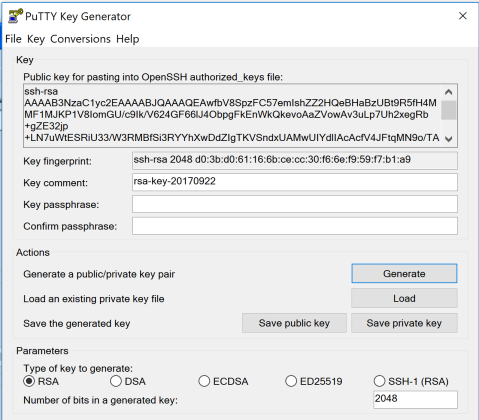
the keys are now generated and now you need to save them in a very safe space
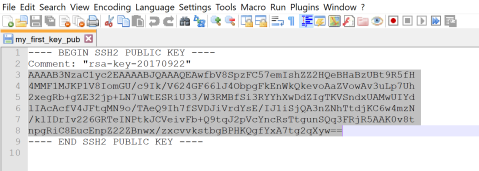
open the public key with your favorite text editor
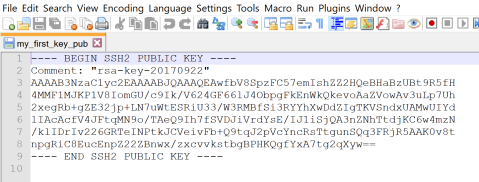
This is what your public key looks like. Now paint and copy all the stuff between start and end lines.
Next, start putty.exe
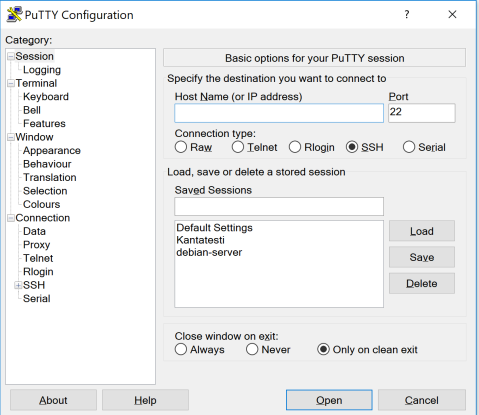
on ”hostname” field, type your user and ip-address in format user@ip-address and then click connect, the ssh-session will open. Enter your password when prompted.
create a new file with your favorite text editor in ~/.ssh/authorized_keys
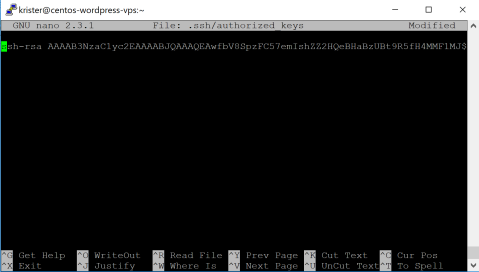
next, set the permissions
chmod 700 ~/.ssh

$ chmod 600 ~/.ssh/authorized_keys
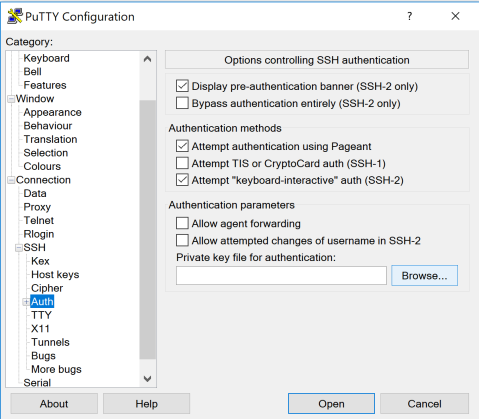
Now I close my putty connection to try establishing it with the rsa-key
First thing is to click open the tab ”Auth” under ”SSH”, where I can choose the private key I want to use for this connection.
Next I go back to the ”session” tab and write down my username and ip-address, then save it as a session by writing name into ”saved session” – section and clicking ”save”.
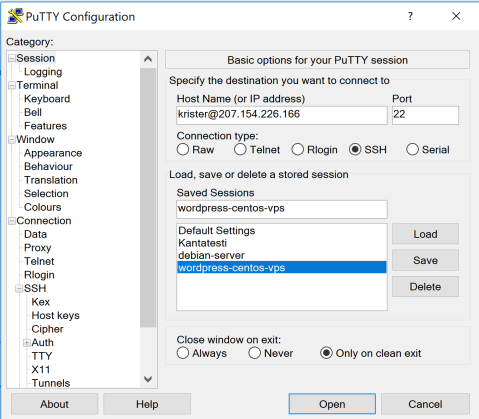
now the session is stored and everytime I open putty, I can restore these settings by choosing the session on the list and clicking ”load”
Now I click ”connect” to see if the server still prompts me the password.
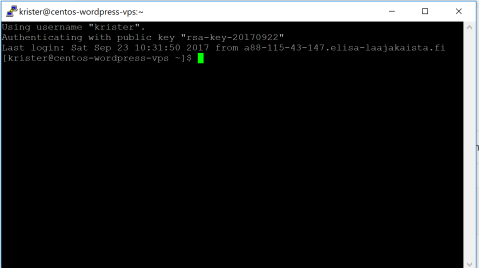
And it works!
Checking the security logs
Before moving on to the LAMP, I’d like to check the security logs to see some cases of breach tryouts.
As we now, there’s tons of scanner bots amongst the real human crackers, who try to penetrate and occupy into servers. The easiest way to protect ourselves from the most common breaches is simply close all the unused ports and use strong passwords (the most secure way would be dropping the password authentication completely and stick with the ssh-key authentication, but I need to have a backup solution, if I happen to lose my private keys.)
In Centos, I can check the latest security logs by using tail
sudo tail /var/log/secure
It shows me this
Sep 23 11:24:25 centos-wordpress-vps sshd[4967]: PAM 2 more authentication failures; logname= uid=0 euid=0 tty=ssh ruser= rhost=118.212.132.227  user=root

Sep 23 11:24:51 centos-wordpress-vps sshd[4972]: reverse mapping checking getaddrinfo for 227.132.212.118.adsl-pool.jx.chinaunicom.com [118.212.132.227] failed - POSSIBLE BREAK-IN ATTEMPT!

Sep 23 11:24:52 centos-wordpress-vps sshd[4972]: pam_unix(sshd:auth): authentication failure; logname= uid=0 euid=0 tty=ssh ruser= rhost=118.212.132.227  user=root

Sep 23 11:24:52 centos-wordpress-vps sshd[4972]: pam_succeed_if(sshd:auth): requirement "uid >= 1000" not met by user "root"

Sep 23 11:24:54 centos-wordpress-vps sshd[4972]: Failed password for root from 118.212.132.227 port 24514 ssh2

Sep 23 11:24:54 centos-wordpress-vps sshd[4972]: pam_succeed_if(sshd:auth): requirement "uid >= 1000" not met by user "root"

Sep 23 11:24:56 centos-wordpress-vps sshd[4972]: Failed password for root from 118.212.132.227 port 24514 ssh2

Sep 23 11:24:56 centos-wordpress-vps sshd[4972]: pam_succeed_if(sshd:auth): requirement "uid >= 1000" not met by user "root"

Sep 23 11:24:58 centos-wordpress-vps sshd[4972]: Failed password for root from 118.212.132.227 port 24514 ssh2

Sep 23 11:24:58 centos-wordpress-vps sudo: krister : TTY=pts/0 ; PWD=/home/krister ; USER=root ; COMMAND=/bin/tail /var/log/secure
that last line obviously shows me (user krister) using root-session with sudo at /home/krister with command /bin/tail to the path /var/log/secure
the upper line seems to be someone knocking the port 24514 with ssh and false password for root. It’s probably just trying a list of the common passwords. Especially that is the obvious case since, it tries to access the same port with username root all the time.
Let’s see where that IP-address is from.
from http://terokarvinen.com/2017/aikataulu-linux-palvelimet-ict4tn021-4-ti-ja-5-to-alkusyksy-2017-5-op I can get two commands for investigation: geoiplookup and whois. The later one I need to install so I type
sudo yum install whois
next I check that ip addresses whois-information
[krister@centos-wordpress-vps ~]$ whois 118.212.132.227

% [whois.apnic.net]

% Whois data copyright terms    http://www.apnic.net/db/dbcopyright.html
% Information related to ’118.212.0.0 – 118.212.255.255’
% Abuse contact for ’118.212.0.0 – 118.212.255.255’ is ’hqs-ipabuse@chinaunicom.cn’
inetnum: 118.212.0.0 – 118.212.255.255
netname: UNICOM-JX
descr: China Unicom Jiangxi province network
descr: China Unicom
country: CN
admin-c: CH1302-AP
tech-c: CH1302-AP
status: ALLOCATED PORTABLE
remarks: service provider
remarks: ——————————————————–
remarks: To report network abuse, please contact mnt-irt
remarks: For troubleshooting, please contact tech-c and admin-c
remarks: Report invalid contact via http://www.apnic.net/invalidcontact
remarks: ——————————————————–
mnt-by: APNIC-HM
mnt-lower: MAINT-CNCGROUP-JX
mnt-routes: MAINT-CNCGROUP-RR
mnt-irt: IRT-CU-CN
changed: hm-changed@apnic.net 20071031
changed: hm-changed@apnic.net 20090508
source: APNIC
irt: IRT-CU-CN
address: No.21,Financial Street
address: Beijing,100033
address: P.R.China
e-mail: hqs-ipabuse@chinaunicom.cn
abuse-mailbox: hqs-ipabuse@chinaunicom.cn
admin-c: CH1302-AP
tech-c: CH1302-AP
auth: # Filtered
mnt-by: MAINT-CNCGROUP
changed: zhouxm@chinaunicom.cn 20101110
changed: hm-changed@apnic.net 20101116
changed: zhaoyz3@chinaunicom.cn 20170905
source: APNIC
person: ChinaUnicom Hostmaster
nic-hdl: CH1302-AP
e-mail: hqs-ipabuse@chinaunicom.cn
address: No.21,Jin-Rong Street
address: Beijing,100033
address: P.R.China
phone: +86-10-66259764
fax-no: +86-10-66259764
country: CN
changed: hqs-ipabuse@chinaunicom.cn 20090408
mnt-by: MAINT-CNCGROUP
changed: hm-changed@apnic.net 20170817
source: APNIC
% Information related to ’118.212.0.0/16AS4837’
route: 118.212.0.0/16
descr: CNC Group CHINA169 Jiangxi Province Network
country: CN
origin: AS4837
mnt-by: MAINT-CNCGROUP-RR
changed: abuse@cnc-noc.net 20080102
source: APNIC
% This query was served by the APNIC Whois Service version 1.88.15-37 (WHOIS-UK4)
Apparently the connection tryouts came from a Chinese internet provider from Beijing, which means, the source machine is probably some invidual hacker’s computer or a zombified machine, which is oppressed into spreading to the other machines with weak passwords.
Let’s try with the geoiplookup
 [krister@centos-wordpress-vps ~]$ geoiplookup 118.212.132.227

GeoIP Country Edition: CN, China
Yup, that pretty much confirms it.
Install rest of the lamp
I’m going to install LAMP into my new Centos 7 VPS with help of this digitalocean’s blog post https://www.digitalocean.com/community/tutorials/how-to-install-linux-apache-mysql-php-lamp-stack-on-centos-7
Linux
I have a running VPS with centos set up, so it can be marked ’done’.
Apache
an HTTP server. In Debian-based distros, the package is named simply as apache2, but in Red Hat -based distros, it’s httpd (HTTP Daemon)
so I can install it with command
sudo yum install httpd
The digitalocean blog says to start the service with systemctl-command because CentOS 7 relies entirely on SystemD, but luckily I know, that service-command, familiar from debian world, works here as well, because it redirects the command into SystemD.
[krister@centos-wordpress-vps ~]$ sudo service httpd start

Redirecting to /bin/systemctl start httpd.service
and next I’ll navigate to the server’s IP address to see if the apache2 is working.
But the browser throws ”The connection has timed out”
the reason is simple: the firewall is blocking access to the port 80, which apache is listening to.
I’ll just enable access to it by commanding firewalld
sudo firewall-cmd --zone=public --add-port=80/tcp
notice that I left out the permanent-flag. It’s because I want to enforce the traffic to flow through port 443, the https, instead of plain 80, the http. Until I have configured the ssl-settings, I need to rely on the non-encrypted http.
let’s try the browser again:
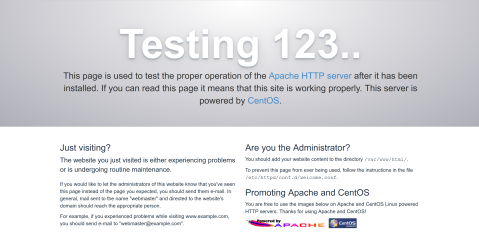
It works, now I can enable the user directory scan for html-pages.
First I’m going to enable httpd so it starts during a boot.
[krister@centos-wordpress-vps ~]$ sudo service httpd enable

[sudo] password for krister:

The service command supports only basic LSB actions (start, stop, restart, try-restart, reload, force-reload, status). For other actions, please try to use systemctl.

[krister@centos-wordpress-vps ~]$
aha, apparently the service-command doesn’t support enable here. Instead I have to type
[krister@centos-wordpress-vps ~]$ sudo systemctl enable httpd.service

Created symlink from /etc/systemd/system/multi-user.target.wants/httpd.service t         o /usr/lib/systemd/system/httpd.service.

[krister@centos-wordpress-vps ~]$
The next thing is to enable user directories. Unfortunately, the ”a2enmod”-command, familiar from debian based OS:es, is not available on Centos, but luckily, based on this blog post https://www.server-world.info/en/note?os=CentOS_7&p=httpd&f=5, I can do the modification manually.
sudo nano /etc/httpd/conf.d/userdir.conf
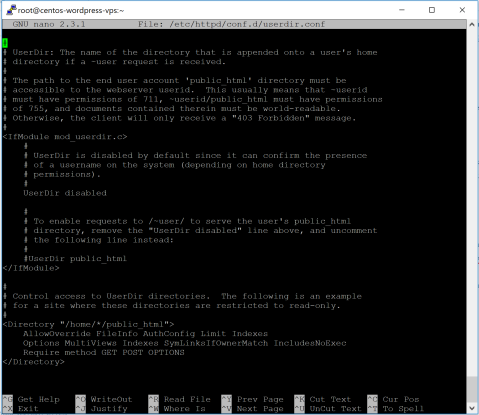
As it says, I need to confirm those permissions said in comments. But first I need to comment out ”UserDir disabled”, uncomment ”UserDir public_html”, comment out both ”AllowOverride” and ”Options” parts and write instead ”AllowOverride All”, ”Options none”

now just hit ctrl + x and save changes
Next thing is to restart the apache2-server
sudo service httpd restart
Next I’m going to create the the public_html-folder and index.html-file to see if the userdir works. Also I’m going to set the permissions for the folders.
chmod 711 /home/krister
mkdir ~/public_html
chmod 755 ~/public_html
nano ~/public_html/index.html
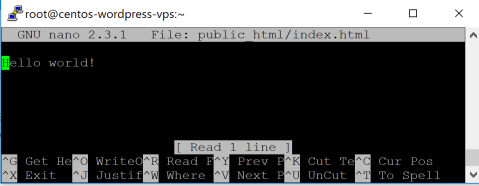
Let’s start with just this phrase, so we can verify it works.
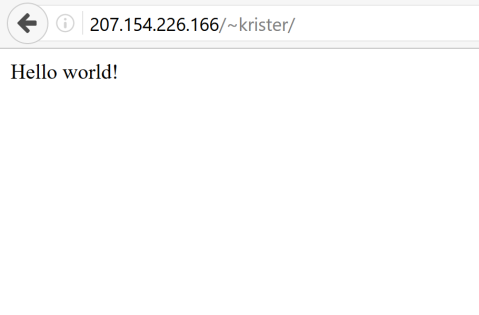
and it works
Mysql
MySQL is pretty straightforward.
So first, let’s install mysql-server.
[krister@centos-wordpress-vps ~]$ sudo yum install mysql-server

[sudo] password for krister:

Loaded plugins: fastestmirror

Loading mirror speeds from cached hostfile

* base: mirror.imt-systems.com

* extras: mirror.23media.de

* updates: mirror.rackspeed.de

No package mysql-server available.

Error: Nothing to do

[krister@centos-wordpress-vps ~]$
Apparently the mysql is completely dropped from yum repositories in favor of mariadb (in comparison: aptitude has both of them available)
so, let’s change it into
sudo yum install mariadb-server
and start it
sudo service mariadb start
sudo systemctl enable mariadb.service
on comparison of the mysql installation, you won’t set the root password during the installation. To cover this, I’m going to run the following script
sudo mysql_secure_installation
[krister@centos-wordpress-vps ~]$ sudo mysql_secure_installation
NOTE: RUNNING ALL PARTS OF THIS SCRIPT IS RECOMMENDED FOR ALL MariaDB
SERVERS IN PRODUCTION USE! PLEASE READ EACH STEP CAREFULLY!
In order to log into MariaDB to secure it, we’ll need the current
password for the root user. If you’ve just installed MariaDB, and
you haven’t set the root password yet, the password will be blank,
so you should just press enter here.
Enter current password for root (enter for none):
OK, successfully used password, moving on…
Setting the root password ensures that nobody can log into the MariaDB
root user without the proper authorisation.
Set root password? [Y/n] y
New password:
Re-enter new password:
Password updated successfully!
Reloading privilege tables..
… Success!
By default, a MariaDB installation has an anonymous user, allowing anyone
to log into MariaDB without having to have a user account created for
them. This is intended only for testing, and to make the installation
go a bit smoother. You should remove them before moving into a
production environment.
Remove anonymous users? [Y/n]
… Success!
Normally, root should only be allowed to connect from ’localhost’. This
ensures that someone cannot guess at the root password from the network.
Disallow root login remotely? [Y/n]
… Success!
By default, MariaDB comes with a database named ’test’ that anyone can
access. This is also intended only for testing, and should be removed
before moving into a production environment.
Remove test database and access to it? [Y/n]
– Dropping test database…
… Success!
– Removing privileges on test database…
… Success!
Reloading the privilege tables will ensure that all changes made so far
will take effect immediately.
Reload privilege tables now? [Y/n]
… Success!
Cleaning up…
All done! If you’ve completed all of the above steps, your MariaDB
installation should now be secure.
Thanks for using MariaDB!
[krister@centos-wordpress-vps ~]$
Just to be clear, I chose to set root password, remove anonymous users, remove root remote login and drop the test database, which strengthen the security, but the most important reason to run this script was to set the root password.
let’s try to login into the mariadb-server
mysql -u root -p
 Welcome to the MariaDB monitor.  Commands end with ; or \g.

Your MariaDB connection id is 10

Server version: 5.5.56-MariaDB MariaDB Server
Copyright (c) 2000, 2017, Oracle, MariaDB Corporation Ab and others.
Type ’help;’ or ’\h’ for help. Type ’\c’ to clear the current input statement.
MariaDB [(none)]>
This ensures that the mariadb installation works.
Since I’m going to install WordPress to my vps later, I could create the database and dedicate a user for it, since I’m now logged in.
MariaDB [(none)]> create database wordpress;

Query OK, 1 row affected (0.00 sec)
next I’ll create a user with privilege to modify on a database ”wordpress”
with commands ”create user ’username’@’location’ identified by ’password’;”
and grant the privileges with ”grant all privileges on database.* to ’username’@’location'”
 MariaDB [(none)]> create user 'wordpress'@'%' identified by 'password';

Query OK, 0 rows affected (0.01 sec)
(note: I replaced the password for this example because I don’t want to share it publicly. Make sure to use passwords with at least 12 characters, both uppercase and lowercase letters, numbers and special characters)
MariaDB [(none)]> grant all privileges on wordpress.* to 'wordpress'@'%';

Query OK, 0 rows affected (0.00 sec)
now, it’s set so I can move to the next phase
Install PHP
In Red hat distros, the php-package already contains a module for apache2 server, so the PHP-package is all we need for the necessity. Of course I need to have database-connections set for the wordpress, therefore I also need package php-mysql
sudo yum install php php-mysql
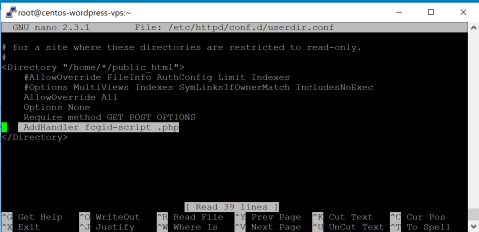
The next thing before testing out the php is to enable it on public_html. This can be simply done in the same userdir.conf-file we edited earlier.
According to the following forum post https://serverfault.com/questions/172217/how-do-i-get-php-to-work-with-userdir, all you have to do is put this line inside the -tag: ”AddHandler fcgid-script .php”
sudo nano /etc/httpd/conf.d/userdir.conf
Next thing is to test out the php-functionality.
First thing is to rename the index.html-file into index.php
mv ~/public_html/index.html ~/public_html/index.php
next thing is to add some php-code inside the file
nano public_html/index.php
I just modify the old ”Hello world!”-phrase into ””, which does exactly the same thing, except showing blank page if the php is not installed properly.
Now I just open my browser and navigate to address ”207.154.226.166/~krister/”
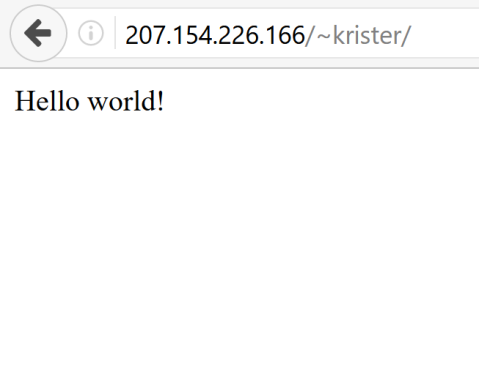
and it works!
Now I have a full-running LAMP initialized
Install WordPress
There’s a good blog-post about installing wordpress available https://tuomassippola.wordpress.com/2014/03/09/wordpressin-asennus/ so I’m going to check some parts out of it.
First I’m going to create a dedicated folder into my public_html-folder.
mkdir ~/public_html/wordpress
Since wordpress is not available in public repositories, I need to download and extract the latest tarball from their site.
wget https://wordpress.org/latest.tar.gz
tar xf latest.tar.gz
Tar extracted all the files into a ”wordpress”-folder, now I’m going to move the content inside into my public_html-folder
mv ~/wordpress/* ~/public_html/wordpress
Now the content is in it’s place, so I can launch the installer via browser by navigating to the address ”207.154.226.166/~krister/wordpress
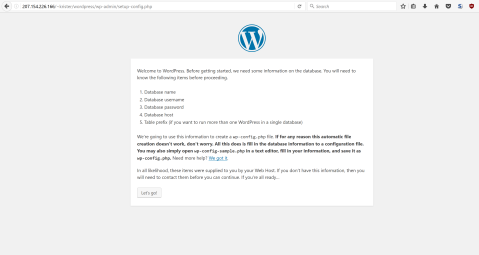
okay, seems working, I’ll click the ”let’s go”-button

Okay, now it asks me the credentials and database name for the database access. Good thing I created those earlier. The prefix is just fine and since the mariadb-server is located into the same vps as the wordpress installation is, localhost will be able to access it with no problem.
I just fill in the information and click ”submit”

Apparently it wasn’t able to write the config file. Well, I just copy the provided content and then create the file
nano ~/public_html/wordpress/wp-config.php
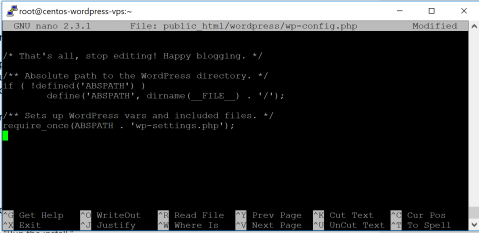
Now just ctrl + x and back to the installer.
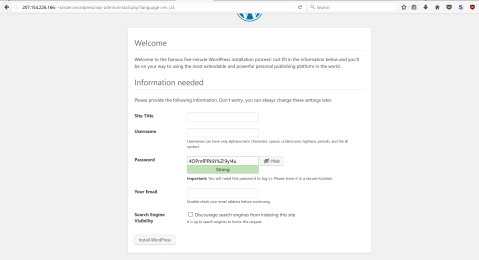
Now it’s time to create my user and the name of the site. Apparently it has already generated me a password, which I believe is instantly expiring one.
For now, I’m just going to put the site name as ”KristerTesti” and change it later. I fill the username and the email and leave ”Discourage search engines from indexing this site” untapped, because I’m probably going to move my wordpress blog into my vps and it’d be nice if the search engines start to re-index into my new blog server.
Lastly I tap the ”install wordpress” -button.
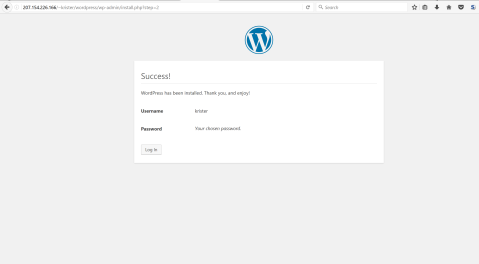
It took less than a second to finish.
Now let’s try logging in.
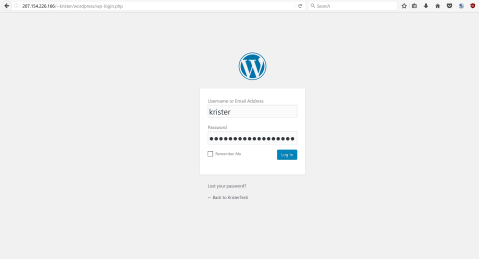
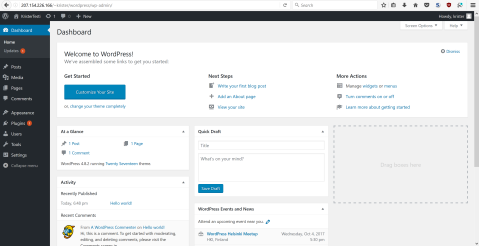
Now I managed to get into the admin panel.
Let’s test the actual usage by posting a test post.
I’ll navigate to ”posts” -> ”add new”
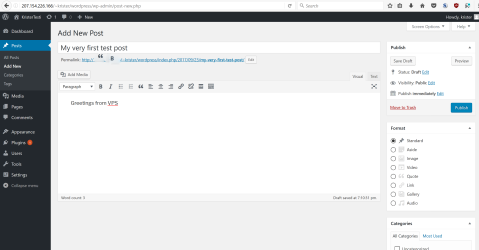
And now to publish from the right panel and see how it looks.
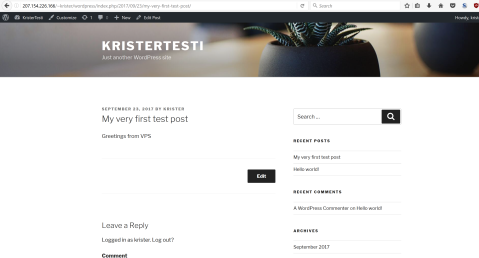
Looks great! Of course there’s still some modifications required for the template and overall look, but at least the base installation works now.
Buy and point domain name
I happen to have the github education pack, which provides me a year use of .me-domain, so I’ll go claim that offer now.
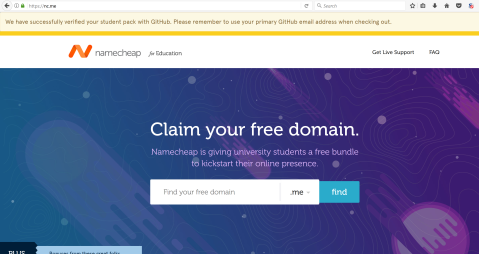
I’m going to try first with my lastname, so let’s search for holmstrom.me
Apparently it was already taken, so I’ll try with kristerholmstrom.me next
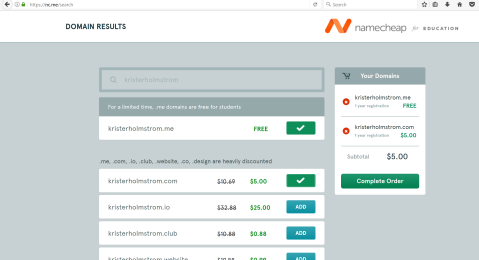
Luckily it’s still available, and kristerholmstrom.com is pretty cheap too. Better register that now before it’s gone.
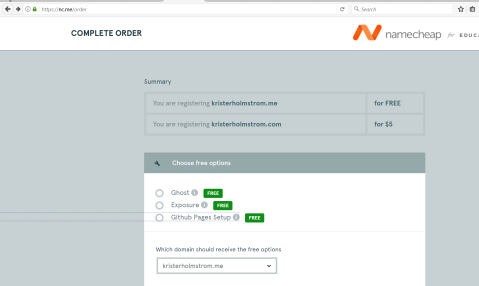
It seems to provide some free services, which are
Ghost – open source online publication platform made with node.js
Exposure – a platform for sharing photo stories
Github pages – tool for generating a site around github project
Since I’m going to point this domaine to my wordpress server, these offers are not necessary for me. Especially that ghost platform I could just install to my server if I happen to need one.
Apparently it forces me to pick one of those, so I’ll just pick ”github pages”, maybe it comes handy later.
Next step is to create a new account and what I find weird is that it doesn’t accept nordic characters on my last name. Even more odd is that since there’s a dropdown menu for mobile phone national codes, which has the nordic countries, so why limit the characters? Maybe the character set of their database is using Latin-1.
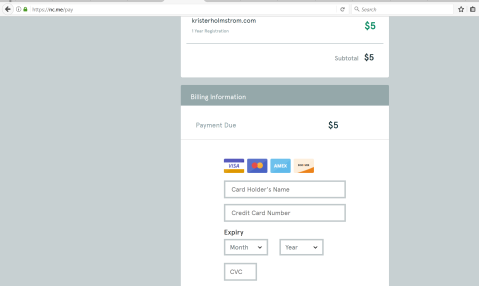
Here it requires me to add my card information. What is the most interesting part is that it doesn’t offer any other payment methods like paypal.
After paying and confirming my email, I should be able to modify the dns-settings of my new domains.
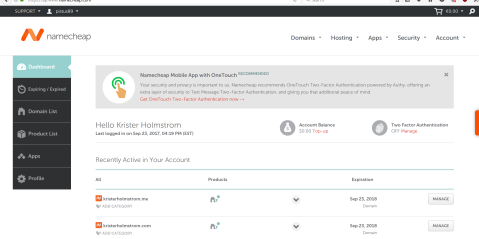
Okay, so this is what the management page looks like. Next I should check the options for dns-settings. I’ll click ”manage” at kristerholmstrom.me
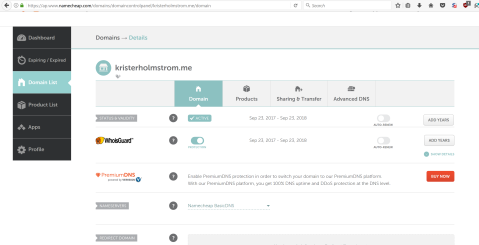
At the manage-page, the obvious place to change the DNS-settins is under ”Advanced DNS” tab
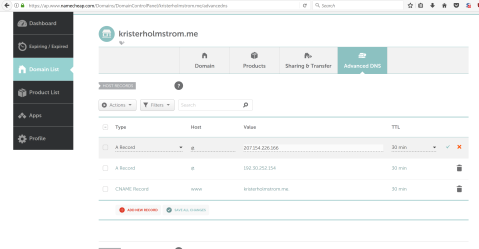
Now here’s where the magics happen. Basicly all I need to do is just change that A-record to point at IP 207.154.226.166, which is my vps public address. Now I just save the changes and see how it looks.
Now it just shows the blank page so apparently it’s not set up yet. (it might take some time before the dns-name record updates to upward).
I just let it be overnight and at the morning, when I tested out the browser again, this shows up
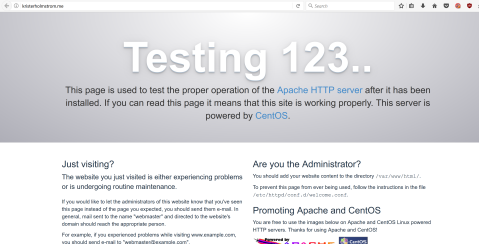
It works now, but of course it just shows the default apache test page. Let’s change it so that the ”root” is my wordpress home page.
Luckily there’s a blog post about this topic already https://www.digitalocean.com/community/tutorials/how-to-set-up-apache-virtual-hosts-on-centos-7
So first, I’m going to create the ”sites-available”-folder, where the available
configurations can be stored.
sudo mkdir /etc/httpd/sites-enabled
Then I’m going to add IncludeOptional sites-enabled/*.conf to the httpd.conf
sudo nano /etc/httpd/conf/httpd.conf
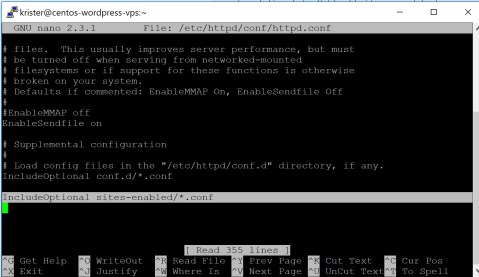
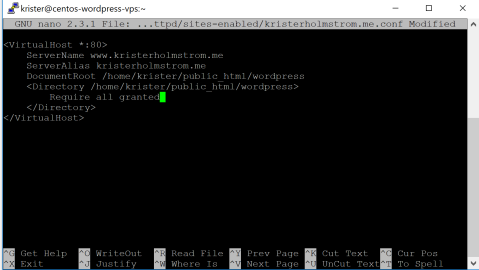
Next I’m going to create a config file, that will set my wordpress page inside /home/krister/public_html/wordpress/ to the root level.
I just name the config file as the domain name, so it’s easier to track later, which config affects in which domain.
sudo nano /etc/httpd/sites-enabled/kristerholmstrom.me.conf
Okay, now it’s time to restart the httpd-service and see the changes
sudo service httpd restart
Redirecting to /bin/systemctl restart httpd.service

[krister@centos-wordpress-vps ~]$
Now I navigate to kristerholmstrom.me with my browser
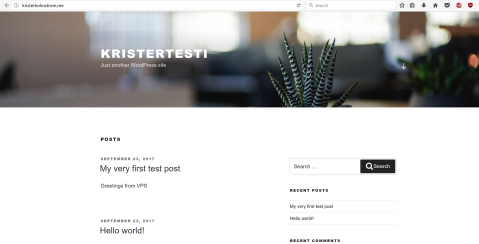
it works!
Setting up SSL-certificates with Let’s Encrypt
It’s probably the easiest way to use an automated ACME-bot provided by EFF, to serve the certificates and I’m bit curious how it works anyways. The instructions are available for all kinds of server platforms and for this test case https://certbot.eff.org/#centosrhel7-apache, I’ll be using Centos 7 with apache2, since that’s what I have now set up.
The acme-installation is available on EPEL-repository, so I have to first enable it.
sudo yum -y install epel-release
and then I can install certbot-apache
sudo yum -y install certbot-apache
Now I have the certbot installed. Next I need to check the commands from this manual https://certbot.eff.org/docs/using.html#certbot-commands
Apparently, since I have configured my public_html-folder to be the root directory, I need to pick the certonly-parameter and specify the path to the virtualhost content in the –webroot attribute. With -d flag, I can define the CNAME-value I want to use the certificates with. In my case, it’s the domain name I pointed earlier at this server.
certbot certonly --webroot -w /home/krister/public_html/wordpress -d kristerholmstrom.me
after asking about email address and agreeing with the terms of condition, I need to install the ssl-module on apache and configure port 443 to direct to the wordpress-folder. Following this blog https://www.digitalocean.com/community/tutorials/how-to-create-an-ssl-certificate-on-apache-for-centos-7
I’m going to install mod_ssl
sudo yum install mod_ssl
Apparently it was already installed.
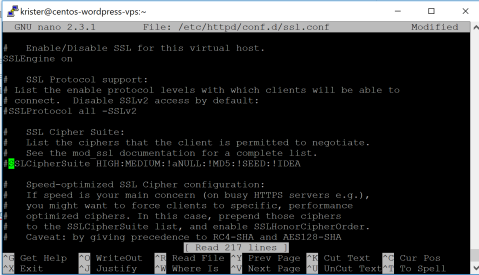
Now, according to the tutorial, I need to comment out the SSLProtocol and SSLCipherSuite from the ssl.conf-file.
sudo nano /etc/httpd/conf.d/ssl.conf
Next thing is to configure https-virtualhost to the config file.
sudo nano /etc/httpd/sites-enabled/kristerholmstrom.me.conf
and add here a new virtualroot-definition
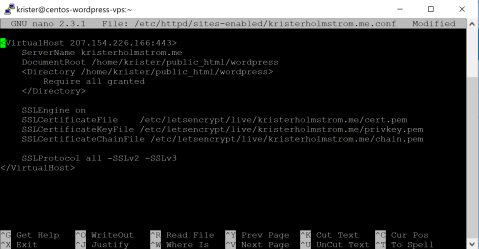
it’s also recommended to copy-paste the following settings at the end of the ssl.conf-file
sudo nano /etc/httpd/conf.d/ssl.conf
# Begin copied text

# from https://cipherli.st/

# and https://raymii.org/s/tutorials/Strong_SSL_Security_On_Apache2.html
SSLCipherSuite EECDH+AESGCM:EDH+AESGCM:AES256+EECDH:AES256+EDH
SSLProtocol All -SSLv2 -SSLv3
SSLHonorCipherOrder On
# Disable preloading HSTS for now. You can use the commented out header line that includes
# the "preload" directive if you understand the implications.
#Header always set Strict-Transport-Security "max-age=63072000; includeSubdomains; preload"
Header always set Strict-Transport-Security "max-age=63072000; includeSubdomains"
Header always set X-Frame-Options DENY
Header always set X-Content-Type-Options nosniff
# Requires Apache >= 2.4
SSLCompression off
SSLUseStapling on
SSLStaplingCache "shmcb:logs/stapling-cache(150000)"
# Requires Apache >= 2.4.11
# SSLSessionTickets Off
Next thing is to run a configuration sanity test
sudo apachectl configtest
AH00558: httpd: Could not reliably determine the server's fully qualified domain name, using ::1. Set the 'ServerName' directive globally to suppress this message

Syntax OK
ok, it complains about missing global servername, but that shouldn’t matter since I have my custom configuration. ”Syntax OK” means it compiles otherwise fine.
Next thing is to restart the httpd-daemon
sudo service httpd restart
No complains from that.
Next thing is to open the ssl-port from firewalld
sudo firewall-cmd --zone=public --permanent --add-port=443/tcp
now let’s open the browser and navigate to address https://kristerholmstrom.me
Okay, it timed out so obviously I’m missing something.
Checking from the ssl_request_log, I was able to find that the certificate didn’t load properly. After googling around, I found this forum post with similiar situation https://unix.stackexchange.com/questions/358089/apache-ssl-server-cert-does-not-include-id-which-matches-server-name and the response says I should use the bot’s autoconfig even with a virtualhost-configuration.
So then I command
sudo certbot --apache
Saving debug log to /var/log/letsencrypt/letsencrypt.log

Plugins selected: Authenticator apache, Installer apache

Starting new HTTPS connection (1): acme-v01.api.letsencrypt.org
Which names would you like to activate HTTPS for?
——————————————————————————-
1: kristerholmstrom.me
2: http://www.kristerholmstrom.me
——————————————————————————-
Select the appropriate numbers separated by commas and/or spaces, or leave input
blank to select all options shown (Enter ’c’ to cancel):
I’m going to choose 1
You have an existing certificate that has exactly the same domains or certificate name you requested and isn't close to expiry.

(ref: /etc/letsencrypt/renewal/kristerholmstrom.me.conf)
What would you like to do?
——————————————————————————-
1: Attempt to reinstall this existing certificate
2: Renew & replace the cert (limit ~5 per 7 days)
——————————————————————————-
Select the appropriate number [1-2] then [enter] (press ’c’ to cancel):
I’ll reinstall the existing one, therefore I pick number 1
Keeping the existing certificate

Deploying Certificate for kristerholmstrom.me to VirtualHost /etc/httpd/sites-enabled/kristerholmstrom.me.conf
Please choose whether or not to redirect HTTP traffic to HTTPS, removing HTTP access.
——————————————————————————-
1: No redirect – Make no further changes to the webserver configuration.
2: Redirect – Make all requests redirect to secure HTTPS access. Choose this for
new sites, or if you’re confident your site works on HTTPS. You can undo this
change by editing your web server’s configuration.
——————————————————————————-
Select the appropriate number [1-2] then [enter] (press ’c’ to cancel):
I want the redirection, so I pick number 2
Failed redirect for kristerholmstrom.me

Unable to set enhancement redirect for kristerholmstrom.me

Unable to find corresponding HTTP vhost; Unable to create one as intended addresses conflict; Current configuration does not support automated redirection
IMPORTANT NOTES:
– We were unable to set up enhancement redirect for your server,
however, we successfully installed your certificate.
– Congratulations! Your certificate and chain have been saved at:
/etc/letsencrypt/live/kristerholmstrom.me/fullchain.pem
Your key file has been saved at:
/etc/letsencrypt/live/kristerholmstrom.me/privkey.pem
Your cert will expire on 2017-12-23. To obtain a new or tweaked
version of this certificate in the future, simply run certbot again
with the ”certonly” option. To non-interactively renew *all* of
your certificates, run ”certbot renew”
[krister@centos-wordpress-vps ~]$
Okay, some error occurred and apparently, the browser still shows timeout.
On this post at Acme-bot’s github page https://github.com/certbot/certbot/issues/3461, they say that it might be a bug. On digitalocean’s blog, it’s recommended to use the default ssl.conf-file instead of custom conf. Let’s try that out and copy the content of kristerholmstrom.me.conf into ssl.conf
So I just keep the -tag but change everything else to match.
Now restart the httpd and try it again.
Still timeout, but the record in log says
[Sun Sep 24 15:14:55.409568 2017] [ssl:warn] [pid 14849] AH01909: RSA certificate configured for www.kristerholmstrom.me:443 does NOT include an ID which matches the server name
it might be that the http://www.-prefix is not compatible, let’s remove that from the virtualhost-configuration.
apparently, it didn’t work out either, so I’ll have to finish up this topic later.
