Hello world with Python, Java and C in Centos 7
The last exercise (h6) on Tero Karvinen’s Linux servers course. is to write ”Hello world!”-program for three different programming languages and run them on a Linux environment.
I’ll be using the same vps-server with centos 7 I created on my vps-related article, for running the programs.
The programming languages I choose are Java, Python3 and C. For each of them, I’ll be testing out the installation of development tools, compiling the ”hello world”-code and run it on terminal environment.
Java
For a compiler, I’ll be using an openjdk, since it’s available on yum-repository.
By searching the repository, I found that the latest available java version is 1.8, therefore the package name is java-1.8.0-openjdk-devel (notice that you keep the -devel-postfix, otherwise it doesn’t install the compiler, only virtual machine)
sudo yum install -y java-1.8.0-openjdk-devel
Next thing is to create a ”helloworld.java”-file with the following content
public class helloworld {

    public static void main(String[] args) {

            System.out.println("Hello World!");

    }

}
to compile the code, I use javac
javac helloworld.java
now I can run the application with the class-name (filename will not be used here, otherwise it won’t work)
java helloworld
output:
Hello world!
Python
I’m going to use python3 since it’s the latest version, but I must also be aware that the language syntax differs a bit from python2.x -version.
apparently the latest package available is python34, according to the yum search
sudo yum install python34
now I just create a helloworld.py-file with the following content
print("Hello world!")
Note: on python2, the syntax would have been print "hello world", which is not compatible with python3
Now I just run it with command
python3 helloworld.py
output:
Hello world!
C
According to this article https://www.cyberciti.biz/faq/howto-compile-and-run-c-cplusplus-code-in-linux/ I should first install the developer tools with this command
sudo yum groupinstall 'Development Tools'
it installed 26 packages containing gcc-related tools and perl-compilers. It might be a one command to install all the necessary stuff to get started with perl.
Next thing is to write the ”hello world” -program. First I create a file named ”helloworld.c” and put the following content in it
#include
int main(void)
{
printf("Hello world!\n");
return 0;
}
Then I compile it with command ”make”
make helloworld
output:
cc helloworld.c -o helloworld
and finally I run it with the name of the compiled file
./helloworld
output:
Hello world!
Python Flask and postgreSQL
For this weeks Linux course homework (h5) at Tero Karvinen’s course, I got a homework to test out Python Flask in both test deployment and production environment.
The Final step is to connect a PostgreSQL-database and read out some data from the database.
I’ll base my experiment at this guide http://terokarvinen.com/2017/hello-python-flask-web-app-development-server-install-on-ubuntu-16-04
”Hello world” on Flask
First I start by installing the flask components and curl to test the endpoints without using my GUI web browser.
sudo apt-get update && sudo apt-get install -y python3-flask curl
The next step is to create a directory for my new python project and create the main-class inside.
I’ll name my project as ”helloFlask” and the main-class will be simply named as ”main.py”
mkdir helloFlask && cd helloFlask
nano main.py
inside the main-class file, I’ll just put the very basic structure to run Flask:
from flask import Flask

app = Flask(__name__)
@app.route(”/”)
def helloWorld():
return ”Hello World!”
if __name__ == ”__main__”:
app.run(debug=True)
It seems a bit confusing, but let me explain, what is happening here.
At the first line, I import Flask-class from the flask-library.
Next I store a new Flask object (with variable __name__)
into an app-variable. Then comes the app.route-annotation, where I define a root-level request dispatcher on top of helloWorld()-function, which
returns a string ”Hello World!”, when called.
Next, there’s a checker for __name__ to be ”__main__”-string and if so, the class will be run with debug-mode.
Now I have everything set, so let’s start the program into a test run and see, if it compiles and works.
CAUTION: the following method is only allowed to be used on the development purposes. It’s not considered safe enough to be run on
a production environment, especially on servers accessible via public Internet.
I will go through the production initialization process later at this article.
python3 main.py
returns
 * Running on http://127.0.0.1:5000/ (Press CTRL+C to quit)

* Restarting with stat
now it runs actively on my terminal session. To test out the root endpoint, I can use curl for that purpose.
First I open up an new terminal tab and then, with curl, I call the local ip-address and the port mentioned on Flask’s startup response.
curl 127.0.0.1:5000
response
Hello World!krister@krister-VirtualBox:~/helloFlask$
there wasn’t any linebreak on that response string, therefore the terminal prefix was printed right after the response.
Anyway, this is a proof, that my code works.
Deploying Flask project into Production environment with wsgi
Next thing is to test, how the production deployment works. I’ll be following the points of this tutorial http://terokarvinen.com/2016/deploy-flask-python3-on-apache2-ubuntu
First I need an apache2-server installed
sudo apt-get install apache2
curl http://localhost/ | grep title
results
Apache2 Ubuntu Default Page: It works
Now that the apache server is up and running, it’s time to install mod_wsgi into it
sudo apt-get install -y libapache2-mod-wsgi-py3
The next thing is to create a configuration file for apache2 that runs my helloFlask-project
sudoedit /etc/apache2/sites-available/helloFlask.conf
content
ServerName virtualbox.krister.com
WSGIDaemonProcess helloFlask user=krister group=krister threads=5
WSGIScriptAlias / /home/krister/helloFlask/main.wsgi
WSGIProcessGroup helloFlask
WSGIApplicationGroup %{GLOBAL}
WSGIScriptReloading On
Require all granted
This just simply a virtualhost-configuration that defines the home path of my project.
Since the main.wsgi-file doesn’t exist yet, let’s create it now
nano ~/helloFlask/main.wsgi
content
import sys
if sys.version_info[0]<3: #check if is run with python3
raise Exception("Python3 is required to run this program! Current version: '%s'" %
sys.version_info)
sys.path.insert(0,'/home/krister/helloFlask/') # path where the project is located
from main import app as application
Now I shall disable the default page configuration from apache2 and enable this new config, helloFlask.conf, instead
sudo a2dissite 000-default.conf

sudo a2ensite helloFlask.conf

sudo service apache2 restart
now I’m going to test, if this setting works with curl. Luckily, since the apache2-server handles the traffic, I can just call plain localhost
curl http://localhost/
result
Hello World!krister@krister-VirtualBox:~/helloFlask$
again, the linebreak was missing, but it printed out the ”Hello World!”-phrase, as I wanted, so it’s quaranteed to work.
Read content from PostgreSQL with Python Flask
I’ll base my testing to this tutorial http://terokarvinen.com/2017/database-connection-from-python-flask-to-postgre-using-raw-sql
First of all, let’s install PostgreSQL
sudo apt-get install -y postgresql
next, I create a new database
sudo -u postgres createdb helloflask
and finally, I create a new database user
sudo -u postgres createuser krister
the next thing is to install sql-alchemy and postgresql-flask-module
sudo apt-get install -y python3-flask-sqlalchemy python3-psycopg2
and finally, let’s modify my main.py file to insert some data into the db and read it out when the endpoint is called
nano ~/helloFlask/main.py
content
from flask import Flask, render_template

from flask_sqlalchemy import SQLAlchemy

app = Flask(__name__)

db = SQLAlchemy(app)

app.config['SQLALCHEMY_DATABASE_URI'] = 'postgresql://krister/helloflask'

app.config['SECRET_KEY'] = 'k377AglooNex+932.asdjReajeIxane436'
def sql(rawSql, sqlVars={}):
assert type(rawSql)==str
assert type(sqlVars)==dict
res=db.session.execute(rawSql, sqlVars)
db.session.commit()
return res
@app.before_first_request
def initDBforFlask():
sql(”CREATE TABLE IF NOT EXISTS members (id SERIAL PRIMARY KEY, name VARCHAR(160) UNIQUE);”)
sql(”INSERT INTO members(name) VALUES (’Tom Johnson’),(’John Thompson’) ON CONFLICT (name) DO NOTHING;”)
@app.route(”/”)
def helloWorld():
return ”Hello World!”
@app.route(”/members”)
def members():
members=sql(”SELECT * FROM members;”)
return render_template(”members.html”, members=members)
if __name__ == ”__main__”:
from flask_sqlalchemy import get_debug_queries
app.run(debug=True)
to parse out the database content cleanly, I’ll define an html-template named members.html
mkdir ~/helloFlask/templates
nano ~/helloFlask/templates/members.html
content
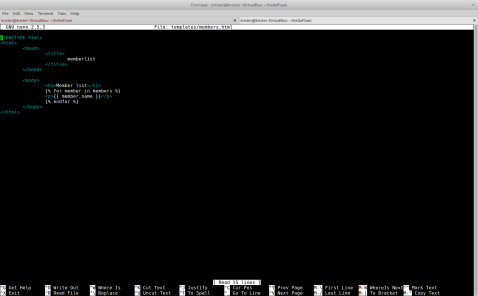
memberlist
Member list
{% for member in members %}
{{ member.name }}
{% endfor %}
and now, curl localhost/members
apparently there’s an error in the code, since I got Internal Server Error 500
For some reason, the apache logs don’t say anything about it, even if I try to grep
Let’s run it on test environment
python3 ~/helloFlask/main.py
curl localhost:5000/members
okay, now I got the error traceback
sqlalchemy.exc.OperationalError: (psycopg2.OperationalError) could not translate host name "krister" to address: Name or service not known
It’s propably a syntax error, according to this https://stackoverflow.com/questions/23839656/sqlalchemy-no-password-supplied-error
the correct syntax is postgresql://user:password@localhost:5432/database_name so let’s change that part on SQLALCHEMY_DATABASE_URI
app.config['SQLALCHEMY_DATABASE_URI'] = 'postgresql:///helloflask
curl localhost:5000/members

nice! now it works!
Arduino ja Python
Sain kotitehtäväksi testata pythonin ja arduinon välistä rajapintaa serialin kautta. Ensimmäinen tehtävä on lukea tietokoneella Arduinon lähettämää tietouomasin koodin kirjoittamisen aikana, että koneellani oleva python 3.30 versio ei pysty lähettämään seriaaliin kirjaimia sellaisenaan, vaan ne on muutettava ensin biteiksi. Tämä tapahtuu kirjoittamalla metodiin write() encode-metodin, esimerkiksi write(’5’) riittäisi pythonin aikaisemmille versioille, mutta python 3.30 tulee kirjoittaa write(’5’.encode(’UTF-8’)).
Kirjoitin komentokehotteella seuraavan python-koodin:
import serial
s = serial.Serial(”/dev/ttyACM0”, 9600); //ensimmäinen polku viittaa porttia, johon arduinoni oli kytketty, tarkista oman arduinosi portti ja täydennä koodiin. 9600 viittaa serialmonitorin kanavaan jota käytetään datan lähettämiseen
while True:
print(s.readline());
ja Arduino IDE:lle kirjoitin
void setup() {
Serial.begin(9600);
}
void loop() {
Serial.println(”this will be readable at computer screen”);
delay(1000);
}
python-ohjelma tulostaa seuraavia rivejä sekunnin välein:
B’this will be readable at computer screen\r\n
Seuraavana tehtävänä oli kirjoittaa tietokoneelta arduinolle , tämäkin onnistuu pythonilla käytteäen
serial-porttia Arduinolla
String s;
void setup() {
Serial.begin(9600);
}
void loop() {
while(Serial.available() || s.length() == 18) { //varmistetaan että dataa tulee ja rivin pituus vastaa python-ohjelmaan annettua lausetta
char c = Serial.read();
s = s + c;
}
Serial.println(s);
s = ””;
delay(1000); //odottaa sekunnin
}
ja Pythonille seuraava koodi:
import serial
import time
ser = serial.Serial(”/dev/ttyACM0”, 9600);
while True:
ser.write(”readable at arduino”.encode(’UTF-8’));
time.sleep(2); //odottaa 2 sekuntia
Syöte on luettavissa arduinon serialmonitorilta 9600 baudin kohdalta. Ohjelma tulostaa vuorotellen tekstirivin ja tyhjän rivin johtuen delayn ja time.sleepin aikaerosta
Seuraavana tehtävänä minun tuli tehdä ohjelma, joka kytkee arduinossa olevan ledin päälle ja pois
Sijoitin arduinon digitaaliseen pinniin nro 12 ja GND:hen ledin. seuraavaksi tein seuraavan koodin pythonilla:
import serial
import time
s = serial.Serial(’/dev/ttyACM0’, 9600);
while True:
s.write(’A’.encode(’UTF-8’)); // kirjain A on merkkinä ledin käynnistämisestä Arduinolla
s.close();
print(”led is ON”); //Ilmoitetaan komentokehotteella että ledin pitäisi nyt palaa
time.sleep(5); // odotetaan 5 sekuntia
s.open();
s.write(’B’.encode(’UTF-8’)); // kirjain B on merkkinä ledin sammuttamisesta
s.close();
print(”led is OFF”);
time.sleep(5);
s.open();
ja arduinoon seuraavan koodin
char ser;
void setup() {
Serial.begin(9600);
pinMode(12, OUTPUT);
}
void loop() {
if (Serial.available()) { //Arduino tarkistaa, onko seriaalin kautta tulossa dataa
ser = Serial.read();
if (ser == ’A’) { // mikäli seriaalissa lukee A, laitetaan ledi päälle
digitalWrite(12,HIGH);
}
else if (ser == ’B’) { //mikäli seriaalissa lukee B, laitetaan ledi pois
digitalWrite(12,LOW);
}
Ohjelmointikielten testaaminen Hello World -ohjelmalla
Sain kotitehtäväksi Työasemat ja Tietoverkot-kurssilta testata kolmea eri ohjelmointikieltä ja tulkkien toimivuutta.
Päätin tehdä testit seuraavilla ohjelmointikielillä: Java, Python ja C++.
Tein myös javalla edistyneemmän ohjelman, jonka lähdekoodin löytää osoitteesta
ohjelman voi ajaa maalaamalla koodin hiirellä, kopioimalla leikepöydälle ( ctrl + c) ja luomalla tekstieditorilla LotteryNumberGenerator.java -nimisen tiedoston, johon koodi liitetään (ctrl + v).
Vaiheittaiset ohjeet java-tiedoston ajamiseen löytyy tästä raportista.
HUOM! LotteryNumberGenerator-ohjelma on ilmaisjaossa GNL-lisenssin mukaisesti. Tarkemmat tiedot lisenssistä raportin lopussa.
JAVA
18.9.2012
22:57 Tulkin asentaminen
asensin viimeisimmän java development kitin, eli lyhennettynä “jdk”, jotta pystyisin ajamaan java-tiedostoja suoraan komentorivitulkin kautta. Ensiksi päivitin pakkauslistan komennolla
$ apt-get update
seuraavaksi asensin jdk versio 6:n, koska sen pitäisi olla helposti yhteensopiva komentorivitulkilta ajettaessa. Jdk:ta on saatavilla myös uudempi versio 7, mutta en käyttänyt sitä testissä lainkaan.
Asensin käyttäen komentoa
$ sudo apt-get install openjdk-6-jdk
nyt koneellani pystyy luomaan java-tiedostoja ja ajamaan niitä tulkin avustuksella
23:04 Hello World -tiedosto
loin testaamista varten HelloWorld.java -tiedoston, joka tulostaa tekstin “Hello World!”.
Ensiksi siirryin kansioon, johon halusin luoda tiedoston
$ cd /home/krister/codes/
kansion “codes” olin aiemmin luonut mkdir-komennolla. Suosittelen käyttämään erillistä kansiota omille kooditiedostoille ja mielellään tekemään myös omat kansiot jokaiselle käyttämälle kielelle erikseen. Näin tiedostot on jälkikäteen helpompi löytää ajamista ja muokkaamista varten.
Tiedosto luodaan esimerkiksi komennolla
$ nano HelloWorld.java
seuraavaksi kirjoitin koodin ja tallensin ctrl + X painamalla. Kirjoittamani HelloWorld-koodin löytää osoitteesta
23:21 Ohjelma ajettavaan muotoon
seuraavaksi loin tiedostosta .class-tiedoston, jotta tulkki pystyy tunnistamaan kooditiedostoni. Käytin komentoa
$ javac HelloWorld.java
lopuksi ajoin valmiin ohjelman komennolla
$ java HelloWorld.java
jolloin komentoriville tulostui teksti “Hello World!”. Ohjelma ja tulkki toimivat näinollen kuten pitääkin.
PYTHON
18.9.2012
Python-ohjelmien ajaminen komentorivitulkissa on todella helppoa ja yksinkertaista, sillä python-tulkki löytyy oletuksena linux-asennuksesta. Loin tässäkin HelloWorld-ohjelman, joka tulostaa Hello World! -tekstin
23:24 tiedoston luominen & testaaminen
koska tulkki on valmiiksi asennettu, pääsin suoraan tekemään ajettavan ohjelmatiedoston komennolla
$ nano HelloWorld.py
tällä kertaa riitti, että kirjoitin tiedostoon aluksi #!/usr/bin/python, eli polun, jota kautta tiedetään millä ohjelmalla tiedosto tulee ajaa. Seuraavaksi tein pari rivinvaihtoa enterillä ja kirjoitin
print “Hello World!”
tallensin tiedoston ja ajoin ohjelman komennolla
$ python HelloWorld.py
jolloin ohjelma tulosti “Hello World!” kuten pitikin. Näin ollen Python-tulkki toimii samoin HelloWorld-ohjelmani.
23:40
C++
C-kieli lähentelee jo puhdasta konekieltä, josta C++ on kenties helpoin omaksua java- tai python-pohjatiedoilla. Tässäkin testissä kokeilin asentaa C-tulkin ja ajaa HelloWorld-ohjelman, joka tulostaa “Hello World” -tekstin.
19.9.2012
00:00 Tulkin asennus
asensin komentorivitulkilla C-tulkin version 4.5 seuraavalla komennolla
$ sudo apt-get install gcc-4.5
tämän jälkeen loin /home/krister/codes/ -kansioon tiedoston HelloWorld.cpp komennolla
$ nano HelloWorld.cpp
kirjoittamani koodi löytyy osoitteesta
seuraavaksi tallensin tiedoston ctrl + X painamalla
00:17 tiedoston muokkaus
annoin tulkin tehdä ajettavan version tiedostostani, joten kirjoitin komennon
$ g++ HelloWorld.cpp -o HelloWorld.
Nyt ohjelman pystyi ajamaan bashilla komennolla
$ ./HelloWorld.
Jolloin ohjelma tulosti tekstin “Hello, World!”. Näinollen C-tulkki asentui oikein ja pystyy kääntämään koodia ongelmitta sekä ohjelmani oli kelvollinen.
Lähde:
http://en.wikipedia.org/wiki/Hello_world_program_examples
GNU GENERAL PUBLIC LICENSE
Version 3, 29 June 2007
Copyright (C) 2007 Free Software Foundation, Inc. <http://fsf.org/>
Everyone is permitted to copy and distribute verbatim copies
of this license document, but changing it is not allowed.
