Creating a Xubuntu boot stick on Windows 10 with Rufus
This blog post is made from an exercise of Haaga-Helia Course Linux as a server (Linux palvelimena) hosted by Tero Karvinen.
The exercise contains the following parts:
- Make your own Linux live boot stick. Try it with some other computer than the ones in school lab. This part doesn’t require installing the OS on your computer – if you do so, make sure you do proper backups first
- List of the hardware of your test computer (’sudo lshw -short -sanitize’)
- Install three new software that are new to you. Try each of them in their mainly tasks
- Check what licenses the installed softwares use. Explain shortly, what rights and duties those licenses provide for you as an end-user
- List the software you use for your daily usage (ie. MS Word), their main purpose (ie. text preparation) and a controversial free Linux-software (ie. Libreoffice Writer). If a program doesn’t have any free Linux-counterparts, list it anyway.
First I start with creating the live boot stick and test the booting with my Lenovo Thinkpad T570 laptop and windows 10 installed (secure boot is already turned off)
Sat 25.8.2017 18:49:00
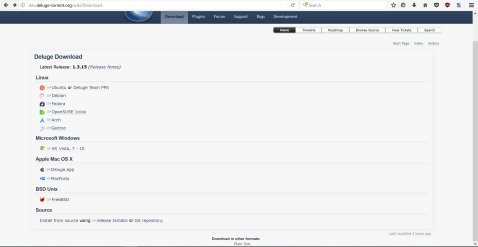
Started with downloading a latest image of a Xubuntu OS from the xubuntu website.
I’m going to pick the latest LTS-release availabe and use an HTTP-download source from Sweden proxy. The latest stable 64-bit release appears to be xubuntu-16.04.3-desktop-amd64.iso
19:15:00
The download took total of 13 minutes for a 3.7 Gb ISO-file, so apparently it’s a pretty slow to fetch an image file via HTTP-download, since it’s only provide from a one source at a time. During the download, the average download bandwith jumped between 3-8 Mbps.
Now it’s time to install an USB live stick creator application and, for Windows 10 operating system I’m currently using, I chose Rufus not only because it’s free and open source application, but also the UI is very simplified and mimics
the standard window of the Windows drive property popup, which makes it more intuitive to use in the Windows environment.
19:27:00
after downloading, I tried to open Rufus, but for some reason, it seems to hang on the background and doesn’t seem to load any visible UI. Even the task manager is unable to kill the process, so I believe the startup process is stuck somewhere.
After looking around the cause, I found out that the File History software I enabled earlier, before starting to studying this case, is still writing a mirror copy of the current personal files into my external drive and does that reeeally slowly
(as any other windows pre-installed backup program, it doesn’t show any progress bar to estimate, when it would be done with it’s job or at least indicate, it’s not
stuck in). After killing the backup process (I’ll just finish it up with some other tool later) Rufus started to work again, so I believe it had hard time on identifying
my external hdd during the backup process.
Next thing would have been finding the path of my downloaded Xubuntu iso-file, but after checking the download history, I found out that it apparently failed after all. This time I chose to download a more trustworthy torrent file and start a cluster download by using this very good, open source bittorrent-client Deluge, which is available on multiple
platforms, including several Linux distros, Mac OSX, Windows and FreeBSD
21:52:00
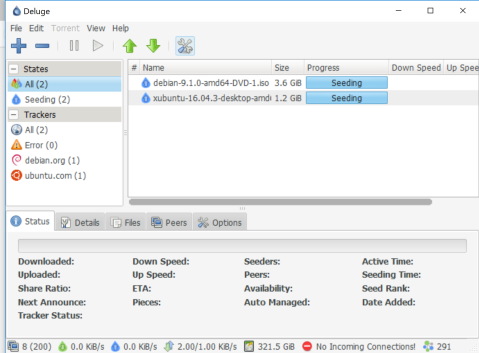
after having a break, I noticed my torrent-download being completed and it turned into a seeding mode.
Now back to Rufus..
21:54:00
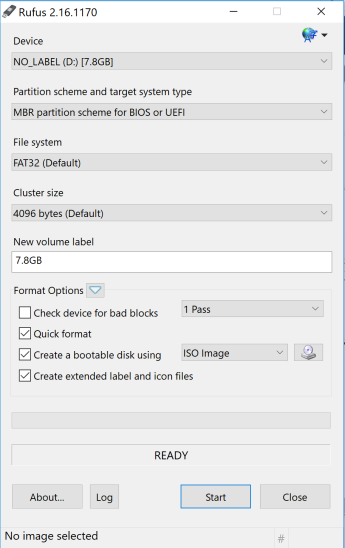
From the screenshot, you can see that I have a 7.8GB sized USB stick attached into a D- drive letter and for a partition scheme I’ve chosen ”MBR partition scheme for BIOS or UEFI” so it can support both BIOS and UEFi boot options.
”File System” has to be FAT32, otherwise it won’t support partitions sized over 1GB.
”Cluster Size” of 4kb is just fine, since I don’t happen to have a volume over 16TB.
”New Volume Label” is fine with 7.8Gb, therefore it uses the entire capacity of the usb stick.
”create a bootable stick with” will be ISO Image, since the downloaded file is formatted with ISO-packaging. By clicking the the disc image next to the dropdown menu, I can choosethe path to the ISO-file.
here I’m going to pick the Xubuntu image I torrented.
now it says ”Using image: xubuntu-16.04.3-desktop-amd64.iso” at the bottom, which means we are ready to start burning, so I just click ”Start” and Rufus gives me the following popup:
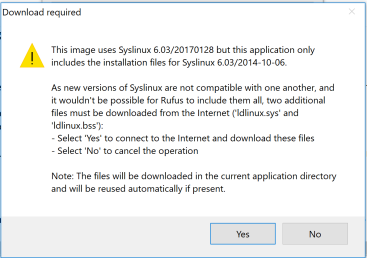
apparently Rufus is capable of analyzing the bootloader used by the chosen image, and now it recommends me to connect internet for downloading the most
latest version of syslinux-bootloader. Probably this is not recommended, since a bootloader is often made bootable for that certain iso-file, but
just out of curiosity I’d like to see, how the Rufus handle such situation, so I just click ”yes”
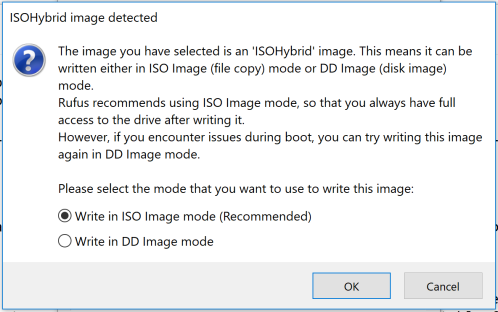
Now the Rufus is telling me that the file is typed as ”ISOHybrid” and I can burn it as ISO-mode or DD-mode. Here I believe it’s referring to a dd-application
from unix operating systems, that is used for writing disks and disk images bit-by-bit into a chosen output (i.e. another disk). Therefore I’m curious to see
this ISO-option it’s offering here.
22:43:00
Now the Rufus seems to be ready with writing the ISO-file and to verify that, we can look inside the drive
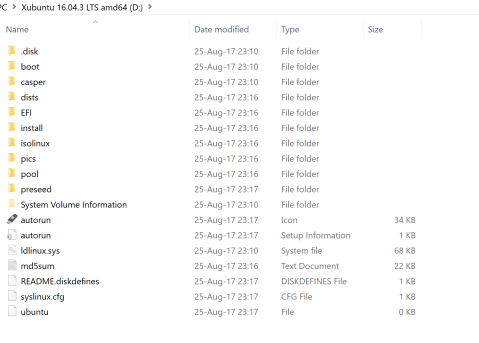
boot stick seems to be ready for the boot test. I have already disabled secure boot on my laptop, so I can try immediately to boot with the stick
23:01:00
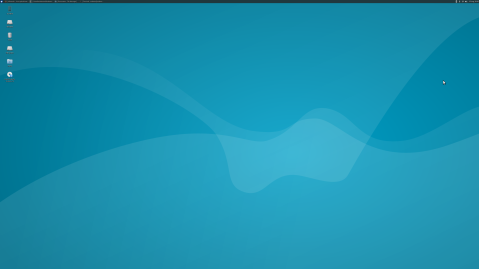
I was able to boot, but the resolution of the screen seems to be a bit outfitted. Probably I need to install some external graphic drivers to support Nvidia GPU.
23:05:00
The next thing is to test out the hardware recognition by using the following command
xubuntu@xubuntu:~$ sudo lshw -short -sanitize
H/W path Device Class Description
==============================================================
system 20H9004MMX (LENOVO_MT_20H9_BU
/0 bus 20H9004MMX
/0/3 memory 16GiB System Memory
/0/3/0 memory 8GiB SODIMM Synchronous 2133
/0/3/1 memory 8GiB SODIMM Synchronous 2133
/0/7 memory 128KiB L1 cache
/0/8 memory 512KiB L2 cache
/0/9 memory 4MiB L3 cache
/0/a processor Intel(R) Core(TM) i7-7500U CP
/0/b memory 128KiB BIOS
/0/100 bridge Intel Corporation
/0/100/2 display Intel Corporation
/0/100/8 generic Sky Lake Gaussian Mixture Mod
/0/100/14 bus Intel Corporation
/0/100/14/0 usb1 bus xHCI Host Controller
/0/100/14/0/1 input USB Receiver
/0/100/14/0/2 generic LG-H870
/0/100/14/0/3 generic EMV Smartcard Reader
/0/100/14/0/4 scsi1 storage DataTraveler 2.0
/0/100/14/0/4/0.0.0 /dev/sdb disk 7756MB SCSI Disk
/0/100/14/0/4/0.0.0/1 /dev/sdb1 volume 7395MiB Windows FAT volume
/0/100/14/0/5 multimedia Integrated IR Camera
/0/100/14/0/6 communication L831-EAU-00
/0/100/14/0/7 communication Bluetooth wireless interface
/0/100/14/0/8 multimedia Integrated Camera
/0/100/14/0/9 generic Generic USB device
/0/100/14/1 usb2 bus xHCI Host Controller
/0/100/14/1/3 scsi0 storage USB3.0-CRW
/0/100/14/1/3/0.0.0 /dev/sda disk SD/MMC
/0/100/14/1/3/0.0.0/0 /dev/sda disk waw
/0/100/14.2 generic Intel Corporation
/0/100/16 communication Intel Corporation
/0/100/1c bridge Intel Corporation
/0/100/1c/0 display GM108M [GeForce 940MX]
/0/100/1c.6 bridge Intel Corporation
/0/100/1c.6/0 wlp4s0 network Intel Corporation
/0/100/1d bridge Intel Corporation
/0/100/1d.2 bridge Intel Corporation
/0/100/1d.2/0 storage Samsung Electronics Co Ltd
/0/100/1f bridge Intel Corporation
/0/100/1f.2 memory Memory controller
/0/100/1f.3 multimedia Intel Corporation
/0/100/1f.4 bus Intel Corporation
/0/100/1f.6 enp0s31f6 network Ethernet Connection (4) I219-
/1 power 00UR892
/2 power 01AV422
/3 wwp0s20f0u6 network Ethernet interface
Apparently it shows the system using the external Nvidia GeForce 940MX chip for graphics display, so that confirms that Xubuntu is missing the proper Nvidia drivers. I have to note that when I’m about to actually install a Linux distro on this laptop.
The next step is to install 3 new software by using a package manager,
so we start with sudo apt-get update.
I have to say, I’ve been using Linux, and especially Ubuntu, for a several years, so I find it hard to think of any new software I haven’t yet installed, so I just ended up looking for the most favorite programs listed on an Internet top ranking lists like this one http://www.omgubuntu.co.uk/2016/12/21-must-have-apps-ubuntu
and pick 3 software that I haven’t yet heard of.
After looking for a while, I ended up picking these three candidates:
– NeoFetch
– Ubuntu cleaner
– Clementine Music Player
Apparently for Neofetch, there’s no official Aptitude repository available, so I have to deal with the installation in an old-fashioned way: downloading sources packed in a tarball:
1. wget https://github.com/dylanaraps/neofetch/archive/3.2.0.tar.gz
2. tar xzfv 3.2.0.tar.gz unzipped neofetch-3.2.0 folder containing the actual source
3. cd neofetch-3.2.0 && ./neofetch makes it run
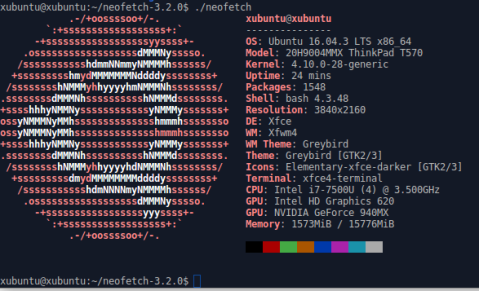
I have to admit, it’s pretty clear and works!
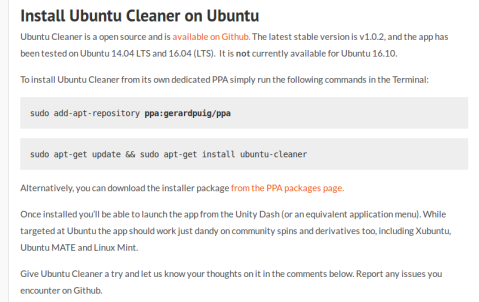
the next software is called Ubuntu Cleaner and again, this candidate doesn’t have any official installation repo on Aptitude,
but it does offer a custom ppa, if you trust them enough. You can also download the actual deb-package or sources from their github page.
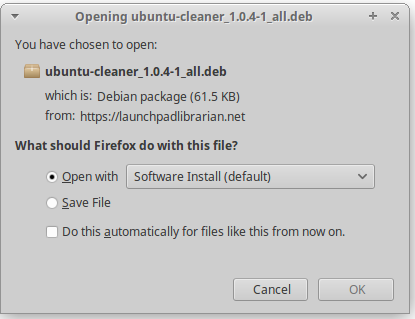
Let’s try the deb-package, you can either use software center to let it install the package, or simply use command dpkg -i ubuntu-cleaner_1.0.4-1_all.deb
First I tried opening the deb-file with Software Center (picture above), but the install button was unresponsive for some unknown reason, so I ended up using terminal and dpkg-command.
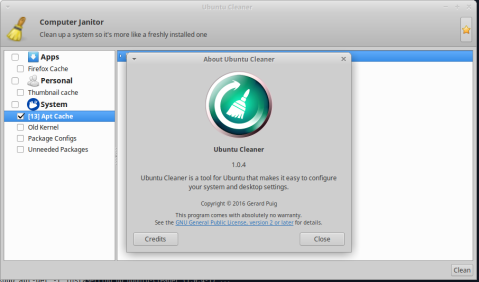
when running dpkg, it encountered a problem with unmet dependencies, but those can be installed by calling sudo apt-get -f install and then dpkg -i ubuntu-cleaner_1.0.4-1_all.deb again.
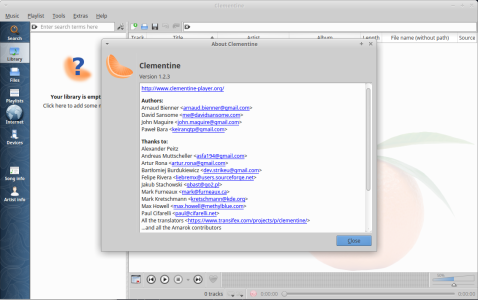
clementine is the last application and it was available on the official repos. I just commanded sudo apt-get install clementine and it was immediately ready to use. Tested out a sample music file and it appears to play music, so at least my speakers do work.
Continuing the steps with identifying the licenses of the previously installed three softwares.
first, the Ubuntu Cleaner says on it’s github page, that the software is licensed with GPLv3.
NeoFetch on the other hand says on their github page, that it’s licensed under MIT , which makes it possible for me to release my own modified version of this app as a closed propiertary software.
Clementine says on their web page https://www.clementine-player.org/ that it’s licensed with GPLv3
For GPLv3 softwares, as a user, I have the four principles as a rights to use these products (run,study, modify, redistribute and sell copies), but it means also
that I have to pass these rights to my modified, redistributed product as well. With MIT-license, I can also take the sources, make a modified application
and keep the sources to myself if I want and relicense the software I have made.
The next task is to list my mostly used applications and their alternatives on free linux-side.
The softwares I mostly use are work-related stuff, which are
– skype for business
– Intellij IDEA
– slack
– Telegram
For skype for business, apache seems to have it’s own openmeetings teleconference application with the Apache Software License version 2.0
Intellij IDEA Community Edition is published under Apache Software License 2.0 and it’s available on windows, osx and linux. The community edition, on the other hand, doesn’t support Java and Spring development, therefore a true alternative would be an easyeclipse , which combines open parts of the Eclipse IDE and the available open source plugins and distributes the migration under GPL-license.
Slack is obviosly not a free software and after googling around, I happened to find a chat-client, that advertises itself as an open-source alternative for slack and it’s called MatterMost. apparently, it’s community version is licensed under MIT.
Telegram provides the source codes for all of their client applications https://telegram.org/apps with GPLv2 licenses for Android, iOS, OSX, WP and Telegram CLI and GPLv3 for web browser client, Desktop client (OSX,Windows,Linux). Therefore there is no need to find an alternative for this product.
Vanhan Linux-kokeen kokeilu
Työasemat ja Tietoverkot -kurssin Linux-kokeeseen valmistautuen päätin harjoituksen vuoksi tehdä vanhan kurssikokeen kotona ja laatia raportin muistamisen tueksi.
Tehtävänanto kuuluu seuraavasti:
“Karttakatu Oy
Me Karttakatu Oy:ssä teemme karttoihin liittyviä weppisovelluksia. Olemme muutaman hengen yritys.
Asenna työasema, jolla tavallisimmat toimistotyöt onnistuvat (weppisurffailu, tekstinkäsittely). (Asentuessa voit käydä kommentoimassa kavereiden blogeja).
Työntekijämme ovat Einari Vähäkäähkä, Pekka Winha, Åke Andersson ja Leila Laila. He haluavat kehittää PHP-kotisivuja etäkäyttöyhteydellä. Asenna tarvittavat palvelut ja tee esimerkkisivut.
Asenna kaikkien käyttäjien käyttöön skripti (shell script) nimeltä “mystatus”, joka näyttää vapaan levytilan (df -h) ja koneen ip-osoitteen.
Tähtäätkö huipputulokseen? Pekka Winha haluaa käyttää MySQL tietokantaa. Asenna hänelle MySQL-tietokanta ja siihen PhpMyAdmin-weppiliittymä.”
Aion asentaa työasemaksi Xubuntu Linux 12.04 -käyttöjärjestelmän, jossa on webbisurffailua varten Firefox -selain. Kotisivujen luontia varten asennan käyttäjille Apache2-demonin ja siihen luon valmiiksi esimerkkisivut käyttäjille erikseen.
Aloitetaan
23.9.2012
18:06 Alustus
Käynnistin koneelleni Xubuntu Linux 12.04 -live-cd:n johon teen tarvittavat muokkaukset. Normaalisti asentaisin järjestelmän kokonaan koneelle, mutta tämä on harjoitustyö.
Valitsin kieleksi englanti (kielen voi tarvittaessa määrittää erikseen kaikille käyttäjille)
Vaihdoin näppäimistön oletuskielen suomeksi komennolla
$ setxkbmap fi
18:07 mystatus-script
ennen käyttäjän luomista kirjoitin tehtävänannossa pyydetyn mystatus-shellscriptin ja lisäsin sen kansioon /etc/skel/
Tämä sen takia, että tiedosto kopioituu silloin automaattisesti uudelle käyttäjälle aina, kun uusi käyttäjä luodaan. Tämä nopeuttaa ylläpitäjän toimia huomattavasti.
Menen siis ensiksi omaan /home/xubuntu/ -kansiooni ja suoritan seuraavan komennon
$ nano mystatus
sen jälkeen kirjoitin tekstieditoriin seuraavan koodin:
#!/bin/bash
df -h
ifconfig
Seuraavaksi tallensin tiedoston, tein siitä kopion kohteeseen /usr/local/bin/ komennolla
$ sudo cp mystatus /usr/local/bin/
ja asetin kaikille käyttäjille oikeudet komennolla
$ sudo chmod a+x mystatus
nyt pystyn ajamaan scriptin kirjoittamalla $ mystatus
kopioin seuraavaksi script-tiedoston kansioon /etc/skel
$ sudo cp mystatus /etc/skel/
näin tiedosto kopioituu myös kaikkien uusien käyttäjien kotihakemistoon
18:40 käyttäjät
loin käyttäjät koneelle komennoilla
$ sudo adduser einari
$ sudo adduser pekka
$ sudo adduser åke
$ sudo adduser leila
laitoin salasanaksi heidän etunimensä, mikä on huono salasana, mutta testivaiheessa ei välttämätön. Todellisessa työtehtävässä tekisin jonkinlaisen salasanamuodostusohjeen tekstitiedostoon ja lisäisin sen /etc/skel/ -hakemistoon. Näin käyttäjät pääsisivät itse tarkistamaan ja vaihtamaan salasanansa omanlaisikseen.
Jouduin tekemään poikkeuksen Åken tunnuksessa, sillä ääkkösiä ei suvaita tunnuksen nimessä. Kirjoitin vastaavasti käyttäjänimeksi ake ja kokonimeksi Åke Andersson, näin ei tule sekaannuksia
19:00 Toimistotyökalut
Asensin libreofficen komennoilla
$ sudo apt-get update
$ sudo apt-get install libreoffice
19:10 – 19:12 Kotisivujen luontimahdollisuus
asensin Apache2 jotta käyttäjät pääsevät tekemään ja jakamaan omia kotisivujaan.
$ sudo apt-get install apache2
testasin että localhost toimii avaamalla firefoxin, samalla tuli myös firefoxin toiminta todettua
Tulostui seuraava teksti
It works!
This is the default web page for this server.
The web server software is running but no content has been added, yet.
Näinollen Apache2 asentui oikein ja toimii, samoin firefox toimii ilman ongelmia.
19:59 index.html
Seuraavaksi halusin luoda testisivut jokaiselle käyttäjälle, joten ensiksi muokkasin Apachen moduulia hakemaan nettisivun /home/user-kansiosta
$ sudo a2enmod userdir
$ sudo service apache2 restart
nyt loin jokaiselle käyttäjälle public_html -kansion, jonne teen oletus- eli index.html-tiedostot
$ for S in ake einari leila pekka ; do sudo mkdir /home/$S/public_html/; done
seuraavaksi loin index.html:t komennolla
$ nano index.html
ja kopioin tiedostot kaikille käyttäjille komennolla
$ sudo cp index.html /home/[user]/public_html/
jossa [user] on käyttäjän nimi
varmistetaan vielä että jokaisella käyttäjällä on oikeus kirjoittaa index.html-tiedostoaan, muuten he eivät pysty muokkaamaan sivustoaan lainkaan
$ for S in pekka leila ake einari ; do sudo chmod a+rwx /home/$S/public_html/index.html; done
nyt pitäisi sivut toimia, avasin nettiselaimen ja tarkistin osoitteesta localhost/~[user]/ jossa [user] on käyttäjätunnus, toimiiko index.html-tiedostot kaikilla käyttäjillä.
Ei toiminut joten seuraavaksi kokeilin uudestaan muokata apachen moduulia:
$ sudo a2enmod userdir
$ sudo service apache2 restart
nyt jokaisella käyttäjänimellä tulostui Hello World!, eli kotisivut toimivat.
20:30 PHP
Seuraavaksi asensin tehtävänannon mukaisesti kaikille käyttäjille PHP-käyttömahdollisuuden, joten ensiksi asensin apache2 kuuluvan PHP5-kirjaston:
$ sudo apt-get install libapache2-mod-php5
tämän jälkeen annoin komennon
$ sudoedit /etc/apache2/mods-enabled/php5.conf
ja ”uloskommentoin” eli lisäsin rivien 11-15 eteen merkin #
kyseinen silmukka estää PHP-tiedostojen käytön käyttäjän kotihakemistosta, joten toimintamme kannalta se on turha.
Tämän jälkeen kaikki index.html -tiedostot tulee muuttaa muotoon index.php. Tämä kävi helpoiten komennolla
$ for S in leila pekka einari ake ; do sudo mv /home/$S/public_html/index.html /home/$S/public_html/index.php; done
ja varmistetaan käyttöoikeudet:
$ for S in leila pekka einari ake ; do sudo chmod a+rwx /home/$S/public_html/index.php; done
nyt tiedostoilla voi tehdä PHP-koodausta ja se näkyy samalla tavalla nettiselaimella kuin aiemmin testattuamme html-tiedostot.
21:00 etäkäyttömahdollisuus
seuraavaksi piti jokaiselle käyttäjälle järjestää mahdollisuus etäkäyttää omaa käyttäjätunnustaan, joten asensin openSSH-palvelimen
$ sudo apt-get install openssh-server
seuraavaksi kokeilin yhdistää kaikkiin käyttäjätunnuksiin xubuntu-käyttäjätunnuksilla:
ensin selvitin koneeni ip-osoitteen
$ ip addr
tämän jälkeen muodostin yhteyden suoraan ssh:lla komennolla
$ ssh [user]@192.168.1.67
yhteys muodostui jokaisen käyttäjän kohdalla, näin ollen lähiverkossa yhteydenmuodostus onnistuu. Mikäli kotona haluaa kokeilla openSSH:n käyttöä, tulee oman reitittimen palomuuriin tehdä portille 22 aukko ulkoisille pyynnöille, jotta esimerkiksi kännykällä voi ottaa ssh-yhteyden koneeseen. Tämä asetus kuitenkin riippuu eri reitittimien hallintaliittymän asetuksista, jotka käytännössä ovat kaikissa erilaisia. Siksi en paneudu aiheeseen vielä tämän tarkemmin.
21:15 mySQL
Seuraavaksi asennan Pekka Winhalle mySQL-tietokannan asentamalla paketin
$ sudo apt-get install mysql-server
määritän salasanat ja tämän jälkeen lisään terokarvinen.com -sivulta poimimani php-sivun, jolla päästään käsiksi mySQL:n
$ ssh pekka@192.168.1.67
$ cd public_html/
$ nano database.php
tiedostoon lisäämäni koodi löytyy osoitteesta http://myy.helia.fi/~karte/fedora_linux_apache_mysql_php.html
kohdasta ”PHP database example
”
tämän jälkeen tallensin ja kirjoitin
$ exit
nyt mySQL-tietokantaan pääsee käsiksi osoitteesta http://192.168.1.67/~pekka/database.php ja Pekka voi sitä omalla käyttäjätunnuksellaan muokata
21:45 Lyhyesti
Kertauksena asensin käyttöjärjestelmän (live-cd tässä tapauksessa), loin neljä käyttäjää (adduser-komento), kaikille käyttäjille PHP-nettisivujen luomismahdollisuus (Apache2, PHP5-kirjasto ja index.php-tiedostot käyttäjäkansioihin), mahdollisuuden kirjautua etänä (openSSH-demoni, mahdolliset aukkojen tekemiset palomuuriin) ja Pekalle erikseen pääsyn mySQL-tietokantaan (mySQL-server, PHP-ajettava database-tiedosto käyttäjäkansioon)
Lähteet:
http://myy.helia.fi/~karte/fedora_linux_apache_mysql_php.html
http://terokarvinen.com/2012/linux-koe-tyoasemat-ja-tietoverkot-25
https://kristerholmstrom.wordpress.com/
GNU Free Documentation License
Version 1.3, 3 November 2008
Copyright © 2000, 2001, 2002, 2007, 2008 Free Software Foundation, Inc. <http://fsf.org/>
Everyone is permitted to copy and distribute verbatim copies of this license document, but changing it is not allowed.
Xubuntu Linux 12.04 asentaminen
Mistä kyse:
Sain Haaga-Helian tietojenkäsittelylinjan kurssilta ”Työasemat ja tietoverkot” tehtäväksi aloittaa xubuntu Linux version 12.04 asentamisen muulle kuin laboratoriokoneelle, jotta voin testata xubuntun toimivuutta yksityiskäyttöön tarkoitetussa koneessa.
Lisäksi minun tuli laatia aiheesta selkeä raportti, jota tämä teksti koskee.
Aloitan projektin tänään 20.8.2012 klo 17: 15
Mitä tarvitaan:
latasin varsinaisen xubuntu linux 12.04:n asennus-CD:n levykuvan, jonka poltin erilliselle kiinteälle levylle. Normaalisti levykuva olisi optimaalisinta polttaa tyhjälle CD-levylle, jotta levy olisi yhteensopiva myös vanhempien koneiden kanssa. Itselläni ei kuitenkaan löydy varastosta tavallista CD-R/CD-RW -levyä, joten poikkeuksellisesti poltan levykuvan tyhjälle DVD-RW-levylle. Tällöin tulee luonnollisesti varmistaa että tietokoneen levyasema tukee DVD-RW-levyjä.
Minulla on Iomegan 1TB ulkoinen kiintolevy tiedostojen varmuuskopiointia varten, jotta varmistun että tiedot eivät katoa vaikka jokin menisi pieleen. Käytin varmuuskopiointiin Windows 7 home premiumin omaa varmuuskopiointiohjelmaa.
Tietokoneeni tiedot:
malli: kannettava tietokone eli läppäri
merkki: Acer Aspire 5738ZG
prosessori: Intel T4400 tuplaydin, kellotaajuus 2,2GHz
näytönohjain: integroitu ATI mobility Radeon HD 4650
välimuisti: kaksipaikkainen 6 GB DDR3 1066 MHz (alunperin 4GB mutta toinen muistikampa vaihdettu isompaan)
Kiintolevy: 500GB
DVD-asema: DVD-Super Multi DualLayer drive
näyttö: 15,6” HD LCD, tuki 16:9 kuvasuhteelle
oletuskäyttöjärjestelmä: Windows 7 home premium SP1 64-bittisenä
Aloitetaan
Latasin Xubuntu Linux 12.04 -levykuvan valmistajan kotisivulta käyttäen Torrent-tiedostonjakoa ja asiakasohjelmana Vuze 4.7.0.2, levykuvan polttamiseen DVD-levylle käytin PowerISO-ohjelmaa, joka suoritti levykuvan polton onnistuneesti.
Ennen uudelleenkäynnistämistä, varmuuskopioin kaikki tiedostoni siltä varalta että jokin menee pieleen. Aloitin järjestelmän varmuuskopioimisen, mutta toistuvan virheen vuoksi (varmuuskopio-ohjelma yrittää kirjoittaa ulkoiselle levylle osioon, joka on käytössä ja tästä syystä keskeyttää varmuuskopioinnin kokonaan) päätin lykätä varmuuskopioinnin ja siten myös varsinaisen linux-asennuksen tämän testin ulkopuolelle. Varmuuskopiointi on myös erittäin aikaavievää (40% varmuuskopiointisuorittamiseen asti kesti arviolta 6 tuntia), joten aikataulun vuoksi en ehdi enää yrittää uudestaan varmuuskopiointia. Nyt tarkoituksenani on käynnistää kone Linuxiin pelkästään LiveCD-muodossa ja suorittaa varsinaisen asennuksen myöhemmin kun varmuuskopiot on varmasti otettu talteen.
Seuraavaksi suljen ohjelmat, laitan DVD-levyn levyasemaan ja käynnistän koneen uudelleen. Tarkoituksenani on käynnistää kone Xubuntu Linux CDLive-tilaan, jossa xubuntu ajetaan suoraan DVD-levyltä, tällöin pystyn kirjoittamaan raporttia reaaliaikaisesti ja varmistumaan, että xubuntu Linuxia on uusimmalla versiolla mahdollista ajaa testikoneessa.
Uudelleenkäynnistäessä kone käynnisti suoraan takaisin windowsiin, eikä huomioinut DVD-levyä ollenkaan. Tämä kuitenkin korjaantui toisella uudelleenkäynnistyksellä, jolloin muutin BIOSista boot- eli käynnistysjärjestystä. Tämän ansiosta kone huomio ensin CD/DVD-levyllä olevan käyttöjärjestelmän ja vasta sitten, mikäli ei DVD-asemasta järjestelmää löytänyt, kiintolevyllä olevaa käyttöjärjestelmää.
Käynnistys sujui vaivattomasti ja Linux osasi automaattisesti havaita langattoman nettiyhteyteni, joten raportin kirjoittaminen sujui ilman ongelmia. Alussa käynnistyksen jälkeen järjestelmä kysyy, haluanko vain kokeilla Linuxia, mikä tarkoittaa DVD-levyn käyttöä käyttöjärjestelmänä, vai haluanko jo asentaa Linuxin koneelleni pitäen kuitenkin LiveCD:n samalla käynnissä. Kuten aiemmin totesin, lykkään asennusta kunnes olen saanut tiedostoni varmasti varmuuskopioitua. Näin vältän turhat riskit, mikäli jokin menee asennuksen aikana pieleen. Valitsen siis ”kokeile XUBUNTUA”.
Avasin työpöydälle päästyäni Firefox-nettiselaimen, jotta voin testata järjestelmän toimivuutta. Oma blogisivuni kristerholmstrom.wordpress.com avautui ilman ongelmia, näinollen sekä xubuntu linux, että nettiyhteys linuxilla vaikuttaisivat toimivan ilman suurempia ongelmia.
Loppusanat:
XUBUNTU linuxin 12.04 version ajaminen CD tai DVD:n kautta onnistuu suhteellisen vaivattomasti omalla Acer-läppärilläni, vaikka käynnistysjärjestystä joutuikin erikseen käydä muuttamassa. Erittäin pieni vaiva kuitenkin kun kokonaisuudessaan käynnistymiseen meni arviolta 2-3 minuuttia aikaa, vaikka Linuxia luettiin suoraan hitaalta DVD:ltä. Iomega External Drive 1 TB osoittautui epäluotettavaksi varmuuskopiointiasemaksi, joten aion hankkia toisen ulkoisen levyaseman varmuuskopioideni säilytystä varten.
GNU Free Documentation License
Version 1.3, 3 November 2008
Copyright © 2000, 2001, 2002, 2007, 2008 Free Software Foundation, Inc. <http://fsf.org/>
Everyone is permitted to copy and distribute verbatim copies of this license document, but changing it is not allowed.
