Hello world with Python, Java and C in Centos 7
The last exercise (h6) on Tero Karvinen’s Linux servers course. is to write ”Hello world!”-program for three different programming languages and run them on a Linux environment.
I’ll be using the same vps-server with centos 7 I created on my vps-related article, for running the programs.
The programming languages I choose are Java, Python3 and C. For each of them, I’ll be testing out the installation of development tools, compiling the ”hello world”-code and run it on terminal environment.
Java
For a compiler, I’ll be using an openjdk, since it’s available on yum-repository.
By searching the repository, I found that the latest available java version is 1.8, therefore the package name is java-1.8.0-openjdk-devel (notice that you keep the -devel-postfix, otherwise it doesn’t install the compiler, only virtual machine)
sudo yum install -y java-1.8.0-openjdk-devel
Next thing is to create a ”helloworld.java”-file with the following content
public class helloworld {

    public static void main(String[] args) {

            System.out.println("Hello World!");

    }

}
to compile the code, I use javac
javac helloworld.java
now I can run the application with the class-name (filename will not be used here, otherwise it won’t work)
java helloworld
output:
Hello world!
Python
I’m going to use python3 since it’s the latest version, but I must also be aware that the language syntax differs a bit from python2.x -version.
apparently the latest package available is python34, according to the yum search
sudo yum install python34
now I just create a helloworld.py-file with the following content
print("Hello world!")
Note: on python2, the syntax would have been print "hello world", which is not compatible with python3
Now I just run it with command
python3 helloworld.py
output:
Hello world!
C
According to this article https://www.cyberciti.biz/faq/howto-compile-and-run-c-cplusplus-code-in-linux/ I should first install the developer tools with this command
sudo yum groupinstall 'Development Tools'
it installed 26 packages containing gcc-related tools and perl-compilers. It might be a one command to install all the necessary stuff to get started with perl.
Next thing is to write the ”hello world” -program. First I create a file named ”helloworld.c” and put the following content in it
#include
int main(void)
{
printf("Hello world!\n");
return 0;
}
Then I compile it with command ”make”
make helloworld
output:
cc helloworld.c -o helloworld
and finally I run it with the name of the compiled file
./helloworld
output:
Hello world!
Python Flask and postgreSQL
For this weeks Linux course homework (h5) at Tero Karvinen’s course, I got a homework to test out Python Flask in both test deployment and production environment.
The Final step is to connect a PostgreSQL-database and read out some data from the database.
I’ll base my experiment at this guide http://terokarvinen.com/2017/hello-python-flask-web-app-development-server-install-on-ubuntu-16-04
”Hello world” on Flask
First I start by installing the flask components and curl to test the endpoints without using my GUI web browser.
sudo apt-get update && sudo apt-get install -y python3-flask curl
The next step is to create a directory for my new python project and create the main-class inside.
I’ll name my project as ”helloFlask” and the main-class will be simply named as ”main.py”
mkdir helloFlask && cd helloFlask
nano main.py
inside the main-class file, I’ll just put the very basic structure to run Flask:
from flask import Flask

app = Flask(__name__)
@app.route(”/”)
def helloWorld():
return ”Hello World!”
if __name__ == ”__main__”:
app.run(debug=True)
It seems a bit confusing, but let me explain, what is happening here.
At the first line, I import Flask-class from the flask-library.
Next I store a new Flask object (with variable __name__)
into an app-variable. Then comes the app.route-annotation, where I define a root-level request dispatcher on top of helloWorld()-function, which
returns a string ”Hello World!”, when called.
Next, there’s a checker for __name__ to be ”__main__”-string and if so, the class will be run with debug-mode.
Now I have everything set, so let’s start the program into a test run and see, if it compiles and works.
CAUTION: the following method is only allowed to be used on the development purposes. It’s not considered safe enough to be run on
a production environment, especially on servers accessible via public Internet.
I will go through the production initialization process later at this article.
python3 main.py
returns
 * Running on http://127.0.0.1:5000/ (Press CTRL+C to quit)

* Restarting with stat
now it runs actively on my terminal session. To test out the root endpoint, I can use curl for that purpose.
First I open up an new terminal tab and then, with curl, I call the local ip-address and the port mentioned on Flask’s startup response.
curl 127.0.0.1:5000
response
Hello World!krister@krister-VirtualBox:~/helloFlask$
there wasn’t any linebreak on that response string, therefore the terminal prefix was printed right after the response.
Anyway, this is a proof, that my code works.
Deploying Flask project into Production environment with wsgi
Next thing is to test, how the production deployment works. I’ll be following the points of this tutorial http://terokarvinen.com/2016/deploy-flask-python3-on-apache2-ubuntu
First I need an apache2-server installed
sudo apt-get install apache2
curl http://localhost/ | grep title
results
Apache2 Ubuntu Default Page: It works
Now that the apache server is up and running, it’s time to install mod_wsgi into it
sudo apt-get install -y libapache2-mod-wsgi-py3
The next thing is to create a configuration file for apache2 that runs my helloFlask-project
sudoedit /etc/apache2/sites-available/helloFlask.conf
content
ServerName virtualbox.krister.com
WSGIDaemonProcess helloFlask user=krister group=krister threads=5
WSGIScriptAlias / /home/krister/helloFlask/main.wsgi
WSGIProcessGroup helloFlask
WSGIApplicationGroup %{GLOBAL}
WSGIScriptReloading On
Require all granted
This just simply a virtualhost-configuration that defines the home path of my project.
Since the main.wsgi-file doesn’t exist yet, let’s create it now
nano ~/helloFlask/main.wsgi
content
import sys
if sys.version_info[0]<3: #check if is run with python3
raise Exception("Python3 is required to run this program! Current version: '%s'" %
sys.version_info)
sys.path.insert(0,'/home/krister/helloFlask/') # path where the project is located
from main import app as application
Now I shall disable the default page configuration from apache2 and enable this new config, helloFlask.conf, instead
sudo a2dissite 000-default.conf

sudo a2ensite helloFlask.conf

sudo service apache2 restart
now I’m going to test, if this setting works with curl. Luckily, since the apache2-server handles the traffic, I can just call plain localhost
curl http://localhost/
result
Hello World!krister@krister-VirtualBox:~/helloFlask$
again, the linebreak was missing, but it printed out the ”Hello World!”-phrase, as I wanted, so it’s quaranteed to work.
Read content from PostgreSQL with Python Flask
I’ll base my testing to this tutorial http://terokarvinen.com/2017/database-connection-from-python-flask-to-postgre-using-raw-sql
First of all, let’s install PostgreSQL
sudo apt-get install -y postgresql
next, I create a new database
sudo -u postgres createdb helloflask
and finally, I create a new database user
sudo -u postgres createuser krister
the next thing is to install sql-alchemy and postgresql-flask-module
sudo apt-get install -y python3-flask-sqlalchemy python3-psycopg2
and finally, let’s modify my main.py file to insert some data into the db and read it out when the endpoint is called
nano ~/helloFlask/main.py
content
from flask import Flask, render_template

from flask_sqlalchemy import SQLAlchemy

app = Flask(__name__)

db = SQLAlchemy(app)

app.config['SQLALCHEMY_DATABASE_URI'] = 'postgresql://krister/helloflask'

app.config['SECRET_KEY'] = 'k377AglooNex+932.asdjReajeIxane436'
def sql(rawSql, sqlVars={}):
assert type(rawSql)==str
assert type(sqlVars)==dict
res=db.session.execute(rawSql, sqlVars)
db.session.commit()
return res
@app.before_first_request
def initDBforFlask():
sql(”CREATE TABLE IF NOT EXISTS members (id SERIAL PRIMARY KEY, name VARCHAR(160) UNIQUE);”)
sql(”INSERT INTO members(name) VALUES (’Tom Johnson’),(’John Thompson’) ON CONFLICT (name) DO NOTHING;”)
@app.route(”/”)
def helloWorld():
return ”Hello World!”
@app.route(”/members”)
def members():
members=sql(”SELECT * FROM members;”)
return render_template(”members.html”, members=members)
if __name__ == ”__main__”:
from flask_sqlalchemy import get_debug_queries
app.run(debug=True)
to parse out the database content cleanly, I’ll define an html-template named members.html
mkdir ~/helloFlask/templates
nano ~/helloFlask/templates/members.html
content
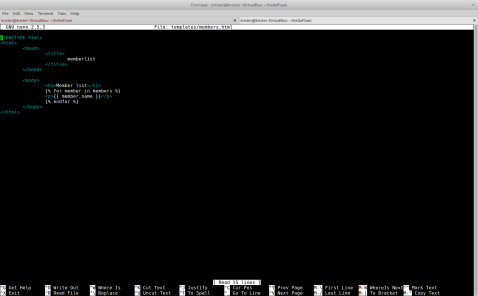
memberlist
Member list
{% for member in members %}
{{ member.name }}
{% endfor %}
and now, curl localhost/members
apparently there’s an error in the code, since I got Internal Server Error 500
For some reason, the apache logs don’t say anything about it, even if I try to grep
Let’s run it on test environment
python3 ~/helloFlask/main.py
curl localhost:5000/members
okay, now I got the error traceback
sqlalchemy.exc.OperationalError: (psycopg2.OperationalError) could not translate host name "krister" to address: Name or service not known
It’s propably a syntax error, according to this https://stackoverflow.com/questions/23839656/sqlalchemy-no-password-supplied-error
the correct syntax is postgresql://user:password@localhost:5432/database_name so let’s change that part on SQLALCHEMY_DATABASE_URI
app.config['SQLALCHEMY_DATABASE_URI'] = 'postgresql:///helloflask
curl localhost:5000/members

nice! now it works!
Visiting Cyber Security Nordic event in Helsinki Expo and Convention Centre
Today I was visiting at the ”Cyber Security Nordic” -event and got to see a lot of booths from different companies providing their security solutions.
Here’s some I found interesting.
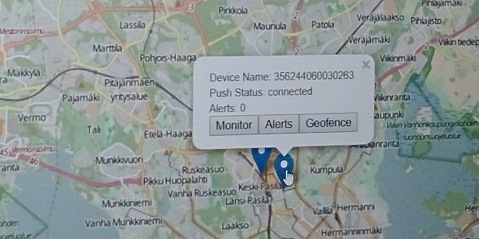
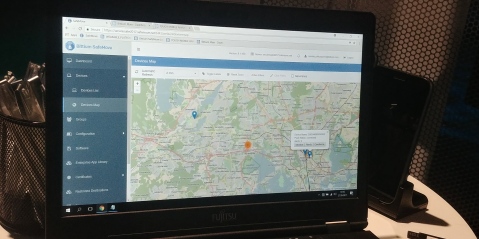
Bittium
Bittium does a several kinds of industrial security products and services. For this event, they were introducing Bittium Secure Suite -software and Bittium Tough Mobile C – mobile phone. The promoter said that they provide the suite as a standalone service for companies’ internal server systems, so the phones can use the server as VPN-gateway with two-way communication, so the administrators can keep on track of the phones and remotely control the phones, if needed, eg. lock the phone, turn it off, boot it up.

The Bittium Tough Mobile C is, according to the promoter, hardware manufactered in Finland and the OS is self-developed port from the Android (full phone specifications can be found here https://www.bittium.com/bittiumtoughmobile). The mobile OS has Finnish national security level 3 certification from NCSA-FI . According to this announcement from the national security centre , it’s currently the only mobile phone system in finnish market, that has such a certificate. Of course this matters only in Finland, but still it seems promising on era of business secret leaks and advanced security breaches. Maybe later they are going to chase for EU-level certificate to ensure sales in global level. The certificate only proves, that there won’t be much competitors on the same level in Finland, but in international level, there might be other companies with their own solutions, like Blackphone is currently providing for consumers.
Their suite has also been certified by NCSA-FI, which has a several requirements, like development has to be done in a radiation isolated room. It also means that there won’t be any similiar product, that could be developed on open communities and have the software certified in a same way as the Bittium Secure Suite.
On the other hand, they indeed rely on open source products by using android as a base of their Secure OS (stripped from the google services, as the promoter said) and their suite runs on top of centos/RHEL.
As a competitors, the promoter mentioned that they have several of them especially focusing on consumer market, when they are relying more on b2b-customers and consultancy on initialization of the product suite.
Jetico

At Jetico-booth, the promoter mentioned they had their BestCrypt product available before Truecrypt and, according to wikipedia, it really has been around since 1995. On a competitor level, there’s of course free software available from ruins of the old TrueCrypt: VeraCrypt. On comparison, Veracrypt supports more algorhitms, but BestCrypt seems to have RAID and UEFI -support and a good compatiblity with Windows boot sector encryption, few to mention.
On their website, they try to gain attention of former Truecrypt users to move to the Bestcrypt. Especially it’s visible on their website, where they have stories from the truecrypt-users about switching to the BestCrypt http://www.jetico.com/solutions/by-need/wiping/40-case-study/use-case/455-why-is-bestcrypt-the-best-truecrypt-alternative-users-tell-why. It’s naturally obvious that they have picked the most positive reviews among others. They seem to even have their own comparison chart on BestCrypt vs TrueCrypt.
The comparison chart shows, that there’s some extra features available on BestCrypt, that TrueCrypt/VeraCrypt doesn’t provide. On the other hand, you can use BestCrypt binaries with 21 day free trial and to continue, you need to buy either of the licenses: BestCrypt Container (for encrypting files and folders) 59.95€/year and BestCrypt Volume (for encrypting whole partitions) 99.50€/year. If you need to encrypt your remote computers, you need to buy enterprise license for central management software, which requires to ask an offer from their consultant.
When you keep in mind, that Veracrypt can do both hidden volume encryption and encrypt whole partitions and, at the same time, provides all this under free software license, it’s pretty obvious which software a regular user (especially old truecrypt users) would favor.
To spice up their event booth, they had these really cool slide cover for your laptop’s webcam, which definitely is better than plain tape, if you need to participate in video conferences.

Dimecc
Dimecc is not an actual company, instead it’s a coalition, or ecosystem as they refer on their web page, helping the private sector and the university researchers to come closer together in national and global level. There’s several means to do this, like let companies to vote, what research teams would focus in Dimecc’s partner universities.
The funding comes mostly as project-based from the funding agencies and private company proposals, so the funding is mostly result-based and can be focused on original research or political lobbying.
