Hello world with Python, Java and C in Centos 7
The last exercise (h6) on Tero Karvinen’s Linux servers course. is to write ”Hello world!”-program for three different programming languages and run them on a Linux environment.
I’ll be using the same vps-server with centos 7 I created on my vps-related article, for running the programs.
The programming languages I choose are Java, Python3 and C. For each of them, I’ll be testing out the installation of development tools, compiling the ”hello world”-code and run it on terminal environment.
Java
For a compiler, I’ll be using an openjdk, since it’s available on yum-repository.
By searching the repository, I found that the latest available java version is 1.8, therefore the package name is java-1.8.0-openjdk-devel (notice that you keep the -devel-postfix, otherwise it doesn’t install the compiler, only virtual machine)
sudo yum install -y java-1.8.0-openjdk-devel
Next thing is to create a ”helloworld.java”-file with the following content
public class helloworld {

    public static void main(String[] args) {

            System.out.println("Hello World!");

    }

}
to compile the code, I use javac
javac helloworld.java
now I can run the application with the class-name (filename will not be used here, otherwise it won’t work)
java helloworld
output:
Hello world!
Python
I’m going to use python3 since it’s the latest version, but I must also be aware that the language syntax differs a bit from python2.x -version.
apparently the latest package available is python34, according to the yum search
sudo yum install python34
now I just create a helloworld.py-file with the following content
print("Hello world!")
Note: on python2, the syntax would have been print "hello world", which is not compatible with python3
Now I just run it with command
python3 helloworld.py
output:
Hello world!
C
According to this article https://www.cyberciti.biz/faq/howto-compile-and-run-c-cplusplus-code-in-linux/ I should first install the developer tools with this command
sudo yum groupinstall 'Development Tools'
it installed 26 packages containing gcc-related tools and perl-compilers. It might be a one command to install all the necessary stuff to get started with perl.
Next thing is to write the ”hello world” -program. First I create a file named ”helloworld.c” and put the following content in it
#include
int main(void)
{
printf("Hello world!\n");
return 0;
}
Then I compile it with command ”make”
make helloworld
output:
cc helloworld.c -o helloworld
and finally I run it with the name of the compiled file
./helloworld
output:
Hello world!
Python Flask and postgreSQL
For this weeks Linux course homework (h5) at Tero Karvinen’s course, I got a homework to test out Python Flask in both test deployment and production environment.
The Final step is to connect a PostgreSQL-database and read out some data from the database.
I’ll base my experiment at this guide http://terokarvinen.com/2017/hello-python-flask-web-app-development-server-install-on-ubuntu-16-04
”Hello world” on Flask
First I start by installing the flask components and curl to test the endpoints without using my GUI web browser.
sudo apt-get update && sudo apt-get install -y python3-flask curl
The next step is to create a directory for my new python project and create the main-class inside.
I’ll name my project as ”helloFlask” and the main-class will be simply named as ”main.py”
mkdir helloFlask && cd helloFlask
nano main.py
inside the main-class file, I’ll just put the very basic structure to run Flask:
from flask import Flask

app = Flask(__name__)
@app.route(”/”)
def helloWorld():
return ”Hello World!”
if __name__ == ”__main__”:
app.run(debug=True)
It seems a bit confusing, but let me explain, what is happening here.
At the first line, I import Flask-class from the flask-library.
Next I store a new Flask object (with variable __name__)
into an app-variable. Then comes the app.route-annotation, where I define a root-level request dispatcher on top of helloWorld()-function, which
returns a string ”Hello World!”, when called.
Next, there’s a checker for __name__ to be ”__main__”-string and if so, the class will be run with debug-mode.
Now I have everything set, so let’s start the program into a test run and see, if it compiles and works.
CAUTION: the following method is only allowed to be used on the development purposes. It’s not considered safe enough to be run on
a production environment, especially on servers accessible via public Internet.
I will go through the production initialization process later at this article.
python3 main.py
returns
 * Running on http://127.0.0.1:5000/ (Press CTRL+C to quit)

* Restarting with stat
now it runs actively on my terminal session. To test out the root endpoint, I can use curl for that purpose.
First I open up an new terminal tab and then, with curl, I call the local ip-address and the port mentioned on Flask’s startup response.
curl 127.0.0.1:5000
response
Hello World!krister@krister-VirtualBox:~/helloFlask$
there wasn’t any linebreak on that response string, therefore the terminal prefix was printed right after the response.
Anyway, this is a proof, that my code works.
Deploying Flask project into Production environment with wsgi
Next thing is to test, how the production deployment works. I’ll be following the points of this tutorial http://terokarvinen.com/2016/deploy-flask-python3-on-apache2-ubuntu
First I need an apache2-server installed
sudo apt-get install apache2
curl http://localhost/ | grep title
results
Apache2 Ubuntu Default Page: It works
Now that the apache server is up and running, it’s time to install mod_wsgi into it
sudo apt-get install -y libapache2-mod-wsgi-py3
The next thing is to create a configuration file for apache2 that runs my helloFlask-project
sudoedit /etc/apache2/sites-available/helloFlask.conf
content
ServerName virtualbox.krister.com
WSGIDaemonProcess helloFlask user=krister group=krister threads=5
WSGIScriptAlias / /home/krister/helloFlask/main.wsgi
WSGIProcessGroup helloFlask
WSGIApplicationGroup %{GLOBAL}
WSGIScriptReloading On
Require all granted
This just simply a virtualhost-configuration that defines the home path of my project.
Since the main.wsgi-file doesn’t exist yet, let’s create it now
nano ~/helloFlask/main.wsgi
content
import sys
if sys.version_info[0]<3: #check if is run with python3
raise Exception("Python3 is required to run this program! Current version: '%s'" %
sys.version_info)
sys.path.insert(0,'/home/krister/helloFlask/') # path where the project is located
from main import app as application
Now I shall disable the default page configuration from apache2 and enable this new config, helloFlask.conf, instead
sudo a2dissite 000-default.conf

sudo a2ensite helloFlask.conf

sudo service apache2 restart
now I’m going to test, if this setting works with curl. Luckily, since the apache2-server handles the traffic, I can just call plain localhost
curl http://localhost/
result
Hello World!krister@krister-VirtualBox:~/helloFlask$
again, the linebreak was missing, but it printed out the ”Hello World!”-phrase, as I wanted, so it’s quaranteed to work.
Read content from PostgreSQL with Python Flask
I’ll base my testing to this tutorial http://terokarvinen.com/2017/database-connection-from-python-flask-to-postgre-using-raw-sql
First of all, let’s install PostgreSQL
sudo apt-get install -y postgresql
next, I create a new database
sudo -u postgres createdb helloflask
and finally, I create a new database user
sudo -u postgres createuser krister
the next thing is to install sql-alchemy and postgresql-flask-module
sudo apt-get install -y python3-flask-sqlalchemy python3-psycopg2
and finally, let’s modify my main.py file to insert some data into the db and read it out when the endpoint is called
nano ~/helloFlask/main.py
content
from flask import Flask, render_template

from flask_sqlalchemy import SQLAlchemy

app = Flask(__name__)

db = SQLAlchemy(app)

app.config['SQLALCHEMY_DATABASE_URI'] = 'postgresql://krister/helloflask'

app.config['SECRET_KEY'] = 'k377AglooNex+932.asdjReajeIxane436'
def sql(rawSql, sqlVars={}):
assert type(rawSql)==str
assert type(sqlVars)==dict
res=db.session.execute(rawSql, sqlVars)
db.session.commit()
return res
@app.before_first_request
def initDBforFlask():
sql(”CREATE TABLE IF NOT EXISTS members (id SERIAL PRIMARY KEY, name VARCHAR(160) UNIQUE);”)
sql(”INSERT INTO members(name) VALUES (’Tom Johnson’),(’John Thompson’) ON CONFLICT (name) DO NOTHING;”)
@app.route(”/”)
def helloWorld():
return ”Hello World!”
@app.route(”/members”)
def members():
members=sql(”SELECT * FROM members;”)
return render_template(”members.html”, members=members)
if __name__ == ”__main__”:
from flask_sqlalchemy import get_debug_queries
app.run(debug=True)
to parse out the database content cleanly, I’ll define an html-template named members.html
mkdir ~/helloFlask/templates
nano ~/helloFlask/templates/members.html
content
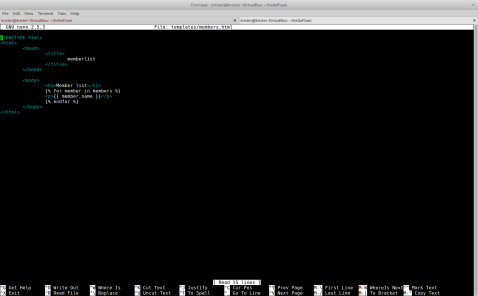
memberlist
Member list
{% for member in members %}
{{ member.name }}
{% endfor %}
and now, curl localhost/members
apparently there’s an error in the code, since I got Internal Server Error 500
For some reason, the apache logs don’t say anything about it, even if I try to grep
Let’s run it on test environment
python3 ~/helloFlask/main.py
curl localhost:5000/members
okay, now I got the error traceback
sqlalchemy.exc.OperationalError: (psycopg2.OperationalError) could not translate host name "krister" to address: Name or service not known
It’s propably a syntax error, according to this https://stackoverflow.com/questions/23839656/sqlalchemy-no-password-supplied-error
the correct syntax is postgresql://user:password@localhost:5432/database_name so let’s change that part on SQLALCHEMY_DATABASE_URI
app.config['SQLALCHEMY_DATABASE_URI'] = 'postgresql:///helloflask
curl localhost:5000/members

nice! now it works!
Visiting Cyber Security Nordic event in Helsinki Expo and Convention Centre
Today I was visiting at the ”Cyber Security Nordic” -event and got to see a lot of booths from different companies providing their security solutions.
Here’s some I found interesting.
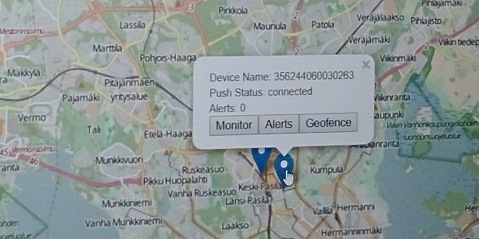
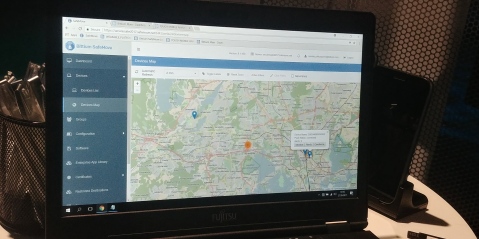
Bittium
Bittium does a several kinds of industrial security products and services. For this event, they were introducing Bittium Secure Suite -software and Bittium Tough Mobile C – mobile phone. The promoter said that they provide the suite as a standalone service for companies’ internal server systems, so the phones can use the server as VPN-gateway with two-way communication, so the administrators can keep on track of the phones and remotely control the phones, if needed, eg. lock the phone, turn it off, boot it up.
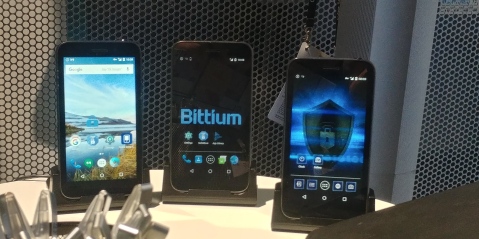
The Bittium Tough Mobile C is, according to the promoter, hardware manufactered in Finland and the OS is self-developed port from the Android (full phone specifications can be found here https://www.bittium.com/bittiumtoughmobile). The mobile OS has Finnish national security level 3 certification from NCSA-FI . According to this announcement from the national security centre , it’s currently the only mobile phone system in finnish market, that has such a certificate. Of course this matters only in Finland, but still it seems promising on era of business secret leaks and advanced security breaches. Maybe later they are going to chase for EU-level certificate to ensure sales in global level. The certificate only proves, that there won’t be much competitors on the same level in Finland, but in international level, there might be other companies with their own solutions, like Blackphone is currently providing for consumers.
Their suite has also been certified by NCSA-FI, which has a several requirements, like development has to be done in a radiation isolated room. It also means that there won’t be any similiar product, that could be developed on open communities and have the software certified in a same way as the Bittium Secure Suite.
On the other hand, they indeed rely on open source products by using android as a base of their Secure OS (stripped from the google services, as the promoter said) and their suite runs on top of centos/RHEL.
As a competitors, the promoter mentioned that they have several of them especially focusing on consumer market, when they are relying more on b2b-customers and consultancy on initialization of the product suite.
Jetico

At Jetico-booth, the promoter mentioned they had their BestCrypt product available before Truecrypt and, according to wikipedia, it really has been around since 1995. On a competitor level, there’s of course free software available from ruins of the old TrueCrypt: VeraCrypt. On comparison, Veracrypt supports more algorhitms, but BestCrypt seems to have RAID and UEFI -support and a good compatiblity with Windows boot sector encryption, few to mention.
On their website, they try to gain attention of former Truecrypt users to move to the Bestcrypt. Especially it’s visible on their website, where they have stories from the truecrypt-users about switching to the BestCrypt http://www.jetico.com/solutions/by-need/wiping/40-case-study/use-case/455-why-is-bestcrypt-the-best-truecrypt-alternative-users-tell-why. It’s naturally obvious that they have picked the most positive reviews among others. They seem to even have their own comparison chart on BestCrypt vs TrueCrypt.
The comparison chart shows, that there’s some extra features available on BestCrypt, that TrueCrypt/VeraCrypt doesn’t provide. On the other hand, you can use BestCrypt binaries with 21 day free trial and to continue, you need to buy either of the licenses: BestCrypt Container (for encrypting files and folders) 59.95€/year and BestCrypt Volume (for encrypting whole partitions) 99.50€/year. If you need to encrypt your remote computers, you need to buy enterprise license for central management software, which requires to ask an offer from their consultant.
When you keep in mind, that Veracrypt can do both hidden volume encryption and encrypt whole partitions and, at the same time, provides all this under free software license, it’s pretty obvious which software a regular user (especially old truecrypt users) would favor.
To spice up their event booth, they had these really cool slide cover for your laptop’s webcam, which definitely is better than plain tape, if you need to participate in video conferences.

Dimecc
Dimecc is not an actual company, instead it’s a coalition, or ecosystem as they refer on their web page, helping the private sector and the university researchers to come closer together in national and global level. There’s several means to do this, like let companies to vote, what research teams would focus in Dimecc’s partner universities.
The funding comes mostly as project-based from the funding agencies and private company proposals, so the funding is mostly result-based and can be focused on original research or political lobbying.
Installing LAMP, WordPress, custom domain name into Centos 7 virtual private server (h4)
Tero Karvinen’s Linux course is stepping into a world of servers and I got some homeworks revolving around the topic.
This time I’m going to do the following steps:
– start a Centos 7 VPS [finished]
– enable firewall on it [finished]
– make login without password possible [finished]
– check the security logs for bot traffic [finished]
– install rest of the LAMP [finished]
– install WordPress [finished]
– initialize domain name to our WP service [finished]
– install CA-authorized certificates to enable HTTPS [not working]
On the security key generation part, I’ll be using the same laptop I used in my post Xubuntu boot stick creation.
Renting a vps
First I need to choose a VPS provider. The recommended ones, that are cheapest, are DigitalOcean, Linode and Tilaa (limited in the netherlands). If there’s a need for more complex tools, like load balancing multiple servers and hosting server containers, there’s Amazon’s AWS, Google Cloud Platform and Microsoft Azure to mention the biggest ones.
I choose DigitalOcean, because it’s pretty cheap, but also I happen to have a github education pack, which provides me $50 for free. Since the cheapest server pack is $5/month, I can run that server for 10 months without need to pay.
First thing of course is to register to the service and create an account.
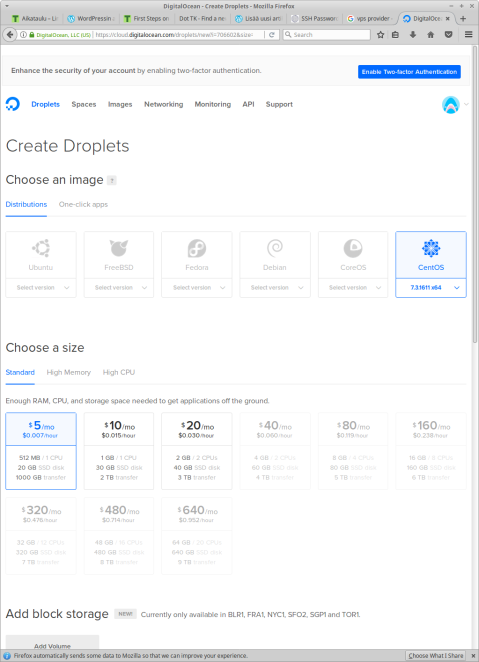
When that is accomplished, the following management page opens:
![]()
First I click the green ”create” button and from the dropdown-menu, I pick ”droplets” which is a term on DigitalOcean’s service catalogue for these VPS packages.
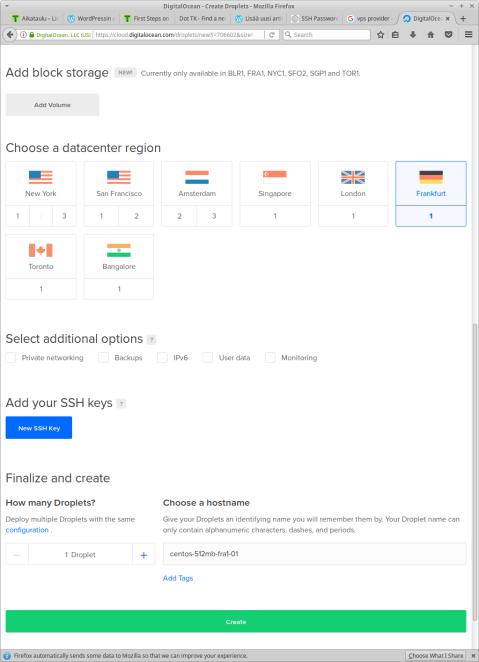
I change the hostname to be wordpress-centos-vps and hit ”create”
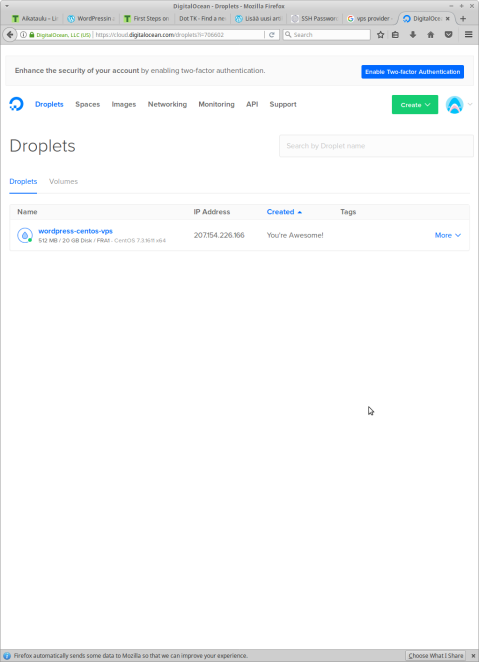
Now the VPS is created and I have my root user’s password sent to my email. Now it’s time to login and follow these steps http://terokarvinen.com/2017/first-steps-on-a-new-virtual-private-server-an-example-on-digitalocean
so first, I’ll establish an ssh connection to the server
ssh root@207.154.226.166
the very first thing is to change your root password, because emailed passwords will bring a serious security risk, even though I’m going to disable the use of root user.
enable the firewall
Next thing to do, would be setting up a firewall to prevent any unwanted access to the server. Apparently Firewalld is a new replacement of the iptables on centos-side, so I need to study it a little bit.
Luckily there’s good tutorial about configuring it and I’ll be referencing to it during this setup https://www.digitalocean.com/community/tutorials/how-to-set-up-a-firewall-using-firewalld-on-centos-7
[root@wordpress-centos-vps ~]# sudo service firewalld start

Redirecting to /bin/systemctl start firewalld.service

[root@wordpress-centos-vps ~]# firewall-cmd --state

running

[root@wordpress-centos-vps ~]# sudo firewall-cmd --zone=public --permanent --add-port=22/tcp

success

[root@wordpress-centos-vps ~]# sudo firewall-cmd --list-all

public

target: default

icmp-block-inversion: no

interfaces:

sources:

services: dhcpv6-client ssh

ports:

protocols:

masquerade: no

forward-ports:

sourceports:

icmp-blocks:

rich rules:
[root@wordpress-centos-vps ~]#
What I did was first setting the firewalld to run and confirming it (state says ”running”). Next part is where I set the port 22 to be permanently allowed in public-zone. If that –permanent-annotation would have been left out, the rould had dropped during the next boot.
Okay, now the firewall is set, it is time to create a new user and block remote access to root for security reasons.
In centos, it’s possible to do by following the steps taken from this guide:
https://www.digitalocean.com/community/tutorials/how-to-add-and-delete-users-on-a-centos-7-server
sudo adduser krister
for the new user, I need to initialize a password. A good password is at least 12 digits long and contains at least one of lower case letters, upper case letters, numbers and special characters.
sudo passwd krister
and finally, add the user into sudoers group
sudo gpasswd -a username wheel
next we try to login with this new user via ssh
ssh krister@207.154.226.166
and it works, now we can safely prevent login of the root user
sudoedit /etc/ssh/sshd_config
Here, I have to uncomment the following line and change the value to ”no”:
PermitRootLogin no
now, I have to restart the daemon to apply the changes
sudo service sshd restart
Next, I’ll test, what happens if I try to login as root via ssh:
xubuntu@xubuntu:~$ ssh root@207.154.226.166

root@207.154.226.166's password:

Permission denied, please try again.

root@207.154.226.166's password:

Permission denied, please try again.

root@207.154.226.166's password:
now it doesn’t allow me to log in as a root user anymore.
Make login without password possible
Next I’m going to create the ssh-keys and make it possible to login without using a password.
on Ubuntu Linux
first I need to create the key with command
ssh-keygen
which produces
Generating public/private rsa key pair.

Enter file in which to save the key (/home/xubuntu/.ssh/id_rsa):

Created directory '/home/xubuntu/.ssh'.

Enter passphrase (empty for no passphrase):

Enter same passphrase again:

Your identification has been saved in /home/xubuntu/.ssh/id_rsa.

Your public key has been saved in /home/xubuntu/.ssh/id_rsa.pub.

The key fingerprint is:

SHA256:9wiLA9ept4DUI5wn+dz1DjmkrbF+qMCBims26AygQeA xubuntu@xubuntu

The key's randomart image is:

+---[RSA 2048]----+

|.                |

|o                |

| E               |

|.  o + . .       |

|o . X = S +      |

|+o o @ = O =     |

|*   + B *.* o    |

|+=   . +.=.+     |

|=o.   .o=.  .    |

+----[SHA256]-----+
now I have the key, next I command the ssh-copy-id to send the public to the server and put it into ”authorized keys”-file.
xubuntu@xubuntu:~$ ssh-copy-id -i .ssh/id_rsa krister@207.154.226.166

/usr/bin/ssh-copy-id: INFO: Source of key(s) to be installed: ".ssh/id_rsa.pub"

/usr/bin/ssh-copy-id: INFO: attempting to log in with the new key(s), to filter out any that are already installed

/usr/bin/ssh-copy-id: INFO: 1 key(s) remain to be installed -- if you are prompted now it is to install the new keys

krister@207.154.226.166's password:
Number of key(s) added: 1
Now I try to login into the machine, with: ”ssh ’krister@207.154.226.166′”
and see, if the ssh daemon recognizes my rsa-key handshake.
xubuntu@xubuntu:~$ ssh krister@207.154.226.166

Last login: Fri Sep 22 13:28:59 2017 from pub-nat.haaga-helia.fi

[krister@wordpress-centos-vps ~]$
no password was asked so it works.
on windows
I’ll be following a tutorial from getfilecloud and use the tools provided by putty.org.
https://www.getfilecloud.com/blog/ssh-without-password-using-putty/
http://www.putty.org/
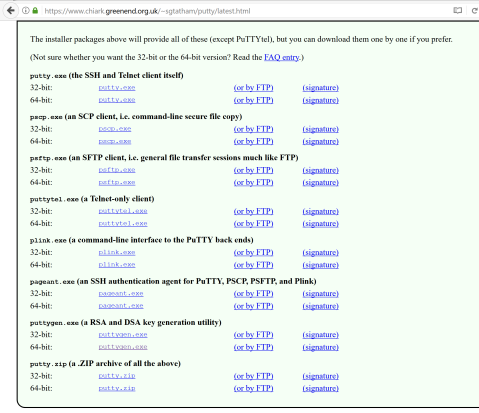
From here you need to download both putty.exe and puttygen.exe
first we need to create the keys, so let’s open up puttygen
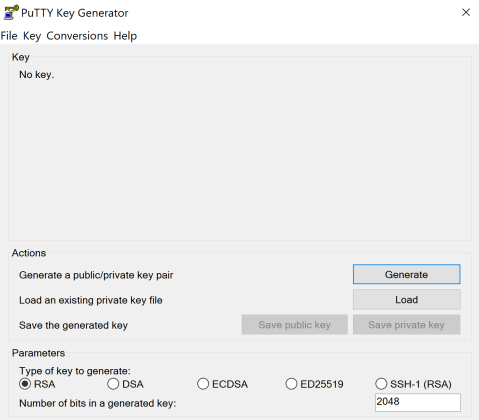
so first just click ”generate”
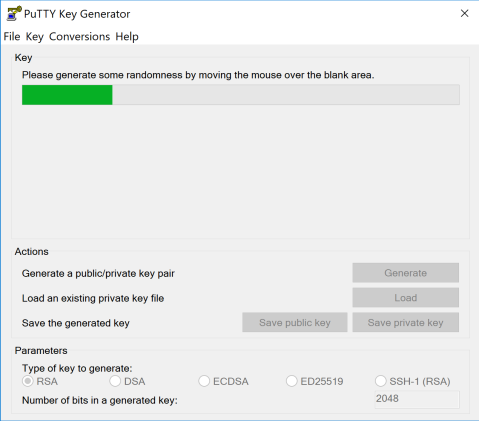
It’ll ask you to create some noise with mouse, so move the cursor until the bar finishes.
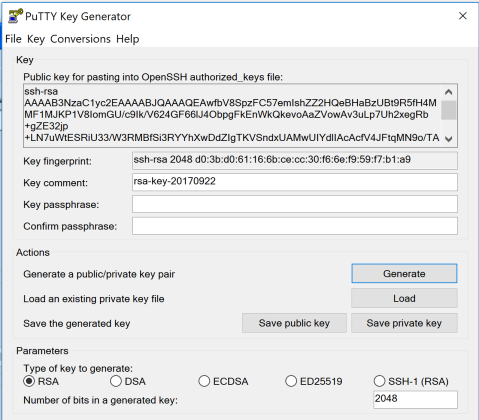
the keys are now generated and now you need to save them in a very safe space
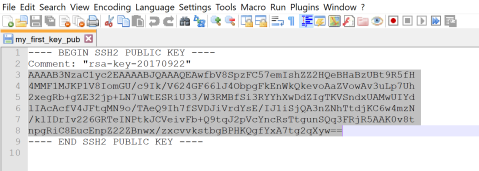
open the public key with your favorite text editor
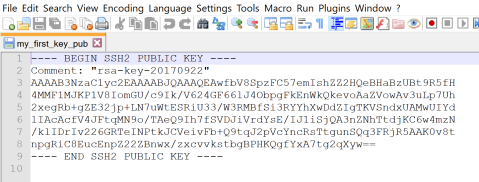
This is what your public key looks like. Now paint and copy all the stuff between start and end lines.
Next, start putty.exe
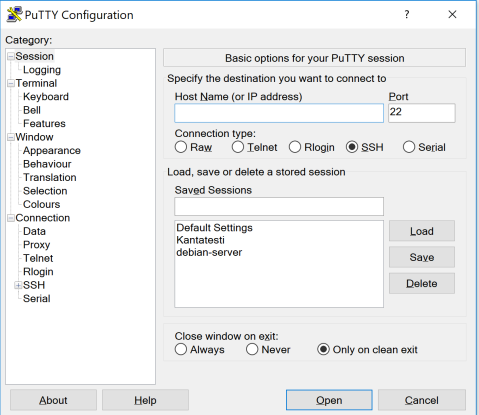
on ”hostname” field, type your user and ip-address in format user@ip-address and then click connect, the ssh-session will open. Enter your password when prompted.
create a new file with your favorite text editor in ~/.ssh/authorized_keys
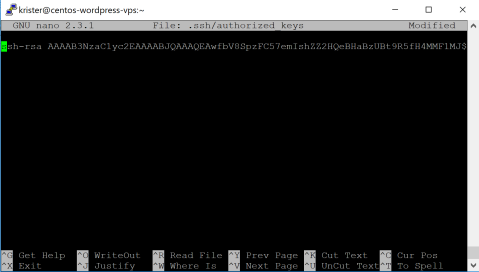
next, set the permissions
chmod 700 ~/.ssh

$ chmod 600 ~/.ssh/authorized_keys
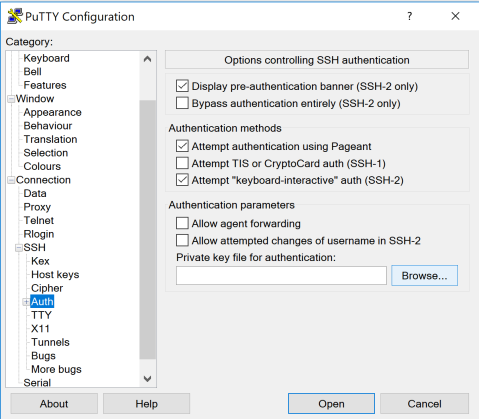
Now I close my putty connection to try establishing it with the rsa-key
First thing is to click open the tab ”Auth” under ”SSH”, where I can choose the private key I want to use for this connection.
Next I go back to the ”session” tab and write down my username and ip-address, then save it as a session by writing name into ”saved session” – section and clicking ”save”.
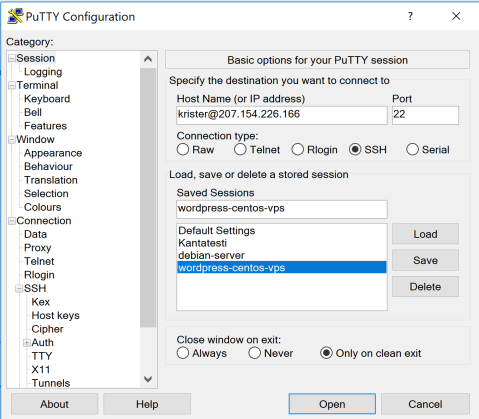
now the session is stored and everytime I open putty, I can restore these settings by choosing the session on the list and clicking ”load”
Now I click ”connect” to see if the server still prompts me the password.
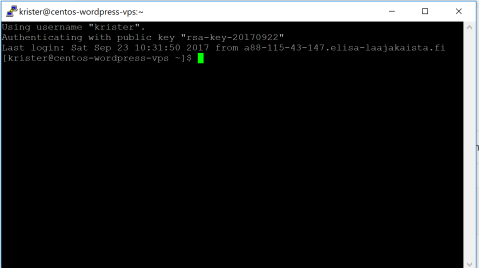
And it works!
Checking the security logs
Before moving on to the LAMP, I’d like to check the security logs to see some cases of breach tryouts.
As we now, there’s tons of scanner bots amongst the real human crackers, who try to penetrate and occupy into servers. The easiest way to protect ourselves from the most common breaches is simply close all the unused ports and use strong passwords (the most secure way would be dropping the password authentication completely and stick with the ssh-key authentication, but I need to have a backup solution, if I happen to lose my private keys.)
In Centos, I can check the latest security logs by using tail
sudo tail /var/log/secure
It shows me this
Sep 23 11:24:25 centos-wordpress-vps sshd[4967]: PAM 2 more authentication failures; logname= uid=0 euid=0 tty=ssh ruser= rhost=118.212.132.227  user=root

Sep 23 11:24:51 centos-wordpress-vps sshd[4972]: reverse mapping checking getaddrinfo for 227.132.212.118.adsl-pool.jx.chinaunicom.com [118.212.132.227] failed - POSSIBLE BREAK-IN ATTEMPT!

Sep 23 11:24:52 centos-wordpress-vps sshd[4972]: pam_unix(sshd:auth): authentication failure; logname= uid=0 euid=0 tty=ssh ruser= rhost=118.212.132.227  user=root

Sep 23 11:24:52 centos-wordpress-vps sshd[4972]: pam_succeed_if(sshd:auth): requirement "uid >= 1000" not met by user "root"

Sep 23 11:24:54 centos-wordpress-vps sshd[4972]: Failed password for root from 118.212.132.227 port 24514 ssh2

Sep 23 11:24:54 centos-wordpress-vps sshd[4972]: pam_succeed_if(sshd:auth): requirement "uid >= 1000" not met by user "root"

Sep 23 11:24:56 centos-wordpress-vps sshd[4972]: Failed password for root from 118.212.132.227 port 24514 ssh2

Sep 23 11:24:56 centos-wordpress-vps sshd[4972]: pam_succeed_if(sshd:auth): requirement "uid >= 1000" not met by user "root"

Sep 23 11:24:58 centos-wordpress-vps sshd[4972]: Failed password for root from 118.212.132.227 port 24514 ssh2

Sep 23 11:24:58 centos-wordpress-vps sudo: krister : TTY=pts/0 ; PWD=/home/krister ; USER=root ; COMMAND=/bin/tail /var/log/secure
that last line obviously shows me (user krister) using root-session with sudo at /home/krister with command /bin/tail to the path /var/log/secure
the upper line seems to be someone knocking the port 24514 with ssh and false password for root. It’s probably just trying a list of the common passwords. Especially that is the obvious case since, it tries to access the same port with username root all the time.
Let’s see where that IP-address is from.
from http://terokarvinen.com/2017/aikataulu-linux-palvelimet-ict4tn021-4-ti-ja-5-to-alkusyksy-2017-5-op I can get two commands for investigation: geoiplookup and whois. The later one I need to install so I type
sudo yum install whois
next I check that ip addresses whois-information
[krister@centos-wordpress-vps ~]$ whois 118.212.132.227

% [whois.apnic.net]

% Whois data copyright terms    http://www.apnic.net/db/dbcopyright.html
% Information related to ’118.212.0.0 – 118.212.255.255’
% Abuse contact for ’118.212.0.0 – 118.212.255.255’ is ’hqs-ipabuse@chinaunicom.cn’
inetnum: 118.212.0.0 – 118.212.255.255
netname: UNICOM-JX
descr: China Unicom Jiangxi province network
descr: China Unicom
country: CN
admin-c: CH1302-AP
tech-c: CH1302-AP
status: ALLOCATED PORTABLE
remarks: service provider
remarks: ——————————————————–
remarks: To report network abuse, please contact mnt-irt
remarks: For troubleshooting, please contact tech-c and admin-c
remarks: Report invalid contact via http://www.apnic.net/invalidcontact
remarks: ——————————————————–
mnt-by: APNIC-HM
mnt-lower: MAINT-CNCGROUP-JX
mnt-routes: MAINT-CNCGROUP-RR
mnt-irt: IRT-CU-CN
changed: hm-changed@apnic.net 20071031
changed: hm-changed@apnic.net 20090508
source: APNIC
irt: IRT-CU-CN
address: No.21,Financial Street
address: Beijing,100033
address: P.R.China
e-mail: hqs-ipabuse@chinaunicom.cn
abuse-mailbox: hqs-ipabuse@chinaunicom.cn
admin-c: CH1302-AP
tech-c: CH1302-AP
auth: # Filtered
mnt-by: MAINT-CNCGROUP
changed: zhouxm@chinaunicom.cn 20101110
changed: hm-changed@apnic.net 20101116
changed: zhaoyz3@chinaunicom.cn 20170905
source: APNIC
person: ChinaUnicom Hostmaster
nic-hdl: CH1302-AP
e-mail: hqs-ipabuse@chinaunicom.cn
address: No.21,Jin-Rong Street
address: Beijing,100033
address: P.R.China
phone: +86-10-66259764
fax-no: +86-10-66259764
country: CN
changed: hqs-ipabuse@chinaunicom.cn 20090408
mnt-by: MAINT-CNCGROUP
changed: hm-changed@apnic.net 20170817
source: APNIC
% Information related to ’118.212.0.0/16AS4837’
route: 118.212.0.0/16
descr: CNC Group CHINA169 Jiangxi Province Network
country: CN
origin: AS4837
mnt-by: MAINT-CNCGROUP-RR
changed: abuse@cnc-noc.net 20080102
source: APNIC
% This query was served by the APNIC Whois Service version 1.88.15-37 (WHOIS-UK4)
Apparently the connection tryouts came from a Chinese internet provider from Beijing, which means, the source machine is probably some invidual hacker’s computer or a zombified machine, which is oppressed into spreading to the other machines with weak passwords.
Let’s try with the geoiplookup
 [krister@centos-wordpress-vps ~]$ geoiplookup 118.212.132.227

GeoIP Country Edition: CN, China
Yup, that pretty much confirms it.
Install rest of the lamp
I’m going to install LAMP into my new Centos 7 VPS with help of this digitalocean’s blog post https://www.digitalocean.com/community/tutorials/how-to-install-linux-apache-mysql-php-lamp-stack-on-centos-7
Linux
I have a running VPS with centos set up, so it can be marked ’done’.
Apache
an HTTP server. In Debian-based distros, the package is named simply as apache2, but in Red Hat -based distros, it’s httpd (HTTP Daemon)
so I can install it with command
sudo yum install httpd
The digitalocean blog says to start the service with systemctl-command because CentOS 7 relies entirely on SystemD, but luckily I know, that service-command, familiar from debian world, works here as well, because it redirects the command into SystemD.
[krister@centos-wordpress-vps ~]$ sudo service httpd start

Redirecting to /bin/systemctl start httpd.service
and next I’ll navigate to the server’s IP address to see if the apache2 is working.
But the browser throws ”The connection has timed out”
the reason is simple: the firewall is blocking access to the port 80, which apache is listening to.
I’ll just enable access to it by commanding firewalld
sudo firewall-cmd --zone=public --add-port=80/tcp
notice that I left out the permanent-flag. It’s because I want to enforce the traffic to flow through port 443, the https, instead of plain 80, the http. Until I have configured the ssl-settings, I need to rely on the non-encrypted http.
let’s try the browser again:
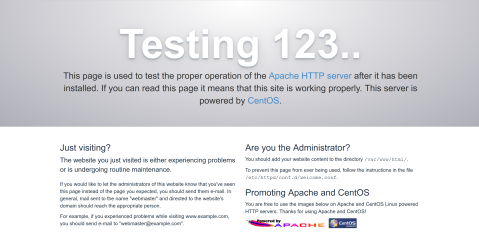
It works, now I can enable the user directory scan for html-pages.
First I’m going to enable httpd so it starts during a boot.
[krister@centos-wordpress-vps ~]$ sudo service httpd enable

[sudo] password for krister:

The service command supports only basic LSB actions (start, stop, restart, try-restart, reload, force-reload, status). For other actions, please try to use systemctl.

[krister@centos-wordpress-vps ~]$
aha, apparently the service-command doesn’t support enable here. Instead I have to type
[krister@centos-wordpress-vps ~]$ sudo systemctl enable httpd.service

Created symlink from /etc/systemd/system/multi-user.target.wants/httpd.service t         o /usr/lib/systemd/system/httpd.service.

[krister@centos-wordpress-vps ~]$
The next thing is to enable user directories. Unfortunately, the ”a2enmod”-command, familiar from debian based OS:es, is not available on Centos, but luckily, based on this blog post https://www.server-world.info/en/note?os=CentOS_7&p=httpd&f=5, I can do the modification manually.
sudo nano /etc/httpd/conf.d/userdir.conf
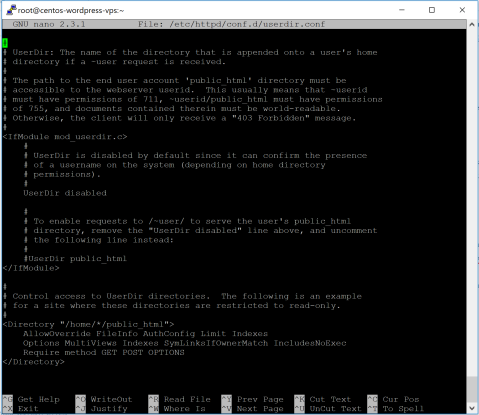
As it says, I need to confirm those permissions said in comments. But first I need to comment out ”UserDir disabled”, uncomment ”UserDir public_html”, comment out both ”AllowOverride” and ”Options” parts and write instead ”AllowOverride All”, ”Options none”

now just hit ctrl + x and save changes
Next thing is to restart the apache2-server
sudo service httpd restart
Next I’m going to create the the public_html-folder and index.html-file to see if the userdir works. Also I’m going to set the permissions for the folders.
chmod 711 /home/krister
mkdir ~/public_html
chmod 755 ~/public_html
nano ~/public_html/index.html
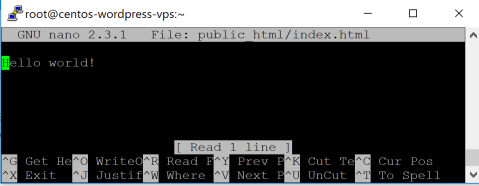
Let’s start with just this phrase, so we can verify it works.
and it works
Mysql
MySQL is pretty straightforward.
So first, let’s install mysql-server.
[krister@centos-wordpress-vps ~]$ sudo yum install mysql-server

[sudo] password for krister:

Loaded plugins: fastestmirror

Loading mirror speeds from cached hostfile

* base: mirror.imt-systems.com

* extras: mirror.23media.de

* updates: mirror.rackspeed.de

No package mysql-server available.

Error: Nothing to do

[krister@centos-wordpress-vps ~]$
Apparently the mysql is completely dropped from yum repositories in favor of mariadb (in comparison: aptitude has both of them available)
so, let’s change it into
sudo yum install mariadb-server
and start it
sudo service mariadb start
sudo systemctl enable mariadb.service
on comparison of the mysql installation, you won’t set the root password during the installation. To cover this, I’m going to run the following script
sudo mysql_secure_installation
[krister@centos-wordpress-vps ~]$ sudo mysql_secure_installation
NOTE: RUNNING ALL PARTS OF THIS SCRIPT IS RECOMMENDED FOR ALL MariaDB
SERVERS IN PRODUCTION USE! PLEASE READ EACH STEP CAREFULLY!
In order to log into MariaDB to secure it, we’ll need the current
password for the root user. If you’ve just installed MariaDB, and
you haven’t set the root password yet, the password will be blank,
so you should just press enter here.
Enter current password for root (enter for none):
OK, successfully used password, moving on…
Setting the root password ensures that nobody can log into the MariaDB
root user without the proper authorisation.
Set root password? [Y/n] y
New password:
Re-enter new password:
Password updated successfully!
Reloading privilege tables..
… Success!
By default, a MariaDB installation has an anonymous user, allowing anyone
to log into MariaDB without having to have a user account created for
them. This is intended only for testing, and to make the installation
go a bit smoother. You should remove them before moving into a
production environment.
Remove anonymous users? [Y/n]
… Success!
Normally, root should only be allowed to connect from ’localhost’. This
ensures that someone cannot guess at the root password from the network.
Disallow root login remotely? [Y/n]
… Success!
By default, MariaDB comes with a database named ’test’ that anyone can
access. This is also intended only for testing, and should be removed
before moving into a production environment.
Remove test database and access to it? [Y/n]
– Dropping test database…
… Success!
– Removing privileges on test database…
… Success!
Reloading the privilege tables will ensure that all changes made so far
will take effect immediately.
Reload privilege tables now? [Y/n]
… Success!
Cleaning up…
All done! If you’ve completed all of the above steps, your MariaDB
installation should now be secure.
Thanks for using MariaDB!
[krister@centos-wordpress-vps ~]$
Just to be clear, I chose to set root password, remove anonymous users, remove root remote login and drop the test database, which strengthen the security, but the most important reason to run this script was to set the root password.
let’s try to login into the mariadb-server
mysql -u root -p
 Welcome to the MariaDB monitor.  Commands end with ; or \g.

Your MariaDB connection id is 10

Server version: 5.5.56-MariaDB MariaDB Server
Copyright (c) 2000, 2017, Oracle, MariaDB Corporation Ab and others.
Type ’help;’ or ’\h’ for help. Type ’\c’ to clear the current input statement.
MariaDB [(none)]>
This ensures that the mariadb installation works.
Since I’m going to install WordPress to my vps later, I could create the database and dedicate a user for it, since I’m now logged in.
MariaDB [(none)]> create database wordpress;

Query OK, 1 row affected (0.00 sec)
next I’ll create a user with privilege to modify on a database ”wordpress”
with commands ”create user ’username’@’location’ identified by ’password’;”
and grant the privileges with ”grant all privileges on database.* to ’username’@’location'”
 MariaDB [(none)]> create user 'wordpress'@'%' identified by 'password';

Query OK, 0 rows affected (0.01 sec)
(note: I replaced the password for this example because I don’t want to share it publicly. Make sure to use passwords with at least 12 characters, both uppercase and lowercase letters, numbers and special characters)
MariaDB [(none)]> grant all privileges on wordpress.* to 'wordpress'@'%';

Query OK, 0 rows affected (0.00 sec)
now, it’s set so I can move to the next phase
Install PHP
In Red hat distros, the php-package already contains a module for apache2 server, so the PHP-package is all we need for the necessity. Of course I need to have database-connections set for the wordpress, therefore I also need package php-mysql
sudo yum install php php-mysql
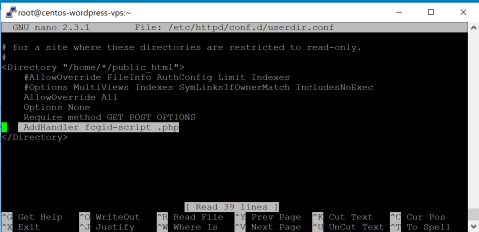
The next thing before testing out the php is to enable it on public_html. This can be simply done in the same userdir.conf-file we edited earlier.
According to the following forum post https://serverfault.com/questions/172217/how-do-i-get-php-to-work-with-userdir, all you have to do is put this line inside the -tag: ”AddHandler fcgid-script .php”
sudo nano /etc/httpd/conf.d/userdir.conf
Next thing is to test out the php-functionality.
First thing is to rename the index.html-file into index.php
mv ~/public_html/index.html ~/public_html/index.php
next thing is to add some php-code inside the file
nano public_html/index.php
I just modify the old ”Hello world!”-phrase into ””, which does exactly the same thing, except showing blank page if the php is not installed properly.
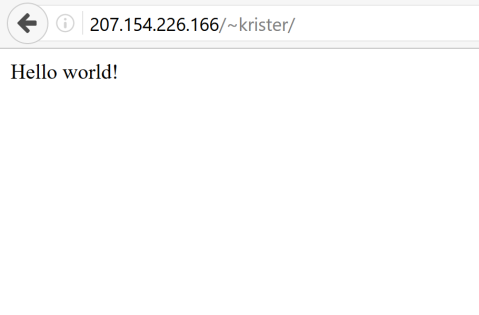
Now I just open my browser and navigate to address ”207.154.226.166/~krister/”
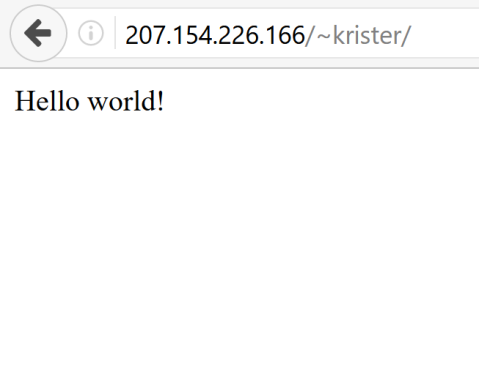
and it works!
Now I have a full-running LAMP initialized
Install WordPress
There’s a good blog-post about installing wordpress available https://tuomassippola.wordpress.com/2014/03/09/wordpressin-asennus/ so I’m going to check some parts out of it.
First I’m going to create a dedicated folder into my public_html-folder.
mkdir ~/public_html/wordpress
Since wordpress is not available in public repositories, I need to download and extract the latest tarball from their site.
wget https://wordpress.org/latest.tar.gz
tar xf latest.tar.gz
Tar extracted all the files into a ”wordpress”-folder, now I’m going to move the content inside into my public_html-folder
mv ~/wordpress/* ~/public_html/wordpress
Now the content is in it’s place, so I can launch the installer via browser by navigating to the address ”207.154.226.166/~krister/wordpress

okay, seems working, I’ll click the ”let’s go”-button

Okay, now it asks me the credentials and database name for the database access. Good thing I created those earlier. The prefix is just fine and since the mariadb-server is located into the same vps as the wordpress installation is, localhost will be able to access it with no problem.
I just fill in the information and click ”submit”

Apparently it wasn’t able to write the config file. Well, I just copy the provided content and then create the file
nano ~/public_html/wordpress/wp-config.php
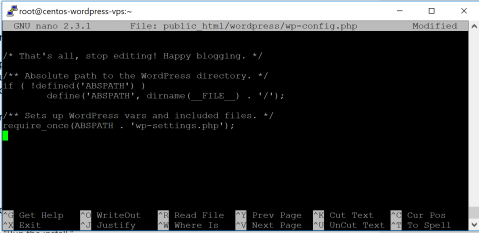
Now just ctrl + x and back to the installer.
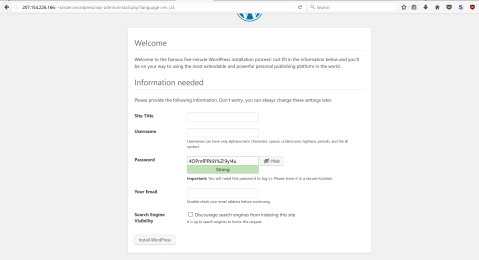
Now it’s time to create my user and the name of the site. Apparently it has already generated me a password, which I believe is instantly expiring one.
For now, I’m just going to put the site name as ”KristerTesti” and change it later. I fill the username and the email and leave ”Discourage search engines from indexing this site” untapped, because I’m probably going to move my wordpress blog into my vps and it’d be nice if the search engines start to re-index into my new blog server.
Lastly I tap the ”install wordpress” -button.
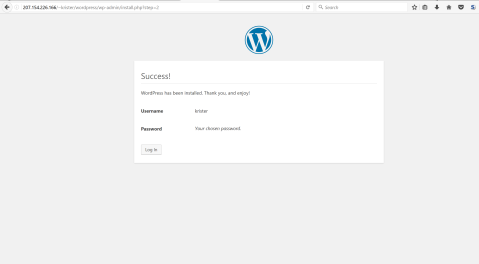
It took less than a second to finish.
Now let’s try logging in.
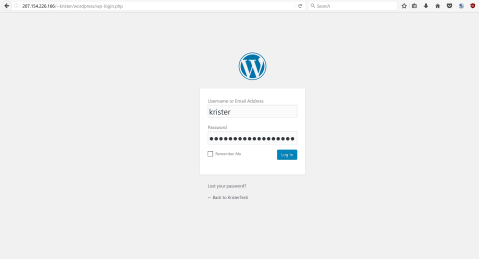
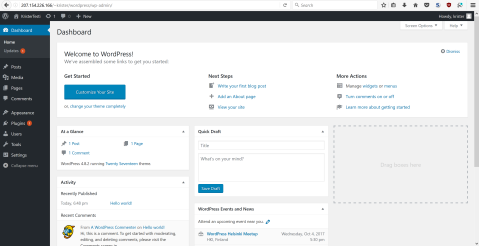
Now I managed to get into the admin panel.
Let’s test the actual usage by posting a test post.
I’ll navigate to ”posts” -> ”add new”
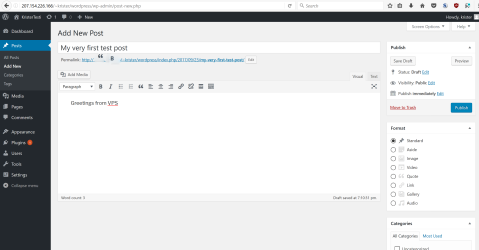
And now to publish from the right panel and see how it looks.
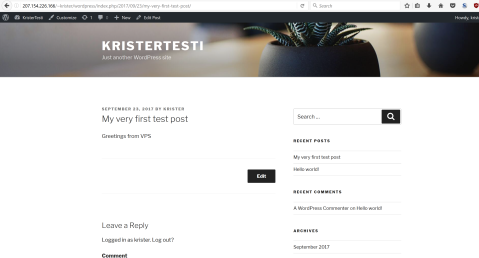
Looks great! Of course there’s still some modifications required for the template and overall look, but at least the base installation works now.
Buy and point domain name
I happen to have the github education pack, which provides me a year use of .me-domain, so I’ll go claim that offer now.

I’m going to try first with my lastname, so let’s search for holmstrom.me
Apparently it was already taken, so I’ll try with kristerholmstrom.me next
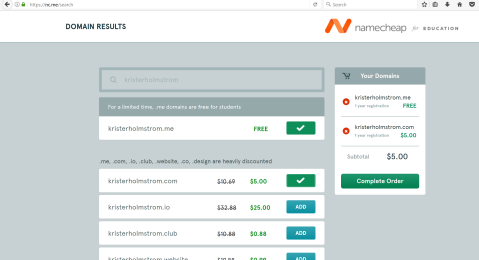
Luckily it’s still available, and kristerholmstrom.com is pretty cheap too. Better register that now before it’s gone.
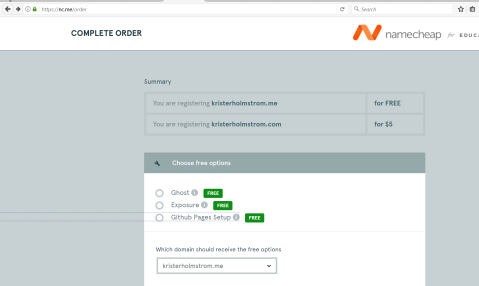
It seems to provide some free services, which are
Ghost – open source online publication platform made with node.js
Exposure – a platform for sharing photo stories
Github pages – tool for generating a site around github project
Since I’m going to point this domaine to my wordpress server, these offers are not necessary for me. Especially that ghost platform I could just install to my server if I happen to need one.
Apparently it forces me to pick one of those, so I’ll just pick ”github pages”, maybe it comes handy later.
Next step is to create a new account and what I find weird is that it doesn’t accept nordic characters on my last name. Even more odd is that since there’s a dropdown menu for mobile phone national codes, which has the nordic countries, so why limit the characters? Maybe the character set of their database is using Latin-1.
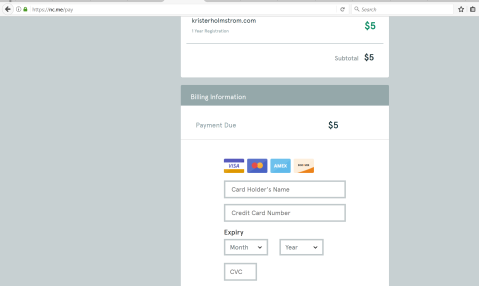
Here it requires me to add my card information. What is the most interesting part is that it doesn’t offer any other payment methods like paypal.
After paying and confirming my email, I should be able to modify the dns-settings of my new domains.
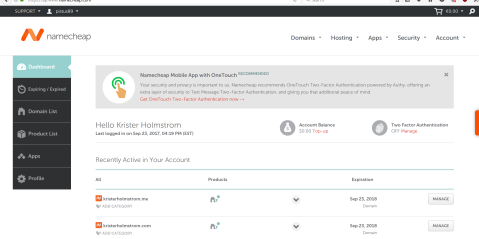
Okay, so this is what the management page looks like. Next I should check the options for dns-settings. I’ll click ”manage” at kristerholmstrom.me
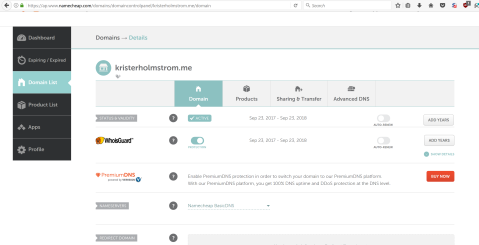
At the manage-page, the obvious place to change the DNS-settins is under ”Advanced DNS” tab
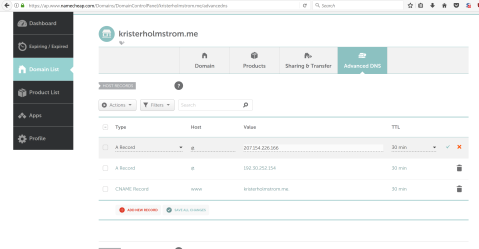
Now here’s where the magics happen. Basicly all I need to do is just change that A-record to point at IP 207.154.226.166, which is my vps public address. Now I just save the changes and see how it looks.
Now it just shows the blank page so apparently it’s not set up yet. (it might take some time before the dns-name record updates to upward).
I just let it be overnight and at the morning, when I tested out the browser again, this shows up
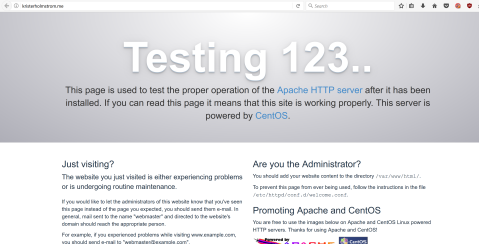
It works now, but of course it just shows the default apache test page. Let’s change it so that the ”root” is my wordpress home page.
Luckily there’s a blog post about this topic already https://www.digitalocean.com/community/tutorials/how-to-set-up-apache-virtual-hosts-on-centos-7
So first, I’m going to create the ”sites-available”-folder, where the available
configurations can be stored.
sudo mkdir /etc/httpd/sites-enabled
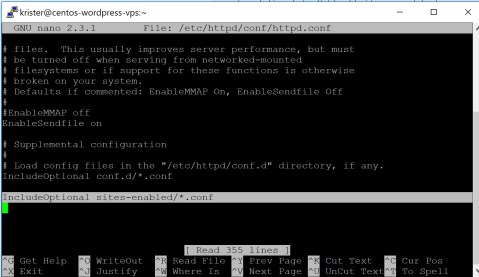
Then I’m going to add IncludeOptional sites-enabled/*.conf to the httpd.conf
sudo nano /etc/httpd/conf/httpd.conf
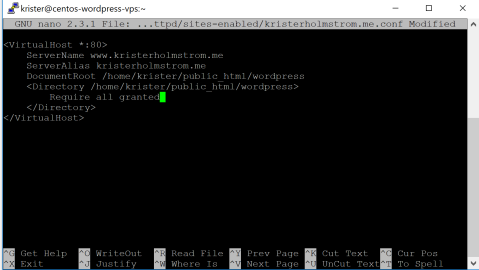
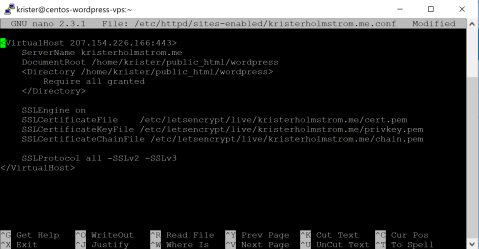
Next I’m going to create a config file, that will set my wordpress page inside /home/krister/public_html/wordpress/ to the root level.
I just name the config file as the domain name, so it’s easier to track later, which config affects in which domain.
sudo nano /etc/httpd/sites-enabled/kristerholmstrom.me.conf
Okay, now it’s time to restart the httpd-service and see the changes
sudo service httpd restart
Redirecting to /bin/systemctl restart httpd.service

[krister@centos-wordpress-vps ~]$
Now I navigate to kristerholmstrom.me with my browser

it works!
Setting up SSL-certificates with Let’s Encrypt
It’s probably the easiest way to use an automated ACME-bot provided by EFF, to serve the certificates and I’m bit curious how it works anyways. The instructions are available for all kinds of server platforms and for this test case https://certbot.eff.org/#centosrhel7-apache, I’ll be using Centos 7 with apache2, since that’s what I have now set up.
The acme-installation is available on EPEL-repository, so I have to first enable it.
sudo yum -y install epel-release
and then I can install certbot-apache
sudo yum -y install certbot-apache
Now I have the certbot installed. Next I need to check the commands from this manual https://certbot.eff.org/docs/using.html#certbot-commands
Apparently, since I have configured my public_html-folder to be the root directory, I need to pick the certonly-parameter and specify the path to the virtualhost content in the –webroot attribute. With -d flag, I can define the CNAME-value I want to use the certificates with. In my case, it’s the domain name I pointed earlier at this server.
certbot certonly --webroot -w /home/krister/public_html/wordpress -d kristerholmstrom.me
after asking about email address and agreeing with the terms of condition, I need to install the ssl-module on apache and configure port 443 to direct to the wordpress-folder. Following this blog https://www.digitalocean.com/community/tutorials/how-to-create-an-ssl-certificate-on-apache-for-centos-7
I’m going to install mod_ssl
sudo yum install mod_ssl
Apparently it was already installed.
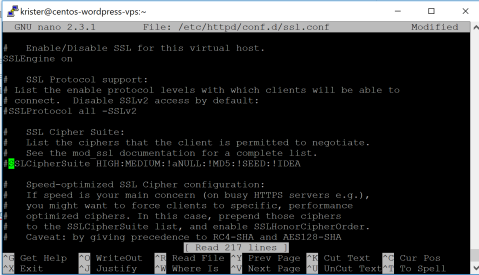
Now, according to the tutorial, I need to comment out the SSLProtocol and SSLCipherSuite from the ssl.conf-file.
sudo nano /etc/httpd/conf.d/ssl.conf
Next thing is to configure https-virtualhost to the config file.
sudo nano /etc/httpd/sites-enabled/kristerholmstrom.me.conf
and add here a new virtualroot-definition
it’s also recommended to copy-paste the following settings at the end of the ssl.conf-file
sudo nano /etc/httpd/conf.d/ssl.conf
# Begin copied text

# from https://cipherli.st/

# and https://raymii.org/s/tutorials/Strong_SSL_Security_On_Apache2.html
SSLCipherSuite EECDH+AESGCM:EDH+AESGCM:AES256+EECDH:AES256+EDH
SSLProtocol All -SSLv2 -SSLv3
SSLHonorCipherOrder On
# Disable preloading HSTS for now. You can use the commented out header line that includes
# the "preload" directive if you understand the implications.
#Header always set Strict-Transport-Security "max-age=63072000; includeSubdomains; preload"
Header always set Strict-Transport-Security "max-age=63072000; includeSubdomains"
Header always set X-Frame-Options DENY
Header always set X-Content-Type-Options nosniff
# Requires Apache >= 2.4
SSLCompression off
SSLUseStapling on
SSLStaplingCache "shmcb:logs/stapling-cache(150000)"
# Requires Apache >= 2.4.11
# SSLSessionTickets Off
Next thing is to run a configuration sanity test
sudo apachectl configtest
AH00558: httpd: Could not reliably determine the server's fully qualified domain name, using ::1. Set the 'ServerName' directive globally to suppress this message

Syntax OK
ok, it complains about missing global servername, but that shouldn’t matter since I have my custom configuration. ”Syntax OK” means it compiles otherwise fine.
Next thing is to restart the httpd-daemon
sudo service httpd restart
No complains from that.
Next thing is to open the ssl-port from firewalld
sudo firewall-cmd --zone=public --permanent --add-port=443/tcp
now let’s open the browser and navigate to address https://kristerholmstrom.me
Okay, it timed out so obviously I’m missing something.
Checking from the ssl_request_log, I was able to find that the certificate didn’t load properly. After googling around, I found this forum post with similiar situation https://unix.stackexchange.com/questions/358089/apache-ssl-server-cert-does-not-include-id-which-matches-server-name and the response says I should use the bot’s autoconfig even with a virtualhost-configuration.
So then I command
sudo certbot --apache
Saving debug log to /var/log/letsencrypt/letsencrypt.log

Plugins selected: Authenticator apache, Installer apache

Starting new HTTPS connection (1): acme-v01.api.letsencrypt.org
Which names would you like to activate HTTPS for?
——————————————————————————-
1: kristerholmstrom.me
2: http://www.kristerholmstrom.me
——————————————————————————-
Select the appropriate numbers separated by commas and/or spaces, or leave input
blank to select all options shown (Enter ’c’ to cancel):
I’m going to choose 1
You have an existing certificate that has exactly the same domains or certificate name you requested and isn't close to expiry.

(ref: /etc/letsencrypt/renewal/kristerholmstrom.me.conf)
What would you like to do?
——————————————————————————-
1: Attempt to reinstall this existing certificate
2: Renew & replace the cert (limit ~5 per 7 days)
——————————————————————————-
Select the appropriate number [1-2] then [enter] (press ’c’ to cancel):
I’ll reinstall the existing one, therefore I pick number 1
Keeping the existing certificate

Deploying Certificate for kristerholmstrom.me to VirtualHost /etc/httpd/sites-enabled/kristerholmstrom.me.conf
Please choose whether or not to redirect HTTP traffic to HTTPS, removing HTTP access.
——————————————————————————-
1: No redirect – Make no further changes to the webserver configuration.
2: Redirect – Make all requests redirect to secure HTTPS access. Choose this for
new sites, or if you’re confident your site works on HTTPS. You can undo this
change by editing your web server’s configuration.
——————————————————————————-
Select the appropriate number [1-2] then [enter] (press ’c’ to cancel):
I want the redirection, so I pick number 2
Failed redirect for kristerholmstrom.me

Unable to set enhancement redirect for kristerholmstrom.me

Unable to find corresponding HTTP vhost; Unable to create one as intended addresses conflict; Current configuration does not support automated redirection
IMPORTANT NOTES:
– We were unable to set up enhancement redirect for your server,
however, we successfully installed your certificate.
– Congratulations! Your certificate and chain have been saved at:
/etc/letsencrypt/live/kristerholmstrom.me/fullchain.pem
Your key file has been saved at:
/etc/letsencrypt/live/kristerholmstrom.me/privkey.pem
Your cert will expire on 2017-12-23. To obtain a new or tweaked
version of this certificate in the future, simply run certbot again
with the ”certonly” option. To non-interactively renew *all* of
your certificates, run ”certbot renew”
[krister@centos-wordpress-vps ~]$
Okay, some error occurred and apparently, the browser still shows timeout.
On this post at Acme-bot’s github page https://github.com/certbot/certbot/issues/3461, they say that it might be a bug. On digitalocean’s blog, it’s recommended to use the default ssl.conf-file instead of custom conf. Let’s try that out and copy the content of kristerholmstrom.me.conf into ssl.conf
So I just keep the -tag but change everything else to match.
Now restart the httpd and try it again.
Still timeout, but the record in log says
[Sun Sep 24 15:14:55.409568 2017] [ssl:warn] [pid 14849] AH01909: RSA certificate configured for www.kristerholmstrom.me:443 does NOT include an ID which matches the server name
it might be that the http://www.-prefix is not compatible, let’s remove that from the virtualhost-configuration.
apparently, it didn’t work out either, so I’ll have to finish up this topic later.
LAMP-stack exercise (h3)
This blog post is made based on the class exercises and homeworks (h2) at Haaga-Helia course Linux servers (Linux palvelimet) hosted by Tero Karvinen
For these exercises, I’ll be using the same computer and xubuntu boot stick that I had on exercises h1 and h2.
Exercise a)
As a first exercise, I need to install an apache2-server and make the websites of the users work.
Probably the best way to provide that is to test the website with my current default user and then
copy the content into /etc/skel-folder. That’ll make sure the content is copied into all of the created
user accounts and they are guaranteed to work.
First thing is to run
sudo apt-get update
so the package database is up-to-date and have the latest versions of packages available.
then I simply run
sudo apt-get install apache2
and the apt installs me the whole apache2-server
let’s see if it’s running: I open my web browser and type ”localhost” to the address bar:

seems to work and according to the apt-log history, this took about 1 minute to accomplish.
Next thing is to enable scanning of the user directories for html-pages and that requires enabling module called ”userdir”
xubuntu@xubuntu:~$ sudo a2enmod userdir

Enabling module userdir.

To activate the new configuration, you need to run:

service apache2 restart

xubuntu@xubuntu:~$ sudo service apache2 restart

xubuntu@xubuntu:~$
okay, let’s try it out by first creating folder called ”public_html” into xubuntu-user’s (the default live user) home folder
mkdir ~/public_html
and then I shall create an index.html-file with nano
nano ~/public_html/index.html

Let’s try with a simple text first, so we can see that the apache actually catches our created file after all.
Now I open my browser again and this time type ”localhost/~xubuntu” on the address bar.

and it works.
Next, since the requirement is to make user’s website to work, it needs to be a valid html5. So I’ll modify the index.html to contain the following text:

now let’s see what the browser says now on ”localhost/~xubuntu”:

and now, to be absolutely certain that the html-code is valid html5, I can verify that on a validator found from https://validator.w3.org

the green bar indicates that no errors were found, so the file is valid html5.
So, now we got a running http-server, that has the user directory scans enabled and I have a working html5-website available.
If I just make sure that every user, who is going to be created on this computer, would have the same website running on their home-folder, I can assure that they all have a working website editable on their home-folder.
Therefore I need to copy this public_html-structure into /etc/skel-folder, so the operating systems takes care of copying the content into every new user’s home folder.
I’ll just run the following command
sudo cp -r ~/public_html /etc/skel
and now I just create a new user to see if it copies properly, for example named ”test”. based on the man-page, I call command
sudo adduser test
and the result is
xubuntu@xubuntu:~$ sudo adduser test

Adding user `test' ...

Adding new group `test' (1000) ...

Adding new user `test' (1000) with group `test' ...

Creating home directory `/home/test' ...

Copying files from `/etc/skel' ...

Enter new UNIX password:

Retype new UNIX password:

passwd: password updated successfully

Changing the user information for test

Enter the new value, or press ENTER for the default

Full Name []:

Room Number []:

Work Phone []:

Home Phone []:

Other []:

Is the information correct? [Y/n] y

xubuntu@xubuntu:~$
since the adduser-command should have taken care of copying the files from /etc/skel, I don’t need to login into the account.
I can just open a browser and write ”localhost/~test” to the address bar

works like charm. Now I can assume that every new user will have a working copy of an html5-valid website on their home-folder.
Exercize b)
The next task is to cause 200-http code on the apache-logs and 404-http code as well and then analyze the lines.
The apache log seems to be located at /var/log/apache2/access.log and the last record happened (by checking the file with tail-command) occurred at [10/Sep/2017:16:10:20 +0000], therefore all the newer lines will be a cause of my actions.
Let’s start with a 200 status code. It can be caused by simply navigating to a working website, so I’ll just open my browser and type ”localhost/~xubuntu”

now, by commanding
tail /var/log/apache2/access.log
a new row has appeared:
127.0.0.1 - - [10/Sep/2017:16:18:54 +0000] "GET /~xubuntu/ HTTP/1.1" 200 558 "-" "Mozilla/5.0 (X11; Ubuntu; Linux x86_64; rv:54.0) Gecko/20100101 Firefox/54.0
the first part says, that someone from ip-address 127.0.0.1 has made request at 10.9.2017 16:18:54 UTC and it was GET-request pointing at resources from /~xubuntu/ with protocol HTTP version 1.1 and the status was 200 OK. The following number 558 is a bit mysterious, but next we can conclude information from the sender, that the request was made with Mozilla Firefox by using Graphical user interface (X11), the distro was Ubuntu, the operating system was a 64-bit Linux, the layout engine is Gecko and the Firefox version was 54.0
Now, let’s try to cause a 404 status code by navigating to a website that doesn’t exist. Let’s open a browser and navigate to an address ”localhost/~xubuntu/notexist.html”

From the title of the page, we can see that it caused ”404 Not Found” error status, so it was success.
The /var/log/apache2/access.log has now a new row:
127.0.0.1 - - [10/Sep/2017:16:32:20 +0000] "GET /~xubuntu/notexist.html HTTP/1.1" 404 512 "-" "Mozilla/5.0 (X11; Ubuntu; Linux x86_64; rv:54.0) Gecko/20100101 Firefox/54.0"
It looks pretty similiar as the 200 status code one, except with some changes: this time the GET-request is faced to the path /~xubuntu/notexist.html and it caused 404 error. We used the same OS and the same browser so those information are not affected. That number 512 still remains a mystery.
Exercise f)
The next task is to create and run a web application, which calculates a simple formula from an input given by a user.
I’ve been doing some beer brewing as a hobby and one crucial information is always needed to be calculated for every batch: the alcohol volume.
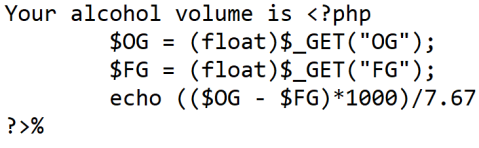
From the following beginner’s guide http://kotiolutta.blogspot.fi/2014/03/huomioitavaa-oluen-kotivalmistuksessa.html we can see, that the formula for calculating alcohol volume is (OG – FG)*1000/7,67 where OG is original gravity of the wort and FG is final gravity measured after the fermentation is completed.
Since I’ve closed my computer between the second and this third task, I need to install the apache2-server again and install the php-module into it
so after updating the apt-repository database I run
sudo apt-get install apache2
and after the installation is finished, I open my firefox-browser and navigate to ”localhost”

it works now.
Next thing is to install the php-module, but first I’ll create a test application to test out, that the module is actually functioning.
I’ll create a new index.php-file straight to the apache’s root folder
sudo nano /var/www/html/index.php
and then write the following code into the file
when the php-module is successfully activated, we shall see the server information printed out on the index-web page by phpinfo.
Next I’ll install the php-module
sudo apt-get install libapache2-mod-php7.0
after the installation, for the last line, apt tells me
apache2_invoke: Enable module php7.0
so it should be already working
Let’s try out! I’ll open my Firefox browser again and navigate to localhost/index.php

nice, it works.
Next I should start the actual programming for my beer alcohol volume calculator. First I’ll make the client page in index.html,
but before doing anything else, I have to move the default apache2 index page aside.
sudo mv /var/www/html/index.html /var/www/html/index.html.default
and then I’ll create a new one:
sudo nano /var/www/html/index.html
and I add the following code
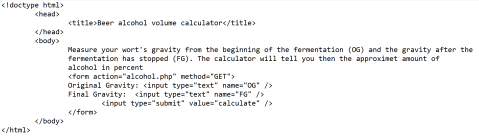
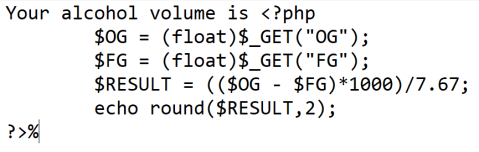
next is the backend-code in php
sudo nano /var/www/html/alcohol.php
with the following code
now save and let’s try it out. Now I’ll open my Firefox-browser and navigate to the ”localhost”

the form page seems to work. Luckily I got my readings from my current batch, so we can try how the calculator works. I’ll add the following values
OG= 1.042G
FG= 1.005G
and click the ”calculate”-button

it works and the result seems about right.
Maybe I should also round it to two decimals, so it looks more nicer.
Based on this link https://www.w3schools.com/php/func_math_round.asp it should be as simple as using function round(number,decimal amount), so let’s give it a try.
First I open the php-file for modification
sudo nano /var/www/html/alcohol.php
and modify the code at the following
now save and let’s try again:
first I open my browser and type ”localhost” on the address bar

I’ll just use the same values as earlier, then click the ”calculate”

and, as we can see, the result has rounded up nicely to 4.82%
Therefore I now have a required server-side web application that calculates simple formula.
Linux Terminal basics (Exercise H2)
This blog post is made based on the class exercises and homeworks (h2) at Haaga-Helia course Linux servers (Linux palvelimet) hosted by Tero Karvinen
The school exercises I’ll do with the school’s lab computer (hp) and the home exercises with the same lenovo thinkpad and xubuntu boot stick I used in the last blog post.
School Exercise 1
Our first exercise is to use a terminal for creating a folder called ”viikonpäivät” (weekdays). Inside the folder needs to be generated weekday-named folders (ma-su) and files called 1.txt to 5.txt in each of them.
Naturally there’s several ways to do this exercise, but the most simplest way would be starting with the ”root” folder
mkdir viikonpäivät
and then create the weekday-folders:
cd viikonpäivät

mkdir ma ti ke to pe
and finally create the files
touch ma/{1..5}.txt
and repeat that same touch-command for all of the weekday-folders (alternative is to use cp-command to copy the files to each of them)
School exercise 2
This exercise is more difficult one and therefor optional. It’s about finding a way to create a folder, which contains folders named as a letter from a to z, and a one hundred files in each named as numbers, like 0.txt,1.txt,2.txt etc.
First thing that comes to my mind is using a for-loop provided by shell, and inside the loop I can use touch with brackets to create the hundred files. The script I made looks like this
mkdir vaikea

cd vaikea

for f in {a..z}

do

mkdir "$f"

cd "$f"

touch {0..99}.txt

cd ..

done
In short terms, it creates folder named ”vaikea”, navigates into it and starts a loop repeating one-by-one of each of the alpabets from a to z. During a loop-round, it makes a new alphabet-folder, navigates in, generates the files with touch and navigates out.
During the discussion, it appeared that the touch itself is a capable of creating those folders without a loop: touch {a..z}/{0..99}.txt
Homework
As a homework I got several things, like
a) cause a linux log to catch a successful event and a failed or illegal event. Analyze
those lines
b) install an SSH-daemon and try out some of the following commands in your ssh server: ssh-copy-id, sshfs, scp or git
c) make apt-get command of your dreams: create one command line that installs all your favorite software
d) install three of your favorite CLI-apps via package manager. Try each of them in their natural use
Let’s try making a succesful event in apt-log with an installation of a software.
First I’m going to check the last record of the apt history log wit command
tail /var/log/apt/history.log
last installation occurred at 2017-08-01 11:28:13, therefore I know that my actions will be written after that row.
Next I’ll run sudo apt-get update and install small app called sl with command
sudo apt-get install sl
now the history.log mentions the installation
Start-Date: 2017-09-01 13:23:55commandline: apt-get install sl

Requested-By: xubuntu (999)

Install: sl:amd64 (3.03-17build1)

End-Date: 2017-09-01 13:24:03
By looking at the lines, the installation started at 1.9.2017 13:23:55 with command apt-get install sl and the requester of this action was user named xubuntu. Next it tells me that the installed sl-package is for amd64 architecture and versioned 3.03-17build1. The installation ended at 13:24:03 same day. The time zone happens to be in UTC, since it’s not localizing the time.
Next, I’ll try to cause a failure record to /var/log/syslog by trying to connect a wifi-router with false password. Here’s what happened:
CSep 1 22:52:06 xubuntu wpa_supplicant[1638]: wlp4s0: WPA: 4-Way Handshake failed - pre-shared key may be incorrect

Sep 1 22:52:06 xubuntu wpa_supplicant[1638]: wlp4s0: CTRL-EVENT-SSID-TEMP-DISABLED id=0 ssid="4G-Gateway-51FF" auth_failures=1 duration=10 reason=WRONG_KEY

Sep 1 22:52:06 xubuntu NetworkManager[1376]: [1504306326.4774] sup-iface[0xe1ea20,wlp4s0]: connection disconnected (reason 2)

Sep 1 22:52:06 xubuntu NetworkManager[1376]: [1504306326.4809] device (wlp4s0): supplicant interface state: 4-way handshake -> disconnected

Sep 1 22:52:06 xubuntu NetworkManager[1376]: [1504306326.4847] device (wlp4s0): Activation: (wifi) disconnected during association, asking for new key

Sep 1 22:52:06 xubuntu NetworkManager[1376]: [1504306326.4852] device (wlp4s0): state change: config -> need-auth (reason 'supplicant-disconnect') [50 60 8]

Sep 1 22:52:06 xubuntu NetworkManager[1376]: [1504306326.5793] device (wlp4s0): supplicant interface state: disconnected -> inactive

Sep 1 22:52:13 xubuntu NetworkManager[1376]: [1504306333.9395] device (wlp4s0): User canceled the secrets request.

Sep 1 22:52:13 xubuntu NetworkManager[1376]: [1504306333.9397] device (wlp4s0): state change: need-auth -> failed (reason 'no-secrets') [60 120 7]

Sep 1 22:52:13 xubuntu NetworkManager[1376]: [1504306333.9403] manager: NetworkManager state is now DISCONNECTED

Sep 1 22:52:13 xubuntu NetworkManager[1376]: [1504306333.9416] device (wlp4s0): Activation: failed for connection '4G-Gateway-51FF'

Sep 1 22:52:13 xubuntu NetworkManager[1376]: [1504306333.9457] device (wlp4s0): state change: failed -> disconnected (reason 'none') [120 30 0]

Sep 1 22:52:13 xubuntu kernel: [ 2259.935402] IPv6: ADDRCONF(NETDEV_UP): wlp4s0: link is not ready
So, as the log says, the Network Manager started authenticating a new connection at 22:56:06 September 1st, but mentions: ”handshake failed, pre-shared key may be incorrect” it tries to authenticate, but fails, which leads to the next step: connection disconnected
Apparently the Network Manager has a fallback option to recall wifi-password from a saved profile, because the following lines mention about activating connection ’Hyotytalo’, which is my home wifi-name
Sep 1 22:52:13 xubuntu NetworkManager[1376]: [1504306333.9522] policy: auto-activating connection 'Hyotytalo'

Sep 1 22:52:13 xubuntu NetworkManager[1376]: [1504306333.9560] device (wlp4s0): Activation: starting connection 'Hyotytalo' (de0bb398-ea95-47ef-9617-991400ce660d)

Sep 1 22:52:13 xubuntu NetworkManager[1376]: [1504306333.9569] device (wlp4s0): state change: disconnected -> prepare (reason 'none') [30 40 0]

Sep 1 22:52:13 xubuntu NetworkManager[1376]: [1504306333.9576] manager: NetworkManager state is now CONNECTING

Sep 1 22:52:13 xubuntu NetworkManager[1376]: [1504306333.9588] device (wlp4s0): state change: prepare -> config (reason 'none') [40 50 0]

Sep 1 22:52:13 xubuntu NetworkManager[1376]: [1504306333.9596] device (wlp4s0): Activation: (wifi) access point 'Hyotytalo' has security, but secrets are required.

Sep 1 22:52:13 xubuntu NetworkManager[1376]: [1504306333.9600] device (wlp4s0): state change: config -> need-auth (reason 'none') [50 60 0]

Sep 1 22:52:13 xubuntu NetworkManager[1376]: [1504306333.9665] device (wlp4s0): state change: need-auth -> prepare (reason 'none') [60 40 0]

Sep 1 22:52:13 xubuntu NetworkManager[1376]: [1504306333.9676] device (wlp4s0): state change: prepare -> config (reason 'none') [40 50 0]

Sep 1 22:52:13 xubuntu NetworkManager[1376]: [1504306333.9681] device (wlp4s0): Activation: (wifi) connection 'Hyotytalo' has security, and secrets exist. No new secrets needed.

Sep 1 22:52:13 xubuntu NetworkManager[1376]: [1504306333.9684] Config: added 'ssid' value 'Hyotytalo'

Sep 1 22:52:13 xubuntu NetworkManager[1376]: [1504306333.9687] Config: added 'scan_ssid' value '1'

Sep 1 22:52:13 xubuntu NetworkManager[1376]: [1504306333.9689] Config: added 'key_mgmt' value 'WPA-PSK'

Sep 1 22:52:13 xubuntu NetworkManager[1376]: [1504306333.9691] Config: added 'auth_alg' value 'OPEN'

Sep 1 22:52:13 xubuntu NetworkManager[1376]: [1504306333.9694] Config: added 'psk' value ''

Sep 1 22:52:13 xubuntu NetworkManager[1376]: [1504306333.9701] sup-iface[0xe1ea20,wlp4s0]: config: set interface ap_scan to 1

Sep 1 22:52:14 xubuntu wpa_supplicant[1638]: wlp4s0: SME: Trying to authenticate with 14:dd:a9:4b:a5:b0 (SSID='Hyotytalo' freq=2462 MHz)

Sep 1 22:52:14 xubuntu kernel: [ 2260.734581] wlp4s0: authenticate with 14:dd:a9:4b:a5:b0

Sep 1 22:52:14 xubuntu kernel: [ 2260.744928] wlp4s0: send auth to 14:dd:a9:4b:a5:b0 (try 1/3)

Sep 1 22:52:14 xubuntu wpa_supplicant[1638]: wlp4s0: Trying to associate with 14:dd:a9:4b:a5:b0 (SSID='Hyotytalo' freq=2462 MHz)

Sep 1 22:52:14 xubuntu kernel: [ 2260.748231] wlp4s0: authenticated

Sep 1 22:52:14 xubuntu kernel: [ 2260.749830] wlp4s0: associating with AP with corrupt probe response

Sep 1 22:52:14 xubuntu NetworkManager[1376]: [1504306334.7658] device (wlp4s0): supplicant interface state: inactive -> authenticating

Sep 1 22:52:14 xubuntu kernel: [ 2260.754329] wlp4s0: associate with 14:dd:a9:4b:a5:b0 (try 1/3)

Sep 1 22:52:14 xubuntu NetworkManager[1376]: [1504306334.7710] device (wlp4s0): supplicant interface state: authenticating -> associating

Sep 1 22:52:14 xubuntu kernel: [ 2260.758747] wlp4s0: RX AssocResp from 14:dd:a9:4b:a5:b0 (capab=0x431 status=0 aid=2)

Sep 1 22:52:14 xubuntu wpa_supplicant[1638]: wlp4s0: Associated with 14:dd:a9:4b:a5:b0

Sep 1 22:52:14 xubuntu kernel: [ 2260.761708] wlp4s0: associated

Sep 1 22:52:14 xubuntu kernel: [ 2260.761779] IPv6: ADDRCONF(NETDEV_CHANGE): wlp4s0: link becomes ready

Sep 1 22:52:14 xubuntu NetworkManager[1376]: [1504306334.7805] device (wlp4s0): supplicant interface state: associating -> associated

Sep 1 22:52:14 xubuntu NetworkManager[1376]: [1504306334.9579] device (wlp4s0): supplicant interface state: associated -> 4-way handshake

Sep 1 22:52:14 xubuntu wpa_supplicant[1638]: wlp4s0: WPA: Key negotiation completed with 14:dd:a9:4b:a5:b0 [PTK=CCMP GTK=CCMP]

Sep 1 22:52:14 xubuntu wpa_supplicant[1638]: wlp4s0: CTRL-EVENT-CONNECTED - Connection to 14:dd:a9:4b:a5:b0 completed [id=0 id_str=]

Sep 1 22:52:14 xubuntu NetworkManager[1376]: [1504306334.9654] device (wlp4s0): supplicant interface state: 4-way handshake -> completed

Sep 1 22:52:14 xubuntu NetworkManager[1376]: [1504306334.9655] device (wlp4s0): Activation: (wifi) Stage 2 of 5 (Device Configure) successful. Connected to wireless network 'Hyotytalo'.

Sep 1 22:52:14 xubuntu NetworkManager[1376]: [1504306334.9658] device (wlp4s0): state change: config -> ip-config (reason 'none') [50 70 0]

Sep 1 22:52:14 xubuntu NetworkManager[1376]: [1504306334.9678] dhcp4 (wlp4s0): activation: beginning transaction (timeout in 45 seconds)

Sep 1 22:52:14 xubuntu NetworkManager[1376]: [1504306334.9725] dhcp4 (wlp4s0): dhclient started with pid 2800

Sep 1 22:52:15 xubuntu dhclient[2800]: DHCPREQUEST of 192.168.1.3 on wlp4s0 to 255.255.255.255 port 67 (xid=0x16264519)

Sep 1 22:52:15 xubuntu dhclient[2800]: DHCPACK of 192.168.1.3 from 192.168.1.1

Sep 1 22:52:15 xubuntu dhclient[2800]: bound to 192.168.1.3 -- renewal in 41453 seconds.

Sep 1 22:52:15 xubuntu NetworkManager[1376]: [1504306335.0645] address 192.168.1.3

Sep 1 22:52:15 xubuntu NetworkManager[1376]: [1504306335.0646] plen 24 (255.255.255.0)

Sep 1 22:52:15 xubuntu NetworkManager[1376]: [1504306335.0646] gateway 192.168.1.1

Sep 1 22:52:15 xubuntu NetworkManager[1376]: [1504306335.0646] server identifier 192.168.1.1

Sep 1 22:52:15 xubuntu NetworkManager[1376]: [1504306335.0646] lease time 86400

Sep 1 22:52:15 xubuntu NetworkManager[1376]: [1504306335.0646] nameserver '192.168.1.1'

Sep 1 22:52:15 xubuntu avahi-daemon[1247]: Joining mDNS multicast group on interface wlp4s0.IPv4 with address 192.168.1.3.

Sep 1 22:52:15 xubuntu NetworkManager[1376]: [1504306335.0647] dhcp4 (wlp4s0): state changed unknown -> bound

Sep 1 22:52:15 xubuntu avahi-daemon[1247]: New relevant interface wlp4s0.IPv4 for mDNS.

Sep 1 22:52:15 xubuntu avahi-daemon[1247]: Registering new address record for 192.168.1.3 on wlp4s0.IPv4.

Sep 1 22:52:15 xubuntu NetworkManager[1376]: [1504306335.0672] device (wlp4s0): state change: ip-config -> ip-check (reason 'none') [70 80 0]

Sep 1 22:52:15 xubuntu NetworkManager[1376]: [1504306335.0679] device (wlp4s0): state change: ip-check -> secondaries (reason 'none') [80 90 0]

Sep 1 22:52:15 xubuntu NetworkManager[1376]: [1504306335.0684] device (wlp4s0): state change: secondaries -> activated (reason 'none') [90 100 0]

Sep 1 22:52:15 xubuntu NetworkManager[1376]: [1504306335.0687] manager: NetworkManager state is now CONNECTED_LOCAL

Sep 1 22:52:15 xubuntu NetworkManager[1376]: [1504306335.0712] manager: NetworkManager state is now CONNECTED_GLOBAL

Sep 1 22:52:15 xubuntu NetworkManager[1376]: [1504306335.0713] policy: set 'Hyotytalo' (wlp4s0) as default for IPv4 routing and DNS

Sep 1 22:52:15 xubuntu NetworkManager[1376]: [1504306335.0716] dns-mgr: Writing DNS information to /sbin/resolvconf

Sep 1 22:52:15 xubuntu whoopsie[2063]: [22:52:15] Cannot reach: https://daisy.ubuntu.com

Sep 1 22:52:15 xubuntu dnsmasq[2433]: setting upstream servers from DBus

Sep 1 22:52:15 xubuntu dnsmasq[2433]: using nameserver 192.168.1.1#53(via wlp4s0)

Sep 1 22:52:15 xubuntu NetworkManager[1376]: [1504306335.0820] device (wlp4s0): Activation: successful, device activated.

Sep 1 22:52:15 xubuntu dbus[1265]: [system] Activating via systemd: service name='org.freedesktop.nm_dispatcher' unit='dbus-org.freedesktop.nm-dispatcher.service'

Sep 1 22:52:15 xubuntu systemd[1]: Starting Network Manager Script Dispatcher Service...

Sep 1 22:52:15 xubuntu whoopsie[2063]: [22:52:15] The default IPv4 route is: /org/freedesktop/NetworkManager/ActiveConnection/2

Sep 1 22:52:15 xubuntu whoopsie[2063]: [22:52:15] Not a paid data plan: /org/freedesktop/NetworkManager/ActiveConnection/2

Sep 1 22:52:15 xubuntu whoopsie[2063]: [22:52:15] Found usable connection: /org/freedesktop/NetworkManager/ActiveConnection/2

Sep 1 22:52:15 xubuntu dbus[1265]: [system] Successfully activated service 'org.freedesktop.nm_dispatcher'

Sep 1 22:52:15 xubuntu systemd[1]: Started Network Manager Script Dispatcher Service.

Sep 1 22:52:15 xubuntu nm-dispatcher: req:1 'up' [wlp4s0]: new request (1 scripts)

Sep 1 22:52:15 xubuntu nm-dispatcher: req:1 'up' [wlp4s0]: start running ordered scripts...

Sep 1 22:52:15 xubuntu whoopsie[2063]: [22:52:15] online

Sep 1 22:52:16 xubuntu avahi-daemon[1247]: Joining mDNS multicast group on interface wlp4s0.IPv6 with address fe80::f428:d7f:5866:ed7b.

Sep 1 22:52:16 xubuntu avahi-daemon[1247]: New relevant interface wlp4s0.IPv6 for mDNS.

Sep 1 22:52:16 xubuntu avahi-daemon[1247]: Registering new address record for fe80::f428:d7f:5866:ed7b on wlp4s0.*.
Lot of stuff happens here, but mostly the Network Manager established a connection to a network called ’Hyotytalo’, then fetched the DHCP information and apparently avahi-daemon configured it’s ipv6 address.
Exercise B
first I create a user whom credentials I can use when I log in to my ssh daemon, so it simplifies the identification of a remote connection, especially on my own local computer.
I open a terminal and run the following command based on man-page of adduser-command:
xubuntu@xubuntu:~$ adduser remoteuser remoteuser

adduser: Only root may add a user or group to the system.

xubuntu@xubuntu:~$ sudo adduser remoteuser

Adding user `remoteuser' ...

Adding new group `remoteuser' (1000) ...

Adding new user `remoteuser' (1000) with group `remoteuser' ...

Creating home directory `/home/remoteuser' ...

Copying files from `/etc/skel' ...

Enter new UNIX password:

Retype new UNIX password:

passwd: password updated successfully

Changing the user information for remoteuser

Enter the new value, or press ENTER for the default

Full Name []: remote user

Room Number []: 42

Work Phone []:

Home Phone []:

Other []:

Is the information correct? [Y/n] y
we can try to log in with this new user with a command
su remoteuser
xubuntu@xubuntu:~$ su remoteuser

Password:

remoteuser@xubuntu:/home/xubuntu$
as the name mentions, I’m now logged in as a remoteuser, so the user creation went succesfully. Next I just logout with command exit and I can continue xubuntu-user’s session.
The next thing is to install the actual ssh-daemon, which we can find from the package database by first updating the repository database (sudo apt-get update) and then using a command
sudo apt search ssh
which shows the following line:
openssh-server/xenial-updates 1:7.2p2-4ubuntu2.2 amd64

secure shell (SSH) server, for secure access from remote machines
this is most probably the correct package so we’ll just install it with command
sudo apt-get install openssh-server
xubuntu@xubuntu:~$ sudo apt-get install openssh-server

Reading package lists... Done

Building dependency tree

Reading state information... Done

The following additional packages will be installed:

ncurses-term openssh-sftp-server ssh-import-id

Suggested packages:

ssh-askpass rssh molly-guard monkeysphere

The following NEW packages will be installed:

ncurses-term openssh-server openssh-sftp-server ssh-import-id

0 upgraded, 4 newly installed, 0 to remove and 65 not upgraded.

Need to get 636 kB of archives.

After this operation, 5,145 kB of additional disk space will be used.

Do you want to continue? [Y/n]

Get:1 http://archive.ubuntu.com/ubuntu xenial/main amd64 ncurses-term all 6.0+20160213-1ubuntu1 [249 kB]

Get:2 http://archive.ubuntu.com/ubuntu xenial-updates/main amd64 openssh-sftp-server amd64 1:7.2p2-4ubuntu2.2 [38.7 kB]

Get:3 http://archive.ubuntu.com/ubuntu xenial-updates/main amd64 openssh-server amd64 1:7.2p2-4ubuntu2.2 [338 kB]

Get:4 http://archive.ubuntu.com/ubuntu xenial/main amd64 ssh-import-id all 5.5-0ubuntu1 [10.2 kB]

Fetched 636 kB in 0s (1,326 kB/s)

Preconfiguring packages ...

Selecting previously unselected package ncurses-term.

(Reading database ... 172286 files and directories currently installed.)

Preparing to unpack .../ncurses-term_6.0+20160213-1ubuntu1_all.deb ...

Unpacking ncurses-term (6.0+20160213-1ubuntu1) ...

Selecting previously unselected package openssh-sftp-server.

Preparing to unpack .../openssh-sftp-server_1%3a7.2p2-4ubuntu2.2_amd64.deb ...

Unpacking openssh-sftp-server (1:7.2p2-4ubuntu2.2) ...

Selecting previously unselected package openssh-server.

Preparing to unpack .../openssh-server_1%3a7.2p2-4ubuntu2.2_amd64.deb ...

Unpacking openssh-server (1:7.2p2-4ubuntu2.2) ...

Selecting previously unselected package ssh-import-id.

Preparing to unpack .../ssh-import-id_5.5-0ubuntu1_all.deb ...

Unpacking ssh-import-id (5.5-0ubuntu1) ...

Processing triggers for man-db (2.7.5-1) ...

Processing triggers for ufw (0.35-0ubuntu2) ...

Processing triggers for systemd (229-4ubuntu19) ...

Processing triggers for ureadahead (0.100.0-19) ...

ureadahead will be reprofiled on next reboot

Setting up ncurses-term (6.0+20160213-1ubuntu1) ...

Setting up openssh-sftp-server (1:7.2p2-4ubuntu2.2) ...

Setting up openssh-server (1:7.2p2-4ubuntu2.2) ...

Creating SSH2 RSA key; this may take some time ...

2048 SHA256:2Wx1JPWbwNSuf0NpDzRwEltSdavTJ0Jd6yMVtu6Lka8 root@xubuntu (RSA)

Creating SSH2 DSA key; this may take some time ...

1024 SHA256:NLy9JLjq8Tu/+RyaLdV9PE+dULIyGkz8sFuQSm9Vekg root@xubuntu (DSA)

Creating SSH2 ECDSA key; this may take some time ...

256 SHA256:r7ZoO9dH/YLXCqcESQfFDYKgQHCaKmQw0G1LdQHC1ZQ root@xubuntu (ECDSA)

Creating SSH2 ED25519 key; this may take some time ...

256 SHA256:L81n3zSsafScMAEPKpSEkh/ulSWj2sW2Qku8LYnEU2s root@xubuntu (ED25519)

Setting up ssh-import-id (5.5-0ubuntu1) ...

Processing triggers for systemd (229-4ubuntu19) ...

Processing triggers for ureadahead (0.100.0-19) ...

Processing triggers for ufw (0.35-0ubuntu2) ...

xubuntu@xubuntu:~$
next I’m going to try remote login to my local computer (ip address is 127.0.0.1) with user remoteuser, which I created earlier
xubuntu@xubuntu:~$ ssh remoteuser@127.0.0.1

The authenticity of host '127.0.0.1 (127.0.0.1)' can't be established.

ECDSA key fingerprint is SHA256:r7ZoO9dH/YLXCqcESQfFDYKgQHCaKmQw0G1LdQHC1ZQ.

Are you sure you want to continue connecting (yes/no)? yes

Warning: Permanently added '127.0.0.1' (ECDSA) to the list of known hosts.

remoteuser@127.0.0.1's password:

Welcome to Ubuntu 16.04.3 LTS (GNU/Linux 4.10.0-28-generic x86_64)
* Documentation: https://help.ubuntu.com
* Management: https://landscape.canonical.com
* Support: https://ubuntu.com/advantage
The programs included with the Ubuntu system are free software;
the exact distribution terms for each program are described in the
individual files in /usr/share/doc/*/copyright.
Ubuntu comes with ABSOLUTELY NO WARRANTY, to the extent permitted by
applicable law.
remoteuser@xubuntu:~$
It seems to work and I have now a remote connection established via ssh-daemon hosted by my local computer.
Next step is to strengthen the security of the ssh-connection by replacing a password-authentication to asymmetric key exchange and verification. ssh-copy-id comes handy in that process, since it can upload my public key into the remote server without manual upload.
I’m going to follow the steps of this guide https://www.ssh.com/ssh/copy-id
so first, I create my very own rsa-key pair with command ssh-keygen
xubuntu@xubuntu:~$ ssh-keygen

Generating public/private rsa key pair.

Enter file in which to save the key (/home/xubuntu/.ssh/id_rsa):

Enter passphrase (empty for no passphrase):

Enter same passphrase again:

Your identification has been saved in /home/xubuntu/.ssh/id_rsa.

Your public key has been saved in /home/xubuntu/.ssh/id_rsa.pub.

The key fingerprint is:

SHA256:+qupv3at15yb38sAulKOI6cV4hsrPSADmjhP916dFjU xubuntu@xubuntu

The key's randomart image is:

+---[RSA 2048]----+

| |

| |

| E |

|. . . |

|+. . .S .. |

|=o..o ...o.o. |

| +o.o+..=o+o o |

| .. +BO.o+ +.o. |

| oO@+*= oo.oo|

+----[SHA256]-----+

xubuntu@xubuntu:~$
for our first key, the default location and filename are good enough. Passphrase is left empty because it makes it possible to create scripts on my local machine, that connects to the remote server. With passphrase, the scripts would get stuck at the prompt.
next I’ll use ssh-copy-id with synopsis gathered from the man-page (ssh-copy-id -i keyfile user@hostname)
xubuntu@xubuntu:~$ ssh-copy-id -i ~/.ssh/id_rsa remoteuser@127.0.0.1

/usr/bin/ssh-copy-id: INFO: Source of key(s) to be installed: "/home/xubuntu/.ssh/id_rsa.pub"

/usr/bin/ssh-copy-id: INFO: attempting to log in with the new key(s), to filter out any that are already installed

/usr/bin/ssh-copy-id: INFO: 1 key(s) remain to be installed -- if you are prompted now it is to install the new keys

remoteuser@127.0.0.1's password:
Number of key(s) added: 1
Now try logging into the machine, with: "ssh 'remoteuser@127.0.0.1'"
and check to make sure that only the key(s) you wanted were added.
xubuntu@xubuntu:~$
seems successfully uploaded, now I shall test it with the command it proposed
xubuntu@xubuntu:~$ ssh remoteuser@127.0.0.1

Welcome to Ubuntu 16.04.3 LTS (GNU/Linux 4.10.0-28-generic x86_64)
* Documentation: https://help.ubuntu.com
* Management: https://landscape.canonical.com
* Support: https://ubuntu.com/advantage
Last login: Sat Sep 2 13:24:31 2017 from 127.0.0.1
remoteuser@xubuntu:~$
it didn’t ask any password, so it seems to work.
next I’ll test remote-mounting a folder into the ssh-server with sshfs-software
first I create a new folder called mountable, which I’m going to attach to the remoteuser’s home folder.
mkdir mountable
ls mountable
with ls, we can confirm that the folder is empty
now, let’s attach it with the remote server via ssh-connection.
sshfs remoteuser@127.0.0.1 ~/mountable
xubuntu@xubuntu:~$ sshfs remoteuser@127.0.0.1: ~/mountable

The program 'sshfs' is currently not installed. You can install it by typing:

sudo apt install sshfs

xubuntu@xubuntu:~$
ok, apparently it’s not installed by default and as a part of sshd-package. Well, let’s install it now.
sudo apt-get update && install sshfs
xubuntu@xubuntu:~$ sudo apt-get install sshfs

Reading package lists... Done

Building dependency tree

Reading state information... Done

The following NEW packages will be installed:

sshfs

0 upgraded, 1 newly installed, 0 to remove and 65 not upgraded.

Need to get 41.7 kB of archives.

After this operation, 138 kB of additional disk space will be used.

Get:1 http://archive.ubuntu.com/ubuntu xenial/universe amd64 sshfs amd64 2.5-1ubuntu1 [41.7 kB]

Fetched 41.7 kB in 0s (199 kB/s)

Selecting previously unselected package sshfs.

(Reading database ... 175044 files and directories currently installed.)

Preparing to unpack .../sshfs_2.5-1ubuntu1_amd64.deb ...

Unpacking sshfs (2.5-1ubuntu1) ...

Processing triggers for man-db (2.7.5-1) ...

Setting up sshfs (2.5-1ubuntu1) ...

xubuntu@xubuntu:~$
it’s now done and I can try the earlier command again
sshfs remoteuser@127.0.0.1: ~/mountable

ls mountable
the mountable folder still appears to be empty, but there’s a way to verify our mount connection: let’s create a text file inside the folder and login to remoteuser via ssh to see, if it appears to remoteuser’s home-folder:
xubuntu@xubuntu:~$ touch mountable/text.txt

xubuntu@xubuntu:~$ ls mountable/

text.txt

xubuntu@xubuntu:~$
now login to the ssh-server:
xubuntu@xubuntu:~$ ssh remoteuser@127.0.0.1

Welcome to Ubuntu 16.04.3 LTS (GNU/Linux 4.10.0-28-generic x86_64)
* Documentation: https://help.ubuntu.com
* Management: https://landscape.canonical.com
* Support: https://ubuntu.com/advantage
Last login: Sat Sep 2 18:50:54 2017 from 127.0.0.1
remoteuser@xubuntu:~$ ls
text.txt
remoteuser@xubuntu:~$
the file appears to be there, so we truly have successfully mounted a remote directory into our local one via ssh.
Exercise C
to simplify the start of using a xubuntu live boot, I shall create a single command line that installs all of my favorite programs via package manager:
sudo apt-get install -y openssh-server sshfs libreoffice vlc deluge mariadb-client openjdk-8-jdk openjdk-9-jdk eclipse wine
Exercise D
For the next task, I’m going to install three new CLI applications via apt package manager and test use them:
– dtrx
a multi-format supportive archive extractor to (hopefully) take the hazzle away.
First I start with creating an exotic formatted archive. From the man-pages of the tar-command, I find that flag J will produce xz-type archive, therefore we call
touch test.txt

tar cvfJ test.xz test.txt
now we have a test.xz archive, which would require studying the tar-man pages to find the correct flag-combination to extract it properly. Let’s give it a try with dtrx
sudo apt-get install dtrx
xubuntu@xubuntu:~$ sudo apt-get install dtrx
from the man-page, the synopsis informs that we need to only run dtrx archive-file and
it’ll do the rest.
dtrx test.xz
okay, it produced a test-file, which contains the following
xubuntu@xubuntu:~$ cat test

test.txt0000664000174700017470000000000013152610305012604 0ustar xubuntuxubuntuxubuntu
apparently it didn’t quite work out, so let’s see if it can peek inside the archive by using -l flag (list)
dtrx -l test.xz

dtrx: ERROR: could not handle test.xz

dtrx: ERROR: treating as xz-encoded compressed file failed: doesn't look like a compressed file

dtrx: ERROR: treating as tar file failed: listing error: 'tar -t' returned status code 2

dtrx: ERROR: Error output from this process:

tar: Archive is compressed. Use -J option

tar: Error is not recoverable: exiting now
Apparently there is a problem calling tar-command and it didn’t recognize the xz-type file.
On the other hand, the man-pages don’t mention anything about supporting xz-files, so it might be, that they are not supported.
Let’s try it with a rar-file instead, since that format is more familiar with the windows-users, when loading stuff from the Internet.
So I just install rar with command
sudo apt-get install rar
and the synopsis based on man-pages seems to be just
rar a test.rar test.txt (a for adding files to an archive)
xubuntu@xubuntu:~$ rar a test.rar test.txt
RAR 5.30 beta 2 Copyright (c) 1993-2015 Alexander Roshal 4 Aug 2015
Trial version Type RAR -? for help
Evaluation copy. Please register.
Creating archive test.rar
Adding test.txt OK
Done
Trial version? I wonder how that’s controled over apt-package. Anyway, moving on back to the dtrx:
dtrx test.rar
xubuntu@xubuntu:~$ dtrx test.rar

dtrx: ERROR: could not handle test.rar

dtrx: ERROR: treating as RAR archive failed: could not run unrar
apparently it uses unrar for extracting, but hasn’t installed it as a dependency.
Doesn’t seem very handy tool, if user has to first install the actual extractor.
Let’s try installing the unrar and then run the extractor again
sudo apt-get install unrar

dtrx test.rar

xubuntu@xubuntu:~$ dtrx test.rar

test.rar contains one file but its name doesn't match.

Expected: test

Actual: test.txt

You can:

* extract the file _I_nside a new directory named test

* extract the file and _R_ename it test

* extract the file _H_ere

What do you want to do? (I/r/h) h

dtrx: WARNING: extracting /home/xubuntu/test.rar to test.txt.1
this is actually reassuring: it explains out, what problem it faces and asks you how should it deal with the situation.
with ls, I can see that I now have files test.rar test.txt test.txt.1, I wonder where that last one came from, but at least it did it’s job.
– multitail
Multitail is a tail-command expanded with multi-window support via ncurses. Let’s install it with
sudo apt-get install multitail
from the man-page, you just simply use it with the command and flagging files you want to monitor, so let’s give it a try with /var/log/syslog and /var/log/dpkg.log
multitail -i /var/log/syslog -i /var/log/dpkg.log

multitail
seems doing fine and I can see why it might come handy in future
help window appears with ctrl + h

– sar (as a part of sysstat)
a system monitor tool
let’s install it by installing sysstat-tool
sudo apt-get install sysstat
based on man-page synopsis, you command the tool by giving flags and also specifying interval and count. Let’s try first with 3 second interval and 4 count.
sar 3 4
xubuntu@xubuntu:~$ sar 3 4

Linux 4.10.0-28-generic (xubuntu) 09/03/2017 _x86_64_ (4 CPU)
12:05:43 AM CPU %user %nice %system %iowait %steal %idle
12:05:46 AM all 2.17 0.08 0.33 0.08 0.00 97.33
12:05:49 AM all 1.83 0.00 0.33 0.00 0.00 97.83
12:05:52 AM all 1.17 0.08 0.17 0.08 0.00 98.49
12:05:55 AM all 1.17 0.00 0.25 0.00 0.00 98.58
Average: all 1.59 0.04 0.27 0.04 0.00 98.06
xubuntu@xubuntu:~$
apparently it gave me information about the current kernel and cpu usage.
Creating a Xubuntu boot stick on Windows 10 with Rufus
This blog post is made from an exercise of Haaga-Helia Course Linux as a server (Linux palvelimena) hosted by Tero Karvinen.
The exercise contains the following parts:
- Make your own Linux live boot stick. Try it with some other computer than the ones in school lab. This part doesn’t require installing the OS on your computer – if you do so, make sure you do proper backups first
- List of the hardware of your test computer (’sudo lshw -short -sanitize’)
- Install three new software that are new to you. Try each of them in their mainly tasks
- Check what licenses the installed softwares use. Explain shortly, what rights and duties those licenses provide for you as an end-user
- List the software you use for your daily usage (ie. MS Word), their main purpose (ie. text preparation) and a controversial free Linux-software (ie. Libreoffice Writer). If a program doesn’t have any free Linux-counterparts, list it anyway.
First I start with creating the live boot stick and test the booting with my Lenovo Thinkpad T570 laptop and windows 10 installed (secure boot is already turned off)
Sat 25.8.2017 18:49:00
Started with downloading a latest image of a Xubuntu OS from the xubuntu website.
I’m going to pick the latest LTS-release availabe and use an HTTP-download source from Sweden proxy. The latest stable 64-bit release appears to be xubuntu-16.04.3-desktop-amd64.iso
19:15:00
The download took total of 13 minutes for a 3.7 Gb ISO-file, so apparently it’s a pretty slow to fetch an image file via HTTP-download, since it’s only provide from a one source at a time. During the download, the average download bandwith jumped between 3-8 Mbps.
Now it’s time to install an USB live stick creator application and, for Windows 10 operating system I’m currently using, I chose Rufus not only because it’s free and open source application, but also the UI is very simplified and mimics
the standard window of the Windows drive property popup, which makes it more intuitive to use in the Windows environment.
19:27:00
after downloading, I tried to open Rufus, but for some reason, it seems to hang on the background and doesn’t seem to load any visible UI. Even the task manager is unable to kill the process, so I believe the startup process is stuck somewhere.
After looking around the cause, I found out that the File History software I enabled earlier, before starting to studying this case, is still writing a mirror copy of the current personal files into my external drive and does that reeeally slowly
(as any other windows pre-installed backup program, it doesn’t show any progress bar to estimate, when it would be done with it’s job or at least indicate, it’s not
stuck in). After killing the backup process (I’ll just finish it up with some other tool later) Rufus started to work again, so I believe it had hard time on identifying
my external hdd during the backup process.
Next thing would have been finding the path of my downloaded Xubuntu iso-file, but after checking the download history, I found out that it apparently failed after all. This time I chose to download a more trustworthy torrent file and start a cluster download by using this very good, open source bittorrent-client Deluge, which is available on multiple
platforms, including several Linux distros, Mac OSX, Windows and FreeBSD
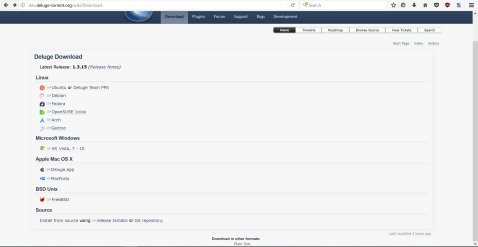
21:52:00
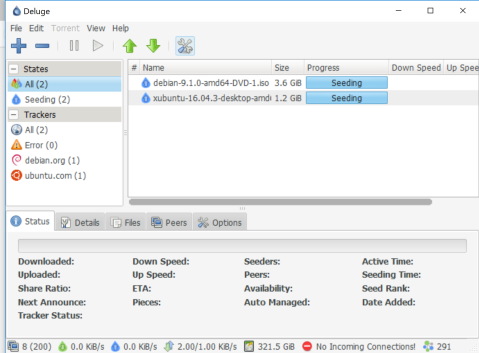
after having a break, I noticed my torrent-download being completed and it turned into a seeding mode.
Now back to Rufus..
21:54:00
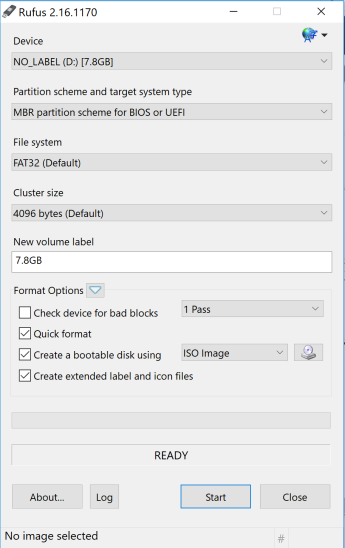
From the screenshot, you can see that I have a 7.8GB sized USB stick attached into a D- drive letter and for a partition scheme I’ve chosen ”MBR partition scheme for BIOS or UEFI” so it can support both BIOS and UEFi boot options.
”File System” has to be FAT32, otherwise it won’t support partitions sized over 1GB.
”Cluster Size” of 4kb is just fine, since I don’t happen to have a volume over 16TB.
”New Volume Label” is fine with 7.8Gb, therefore it uses the entire capacity of the usb stick.
”create a bootable stick with” will be ISO Image, since the downloaded file is formatted with ISO-packaging. By clicking the the disc image next to the dropdown menu, I can choosethe path to the ISO-file.
here I’m going to pick the Xubuntu image I torrented.
now it says ”Using image: xubuntu-16.04.3-desktop-amd64.iso” at the bottom, which means we are ready to start burning, so I just click ”Start” and Rufus gives me the following popup:
apparently Rufus is capable of analyzing the bootloader used by the chosen image, and now it recommends me to connect internet for downloading the most
latest version of syslinux-bootloader. Probably this is not recommended, since a bootloader is often made bootable for that certain iso-file, but
just out of curiosity I’d like to see, how the Rufus handle such situation, so I just click ”yes”
Now the Rufus is telling me that the file is typed as ”ISOHybrid” and I can burn it as ISO-mode or DD-mode. Here I believe it’s referring to a dd-application
from unix operating systems, that is used for writing disks and disk images bit-by-bit into a chosen output (i.e. another disk). Therefore I’m curious to see
this ISO-option it’s offering here.
22:43:00
Now the Rufus seems to be ready with writing the ISO-file and to verify that, we can look inside the drive
boot stick seems to be ready for the boot test. I have already disabled secure boot on my laptop, so I can try immediately to boot with the stick
23:01:00

I was able to boot, but the resolution of the screen seems to be a bit outfitted. Probably I need to install some external graphic drivers to support Nvidia GPU.
23:05:00
The next thing is to test out the hardware recognition by using the following command
xubuntu@xubuntu:~$ sudo lshw -short -sanitize
H/W path Device Class Description
==============================================================
system 20H9004MMX (LENOVO_MT_20H9_BU
/0 bus 20H9004MMX
/0/3 memory 16GiB System Memory
/0/3/0 memory 8GiB SODIMM Synchronous 2133
/0/3/1 memory 8GiB SODIMM Synchronous 2133
/0/7 memory 128KiB L1 cache
/0/8 memory 512KiB L2 cache
/0/9 memory 4MiB L3 cache
/0/a processor Intel(R) Core(TM) i7-7500U CP
/0/b memory 128KiB BIOS
/0/100 bridge Intel Corporation
/0/100/2 display Intel Corporation
/0/100/8 generic Sky Lake Gaussian Mixture Mod
/0/100/14 bus Intel Corporation
/0/100/14/0 usb1 bus xHCI Host Controller
/0/100/14/0/1 input USB Receiver
/0/100/14/0/2 generic LG-H870
/0/100/14/0/3 generic EMV Smartcard Reader
/0/100/14/0/4 scsi1 storage DataTraveler 2.0
/0/100/14/0/4/0.0.0 /dev/sdb disk 7756MB SCSI Disk
/0/100/14/0/4/0.0.0/1 /dev/sdb1 volume 7395MiB Windows FAT volume
/0/100/14/0/5 multimedia Integrated IR Camera
/0/100/14/0/6 communication L831-EAU-00
/0/100/14/0/7 communication Bluetooth wireless interface
/0/100/14/0/8 multimedia Integrated Camera
/0/100/14/0/9 generic Generic USB device
/0/100/14/1 usb2 bus xHCI Host Controller
/0/100/14/1/3 scsi0 storage USB3.0-CRW
/0/100/14/1/3/0.0.0 /dev/sda disk SD/MMC
/0/100/14/1/3/0.0.0/0 /dev/sda disk waw
/0/100/14.2 generic Intel Corporation
/0/100/16 communication Intel Corporation
/0/100/1c bridge Intel Corporation
/0/100/1c/0 display GM108M [GeForce 940MX]
/0/100/1c.6 bridge Intel Corporation
/0/100/1c.6/0 wlp4s0 network Intel Corporation
/0/100/1d bridge Intel Corporation
/0/100/1d.2 bridge Intel Corporation
/0/100/1d.2/0 storage Samsung Electronics Co Ltd
/0/100/1f bridge Intel Corporation
/0/100/1f.2 memory Memory controller
/0/100/1f.3 multimedia Intel Corporation
/0/100/1f.4 bus Intel Corporation
/0/100/1f.6 enp0s31f6 network Ethernet Connection (4) I219-
/1 power 00UR892
/2 power 01AV422
/3 wwp0s20f0u6 network Ethernet interface
Apparently it shows the system using the external Nvidia GeForce 940MX chip for graphics display, so that confirms that Xubuntu is missing the proper Nvidia drivers. I have to note that when I’m about to actually install a Linux distro on this laptop.
The next step is to install 3 new software by using a package manager,
so we start with sudo apt-get update.
I have to say, I’ve been using Linux, and especially Ubuntu, for a several years, so I find it hard to think of any new software I haven’t yet installed, so I just ended up looking for the most favorite programs listed on an Internet top ranking lists like this one http://www.omgubuntu.co.uk/2016/12/21-must-have-apps-ubuntu
and pick 3 software that I haven’t yet heard of.
After looking for a while, I ended up picking these three candidates:
– NeoFetch
– Ubuntu cleaner
– Clementine Music Player
Apparently for Neofetch, there’s no official Aptitude repository available, so I have to deal with the installation in an old-fashioned way: downloading sources packed in a tarball:
1. wget https://github.com/dylanaraps/neofetch/archive/3.2.0.tar.gz
2. tar xzfv 3.2.0.tar.gz unzipped neofetch-3.2.0 folder containing the actual source
3. cd neofetch-3.2.0 && ./neofetch makes it run
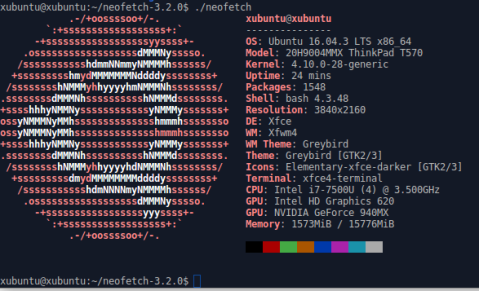
I have to admit, it’s pretty clear and works!
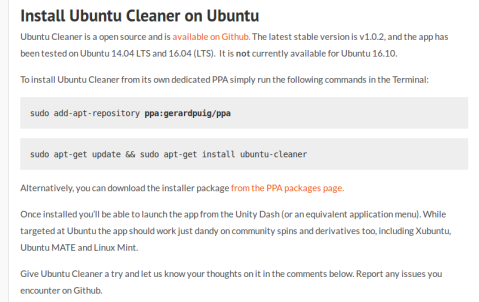
the next software is called Ubuntu Cleaner and again, this candidate doesn’t have any official installation repo on Aptitude,
but it does offer a custom ppa, if you trust them enough. You can also download the actual deb-package or sources from their github page.
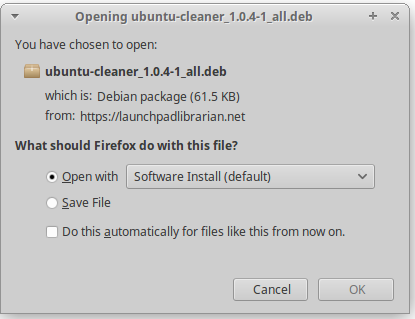
Let’s try the deb-package, you can either use software center to let it install the package, or simply use command dpkg -i ubuntu-cleaner_1.0.4-1_all.deb
First I tried opening the deb-file with Software Center (picture above), but the install button was unresponsive for some unknown reason, so I ended up using terminal and dpkg-command.
when running dpkg, it encountered a problem with unmet dependencies, but those can be installed by calling sudo apt-get -f install and then dpkg -i ubuntu-cleaner_1.0.4-1_all.deb again.
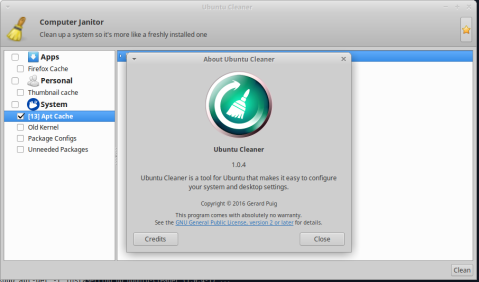
clementine is the last application and it was available on the official repos. I just commanded sudo apt-get install clementine and it was immediately ready to use. Tested out a sample music file and it appears to play music, so at least my speakers do work.
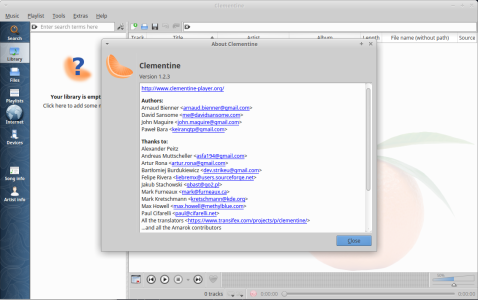
Continuing the steps with identifying the licenses of the previously installed three softwares.
first, the Ubuntu Cleaner says on it’s github page, that the software is licensed with GPLv3.
NeoFetch on the other hand says on their github page, that it’s licensed under MIT , which makes it possible for me to release my own modified version of this app as a closed propiertary software.
Clementine says on their web page https://www.clementine-player.org/ that it’s licensed with GPLv3
For GPLv3 softwares, as a user, I have the four principles as a rights to use these products (run,study, modify, redistribute and sell copies), but it means also
that I have to pass these rights to my modified, redistributed product as well. With MIT-license, I can also take the sources, make a modified application
and keep the sources to myself if I want and relicense the software I have made.
The next task is to list my mostly used applications and their alternatives on free linux-side.
The softwares I mostly use are work-related stuff, which are
– skype for business
– Intellij IDEA
– slack
– Telegram
For skype for business, apache seems to have it’s own openmeetings teleconference application with the Apache Software License version 2.0
Intellij IDEA Community Edition is published under Apache Software License 2.0 and it’s available on windows, osx and linux. The community edition, on the other hand, doesn’t support Java and Spring development, therefore a true alternative would be an easyeclipse , which combines open parts of the Eclipse IDE and the available open source plugins and distributes the migration under GPL-license.
Slack is obviosly not a free software and after googling around, I happened to find a chat-client, that advertises itself as an open-source alternative for slack and it’s called MatterMost. apparently, it’s community version is licensed under MIT.
Telegram provides the source codes for all of their client applications https://telegram.org/apps with GPLv2 licenses for Android, iOS, OSX, WP and Telegram CLI and GPLv3 for web browser client, Desktop client (OSX,Windows,Linux). Therefore there is no need to find an alternative for this product.
vatupassi
Kuvaus: Ohjelma jolla voi tarkistaa pintojen kaltevuuden
Status: beta
Lisenssi: GPL v2
APK-asennuspaketti: lataa tästä
Lähdekoodi: lataa tästä(zip)
Ohjelma hyödyntää puhelimen kiihtyvyysanturia siten, että ruudulla näkyvä neliö on keskellä kun pinta on täysin suorassa kulmassa.
Linkit:
terokarvinen.com
w3school
phonegap – accelerometer API
Memorize Distros

memorize distros
tekijät: Niko Niittyranta ja Krister Holmström
Kuvaus: Perinteinen muistipeli, jossa parin toinen palikka on suurennettuna ylhäällä ja puuttuva palikka tulee etsiä piilotettujen palikoiden joukosta.
Status: release
Lisenssi: GPLv2
APK-paketti: lataa tästä
Lähdekoodi: (vaatii kääntämistä varten cordova/phonegap-ohjelman) lataa tästä(ZIP)
Tekninen toiminta: peli on pääasiallisesti toteutettu javascriptillä + JQuerylla, joilla palikoiden luonti, liikkuminen, pistesaldon muutos, valikoissa navigointi ja highscore-listan päivitys tapahtuvat hyödyntäen erityisesti click- ja animate-metodeita. Kymmenen parasta pistetulosta tallennetaan taulukkona HTML5-standardin tarjoamaan localStorageen, jossa se säilyy käytännössä niin kauan kunnes sovellus poistetaan tai käyttäjä tyhjentää listan.
Lähteet:
distro-logot: http://fatduck.org/gnulinux/distro-logos.en.html
kurssin kotisivu: http://terokarvinen.com/2013/aikataulu-%E2%80%93-mobiilituotekehitys-bus4tn008-3-syksylla-2013
JQuery-materiaalit: http://www.w3schools.com/jquery/default.asp
phonegap-rajapinta: http://docs.phonegap.com/en/2.1.0/index.html
Ksenos VMS messuarvio
ksenos vms mobile platform
Kävin vierailemassa Finnsec-messuilla 13.11.2013 Helsingin Messukeskuksessa ja sain kotitehtäväksi arvioida jotain messuilla esiteltyä mobiilituotetta. Vaikka Ksenos VMS– järjestelmä keskittyykin enemmän backend-ratkaisuun kuin itse mobiilisovellukseen, katsoin sen merkittävän etuuden tulevan esille juuri kännykän käytettävyyden kautta.
Valvova Oy:n tuottama Ksenos VMS järjestelmän ideana on tarjota yrityksen käyttöön keskitetty valvontakameroiden hallinta ja yhden palvelimen/workstationin kapasiteetitksi mainitaan maksimissaan 24 videokameran kytkeminen. Erikoiseksi järjestelmän tekee yksinkertainen käyttöliittymä, jonka avulla kameroiden livekuvaa voi seurata slideina ja samalta näkymältä jopa kelata kuvamateriaalia eteen- ja taaksepäin timeline-paneelin avulla. Client-sideen pääsee käsiksi workstation-koneelle asennetun ohjelman kautta, käyttämällä selainpohjaista käyttöliittymää miltä tahansa lähiverkon tietokoneelta tai lataamalla android-mobiililaitteeseen yhtiön sovelluksen google play-kaupasta ilman lisämaksua.
PC-puolen ohjelmista poiketen mobiiliapplikaatiolla ei pysty selaamaan aikajanaa, mutta sillä voi katsoa haluttujen kameroiden live-kuvaa ja samalla liikuttaa sekä tarkentaa kameraa, mikä mahdollistaa tehokkaan valvontakameroiden etäkäytön valvomon ulkopuolella. Mobiilisovelluksen käyttöliittymä on selkeä ja riittävän yksinkertainen, jotta elementit eivät ”kasaudu” pienellä näytöllä muodottomaksi massaksi.
Yhtiön pääasiallisena tuotteena vaikutti kuitenkin pääasiassa olevan back-end-ratkaisut serverimuodossa ja front-endinä tarjota workstation-työasemaa, joten mobiiliapplikaation osuus kokonaistuotteesta jäi varsin pieneksi, mutta silti oikeassa käytössä tehokkaaksi apuvälineeksi videovalvonnan hallinnassa.
Kiitin esittelystä ja jatkoin matkaani messuilla kohti Sievin turvajalkineosastolle.
